Using Message Converter Extensions to Display 3D Markers in Foxglove
Write a message converter to visualize custom markers in the 3D panel


By writing your own message converter extension, you can use Foxglove’s out-of-the-box panels to visualize your custom messages – even if these messages’ schemas aren’t natively supported by any panel.
In this tutorial, we’ll convert custom messages to use a Foxglove-supported schema for easy in-app visualization.
Why use message converters?
Though you could build a custom panel every time you want to visualize some unique data, you can save a great deal of time and effort by simply writing a message converter instead. By transforming data into a supported format, message converters allow you to leverage Foxglove’s existing visualization capabilities – and not build another new bespoke tool from scratch.
For the purposes of this tutorial, let’s assume that our robots record detected_objects messages that we want to visualize as boxes in Foxglove’s 3D panel for easy debugging. (Download example MCAP file here).
When we review the 3D panel’s supported message types – which include transforms, point clouds, images, and more – we see that we can display primitive shapes like cubes using the scene entities schema.
However, we have one small problem – our messages use a custom schema to represent detected objects:
type DetectedObject = {
  position: [number, number, number];
  markerType: 'robot' | 'human' | 'package';
  scale: [number, number, number];
  timestamp: Time;
  frameId: string;
};
Instead of creating an entirely new panel to visualize these detected objects, let’s write a message converter that transforms them into already-supported foxglove.SceneUpdate messages, so that they can be visualized in the existing 3D panel.
Set up your extension directory
Use create-foxglove-extension to generate an extension directory:
$ npm init foxglove-extension@latest mySceneUpdateConverterThis will create a mySceneUpdateConverter directory with some template source code.
Write the converter
The index.ts file in your project’s src folder is the entry point for your extension source code. It exports an activate function that accepts a single extensionContext argument of type ExtensionContext.
First, let’s add the @foxglove/schemas packages to our directory:
$ cd mySceneUpdateConverter
$ yarn add @foxglove/schemas
Then, import the following packages in the index.ts file:
import { ExtensionContext } from '@foxglove/extension';
import { CubePrimitive, SceneUpdate } from '@foxglove/schemas';
import { Time } from '@foxglove/schemas/schemas/typescript/Time';
And define our detected_object schema as a TypeScript type:
type DetectedObject = {
  position: [number, number, number];
  markerType: 'robot' | 'human' | 'package';
  scale: [number, number, number];
  timestamp: Time;
  frameId: string;
};
To register a message converter, we call registerMessageConverter on the extensionContext argument with three arguments: the source schema name (detected_object), the destination schema name (foxglove.SceneUpdate), and the converter function that will do the transformation:
export function activate(extensionContext: ExtensionContext) {
  extensionContext.registerMessageConverter({
    fromSchemaName: 'detected_object',
    toSchemaName: 'foxglove.SceneUpdate',
    converter: (inputMessage: DetectedObject): SceneUpdate => {
      // logic to turn detected_object messages into foxglove.SceneUpdate messages
    },
  });
}
Fill out the converter function to re-map our detected_object messages’ fields to the foxglove.SceneUpdate schema’s fields. We’ll display all detected objects as colored cubes – blue for robots, red for humans, and green for packages.
converter: (inputMessage: MySchema) => {
  const { position, scale, markerType, timestamp, frameId } = inputMessage;
  const colorMap = {
    robot: { r: 0, g: 0, b: 1, a: 1 },
    human: { r: 1, g: 0, b: 0, a: 1 },
    package: { r: 0, g: 1, b: 0, a: 1 },
  };
  const cubePrimitive: CubePrimitive = {
    pose: {
      position: { x: position[0], y: position[1], z: position[2] },
      orientation: { x: 0, y: 0, z: 0, w: 1 },
    },
    size: { x: scale[0], y: scale[1], z: scale[2] },
    color: colorMap[markerType] || { r: 1, g: 1, b: 1, a: 1 },
  };
  const sceneUpdateMessage = {
    deletions: [],
    entities: [
      {
        id: 'detectedObjects-entities',
        timestamp,
        frame_id: frameId,
        lifetime: { sec: 10, nsec: 0 },
        frame_locked: false,
        metadata: [],
        arrows: [],
        cubes: [cubePrimitive],
        spheres: [],
        cylinders: [],
        lines: [],
        triangles: [],
        texts: [],
        models: [],
      },
    ],
  };
  return sceneUpdateMessage;
};
Test the extension
To build and install your extension for local testing in the Foxglove desktop app, run the following command in the extension directory:
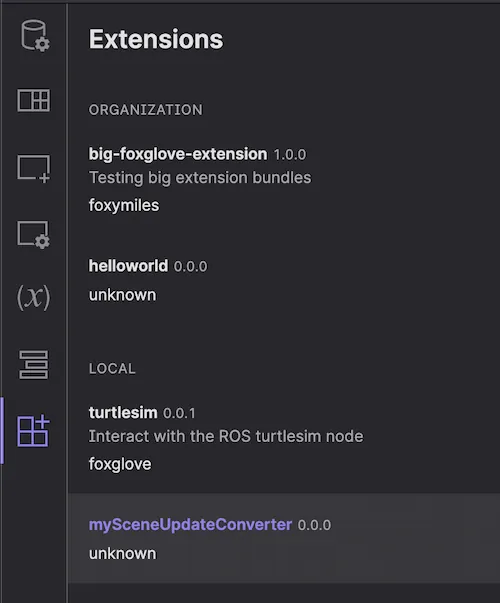
$ yarn local-installIn the Foxglove desktop app, open your app settings – you’ll now see mySceneUpdateConverter appear in the list of installed extensions:
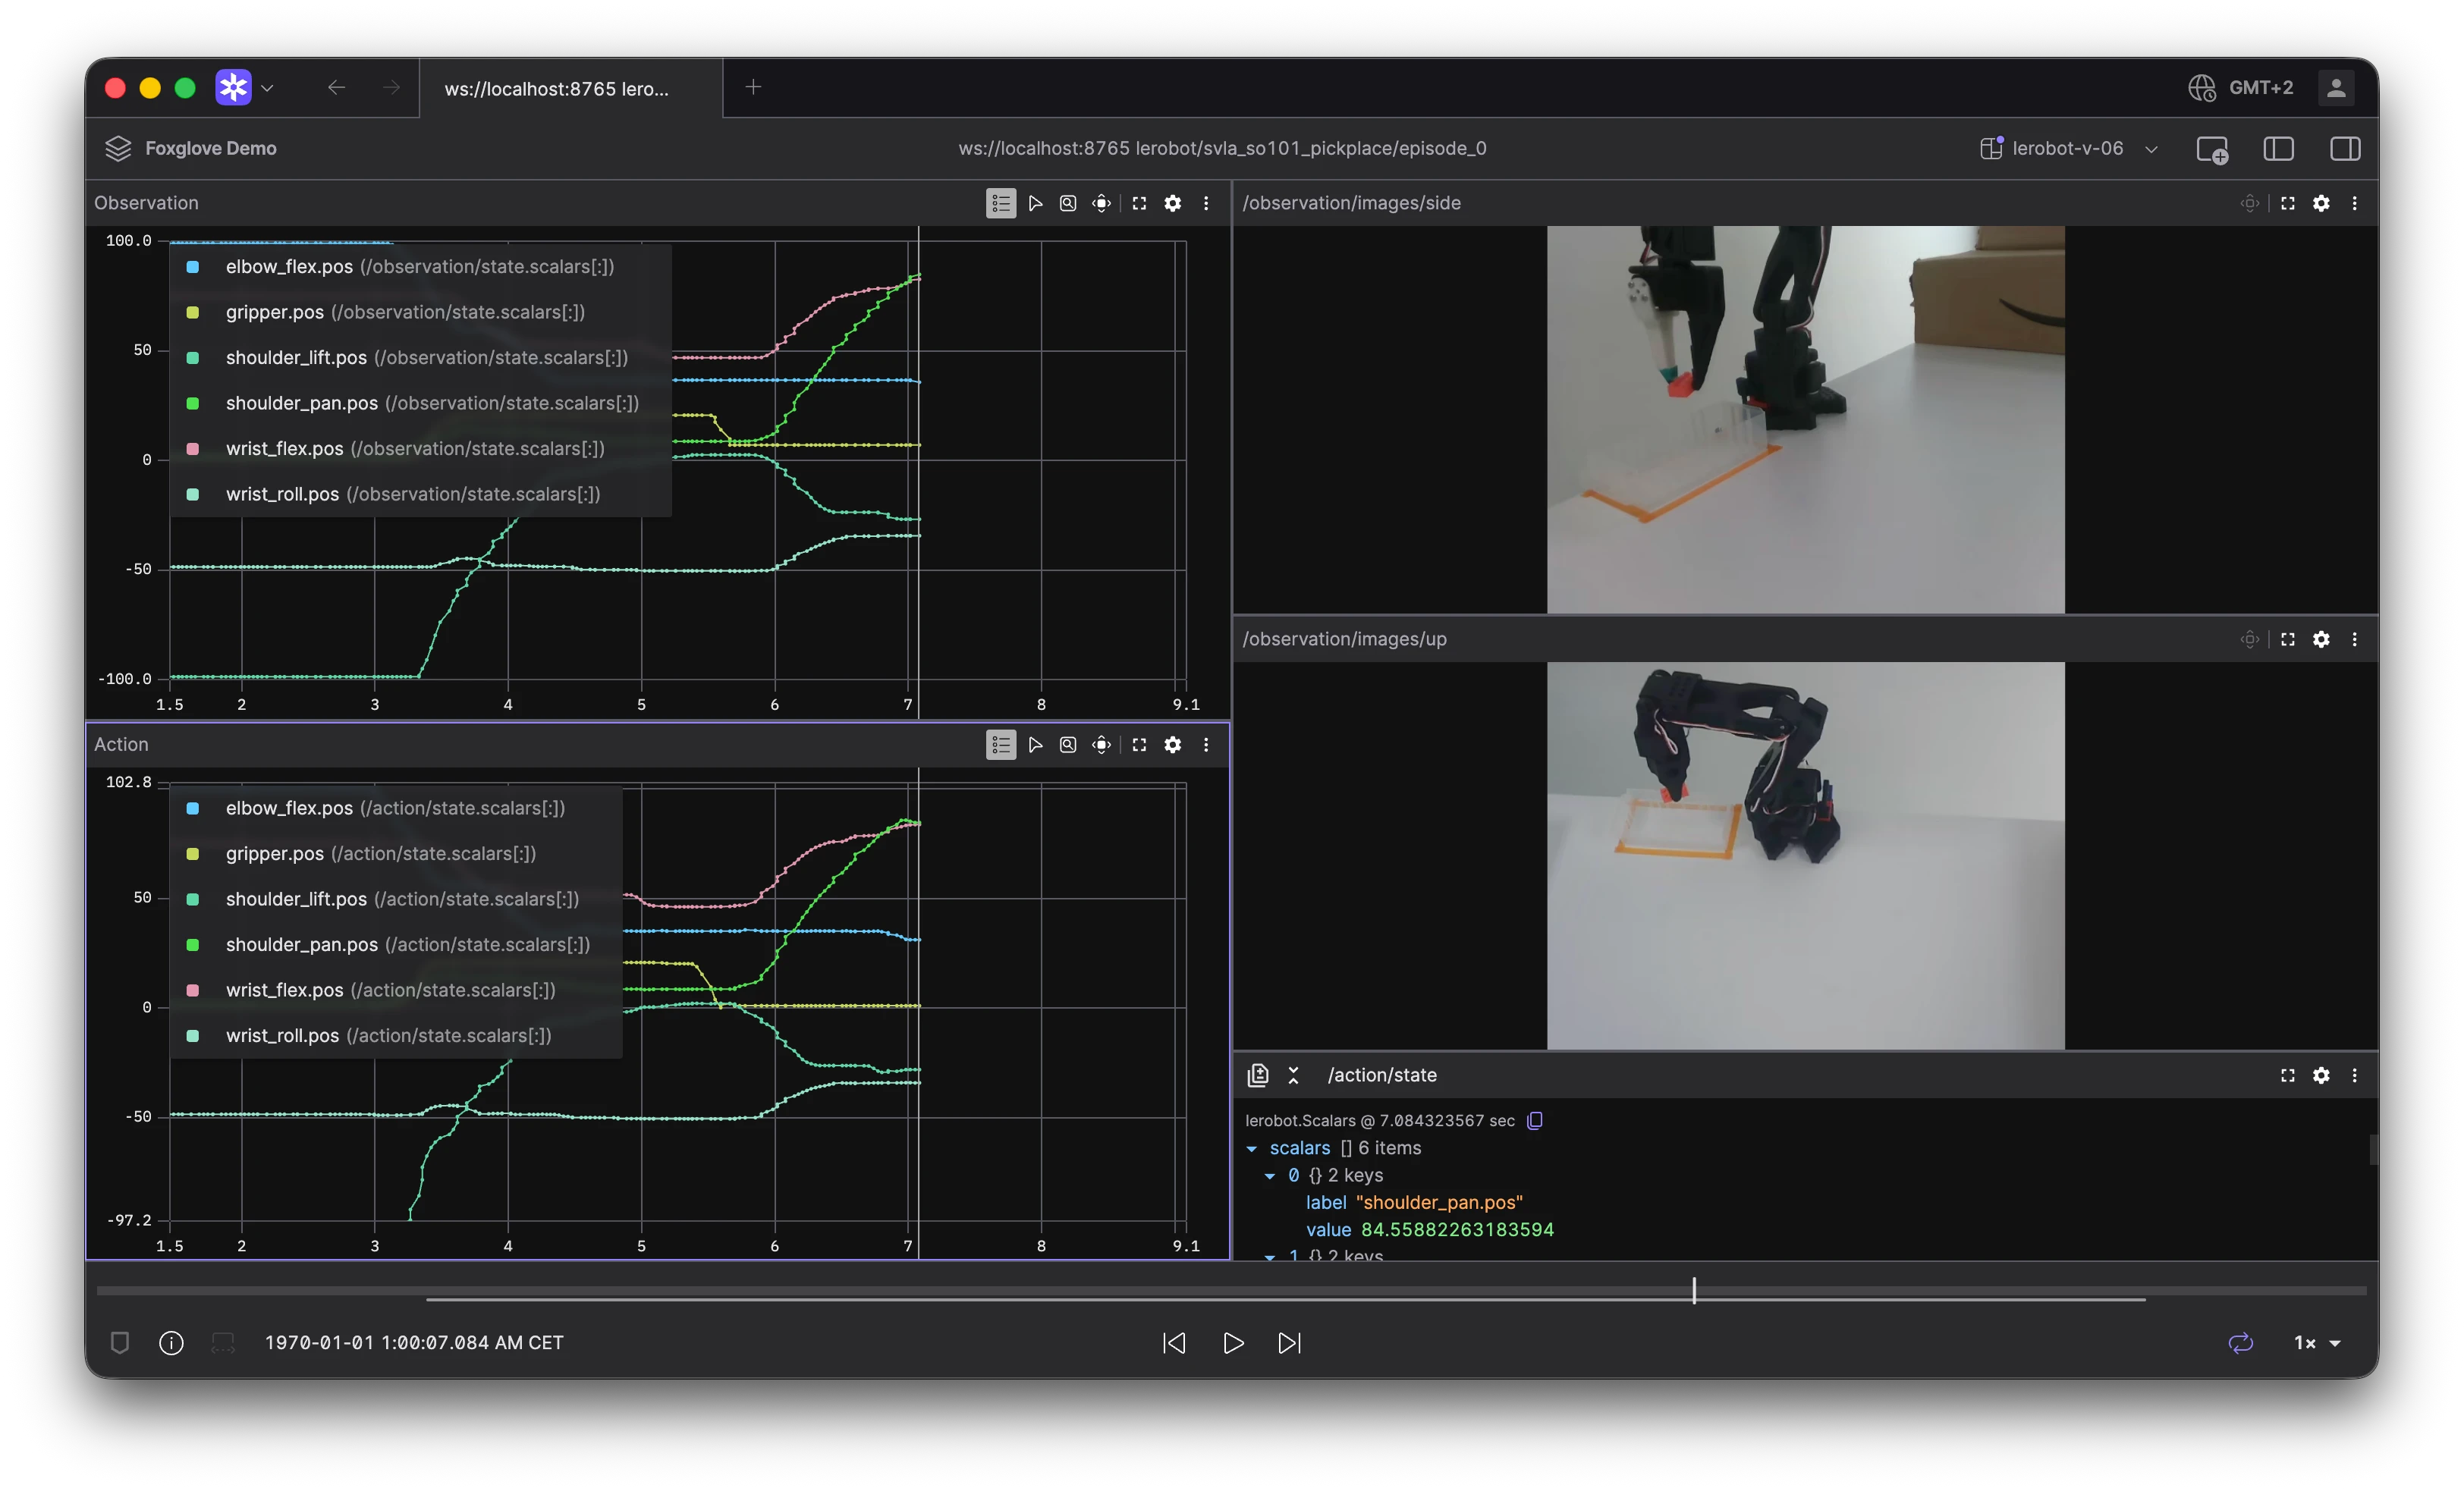
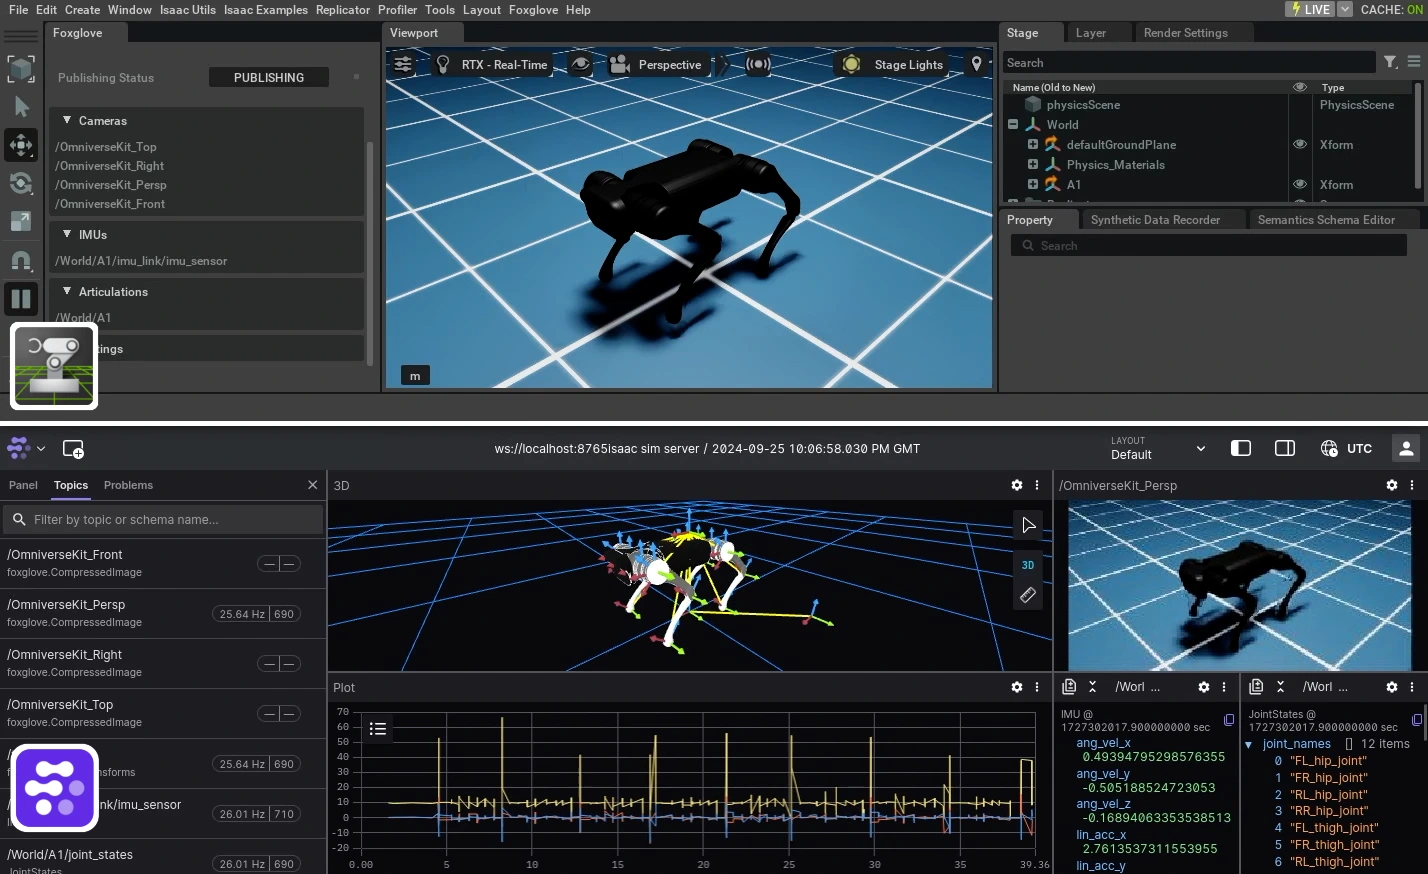
Connect to your data source, and add a 3D panel to the layout. Once you toggle on the detected_objects topic in the panel’s settings, you should see your custom SceneEntity messages visualized in the scene:

Release the extension
Once you are happy with how your extension works, you can package it and share with your team using the foxglove CLI tool. This will deploy the extension to all users within your organization.
$ yarn package
$ foxglove extensions publish ./my-extension.1.0.0.foxe
Share your feedback
Read the extensions documentation for more details on Foxglove’s extension API.
As we continue building out extension support, we’d love to hear your feedback. Join the conversation in our Discord community or on Twitter.