Overview
Now that we’ve learned about the building blocks that make up a ROS system, let’s apply our knowledge to see these components in action!
In this post, we’ll cover how to install ROS on your computer, run your first ROS node, and interact with your data using Foxglove. Whether you want to inspect your active nodes, chart values of interest, or publish ROS messages back to your stack, we’ll cover a few of the many ways that Foxglove can enhance your data exploration experience and accelerate your robotics development.
Installing ROS
To get started with developing robotics software with ROS, you’ll first need to install it on your machine – whether your platform of choice is Ubuntu, macOS, or Windows.
Ubuntu
ROS officially supports Ubuntu, so it’s easiest to get up and running on this platform – we recommend using Ubuntu 20.04 and following these instructions to finish installation.
macOS or Windows
To install and run ROS on macOS or Windows, you must have access to a Linux system.
You can set one up by installing VirtualBox, a free and open source virtualization software package that allows you to run Linux on macOS or Windows. Parallels is another virtualization option, albeit paid, for macOS. Again, we recommend using Ubuntu 20.04 and following the same instructions for installing ROS to get started.
Running your first ROS node
Let’s test that ROS was installed correctly by running our first ROS node. For this tutorial, we’ll be launching turtlesim, a ready-to-launch ROS tutorial conveniently packaged as a node.
Open two terminal windows. In the first, start your ROS master:
$ roscoreIn the second, start turtlesim:
$ rosrun turtlesim turtlesim_nodeIf everything worked as expected, you should see logs similar to the following in your turtlesim window:
[ INFO] [1622151455.538755408]: Starting turtlesim with node name /turtlesim
[ INFO] [1622151455.540372304]: Spawning turtle [turtle1] at x=[5.544445], y=[5.544445], theta=[0.000000]
You should also see a window pop up, showing a tiny turtle peacefully floating in the middle of a vast ocean:

Now that we have our simulation running, let’s interact with our turtle by controlling its movements in this ocean world. Open another terminal to run the teleop program, conveniently packaged as another node in the same turtlesim package:
$ rosrun turtlesim turtle_teleop_keyOnce running, the turtle_teleop_key node binds to your keyboard’s arrow keys to determine what ROS messages to publish back to the /turtle1/cmd_vel topic, which in turn controls where our turtle swims. You should see logs similar to the following in your terminal:
Reading from keyboard
---------------------------
Use arrow keys to move the turtle.
If we’re focused on this terminal window and pressing arrow keys, we’ll see our turtle following our directions, leaving behind a trail indicating where it has been.

Using Foxglove to interact with turtlesim
Now that we’ve been able to interact with our simulated turtle in a few ways with the turtlesim package, let’s use Foxglove to look behind the scenes at how this all works.
Download and open Foxglove – if this is your first time opening the app, you’ll be greeted with a Welcome layout and introductory message.
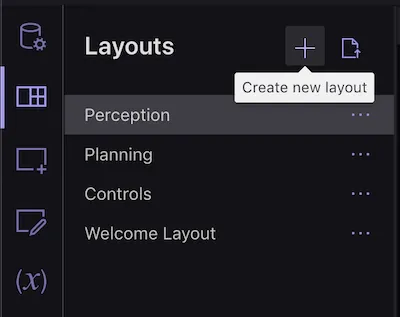
When you’re ready, use the sidebar’s Layouts tab to load a “New” empty layout.
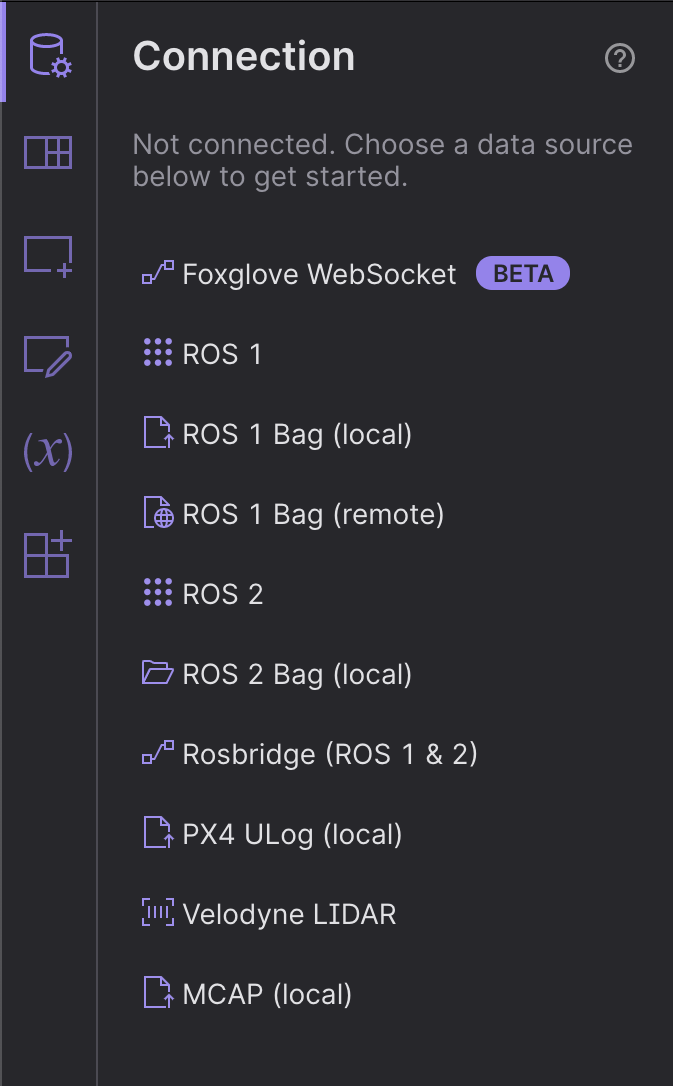
To explore our turtlesim data , we must first connect Foxglove to our ROS system. You can use a native ROS connection within your Ubuntu environment (whether that’s inside a virtual machine or not) – simply enter your ROS master’s IP and port (e.g. “https://localhost:11311”) to connect to your ROS system.
View the simulation’s ROS graph
To start off our data exploration, let’s try to understand the connections between the running processes within our ROS system. Conveniently enough, Foxglove has a panel for exactly this.
Use the sidebar’s Add panel tab to drag and drop a Topic Graph panel into your layout. This panel will display an interactive graph visualization of the current node and topic topology.
If your connection was successful, your panel should come alive with a graph of your active nodes, the topics they are publishing and subscribing to, and the services attached to them:
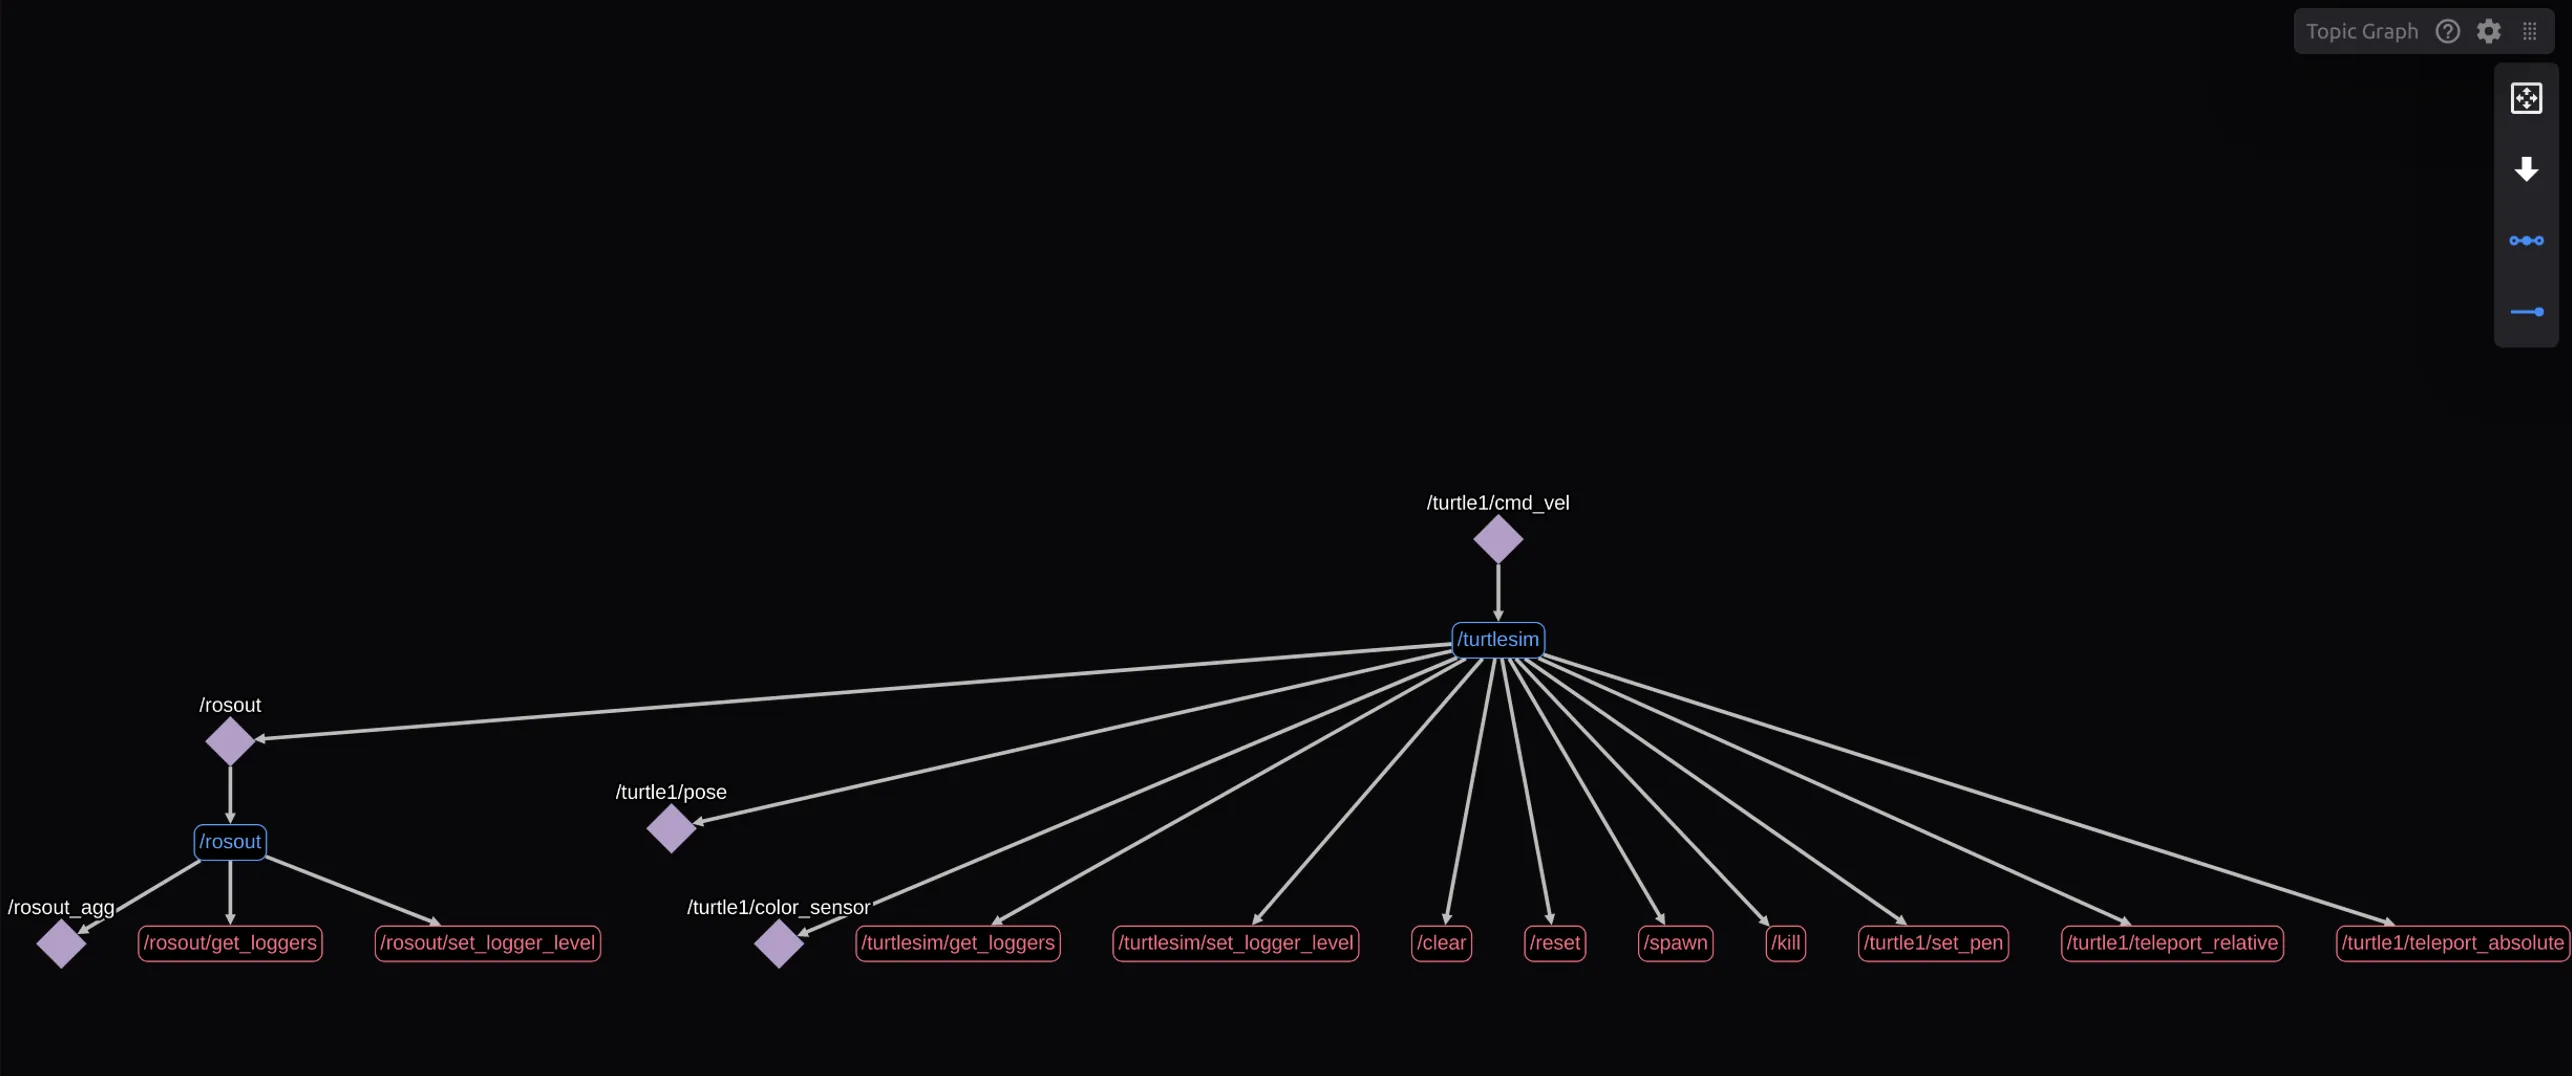
Click and drag overlapping items in the graph to reposition them for easier viewing. We can see from this graph that our turtlesim node subscribes to the /turtle1/cmd_vel topic and publishes the topics /turtle1/pose and /turtle1/color_sensor.
Plot the turtle’s position
Next, let’s use Foxglove to investigate how the values in our published messages change over time.
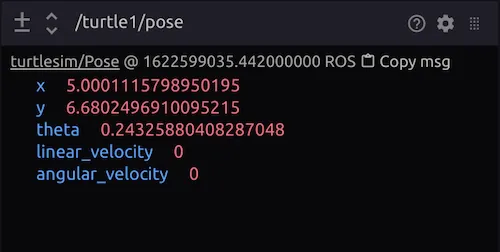
From our ROS computation graph, we learned that our turtle publishes its position on the topic /turtle1/pose. Let’s examine this topic using the Raw Messages and Plot panels.
Use the sidebar’s Add panel tab to drag and drop both panels into your layout. In the Raw Messages panel, add /turtle1/pose to see the structure of the topic’s messages:
In the Plot panel, add /turtle1/pose.x and /turtle1/pose.y as the custom values to plot on your x-axis and y-axis, respectively. These topic message paths use message path syntax to drill down into the /turtle1/pose topic’s x and y field values.
You should start to see the corresponding values populating your plot:
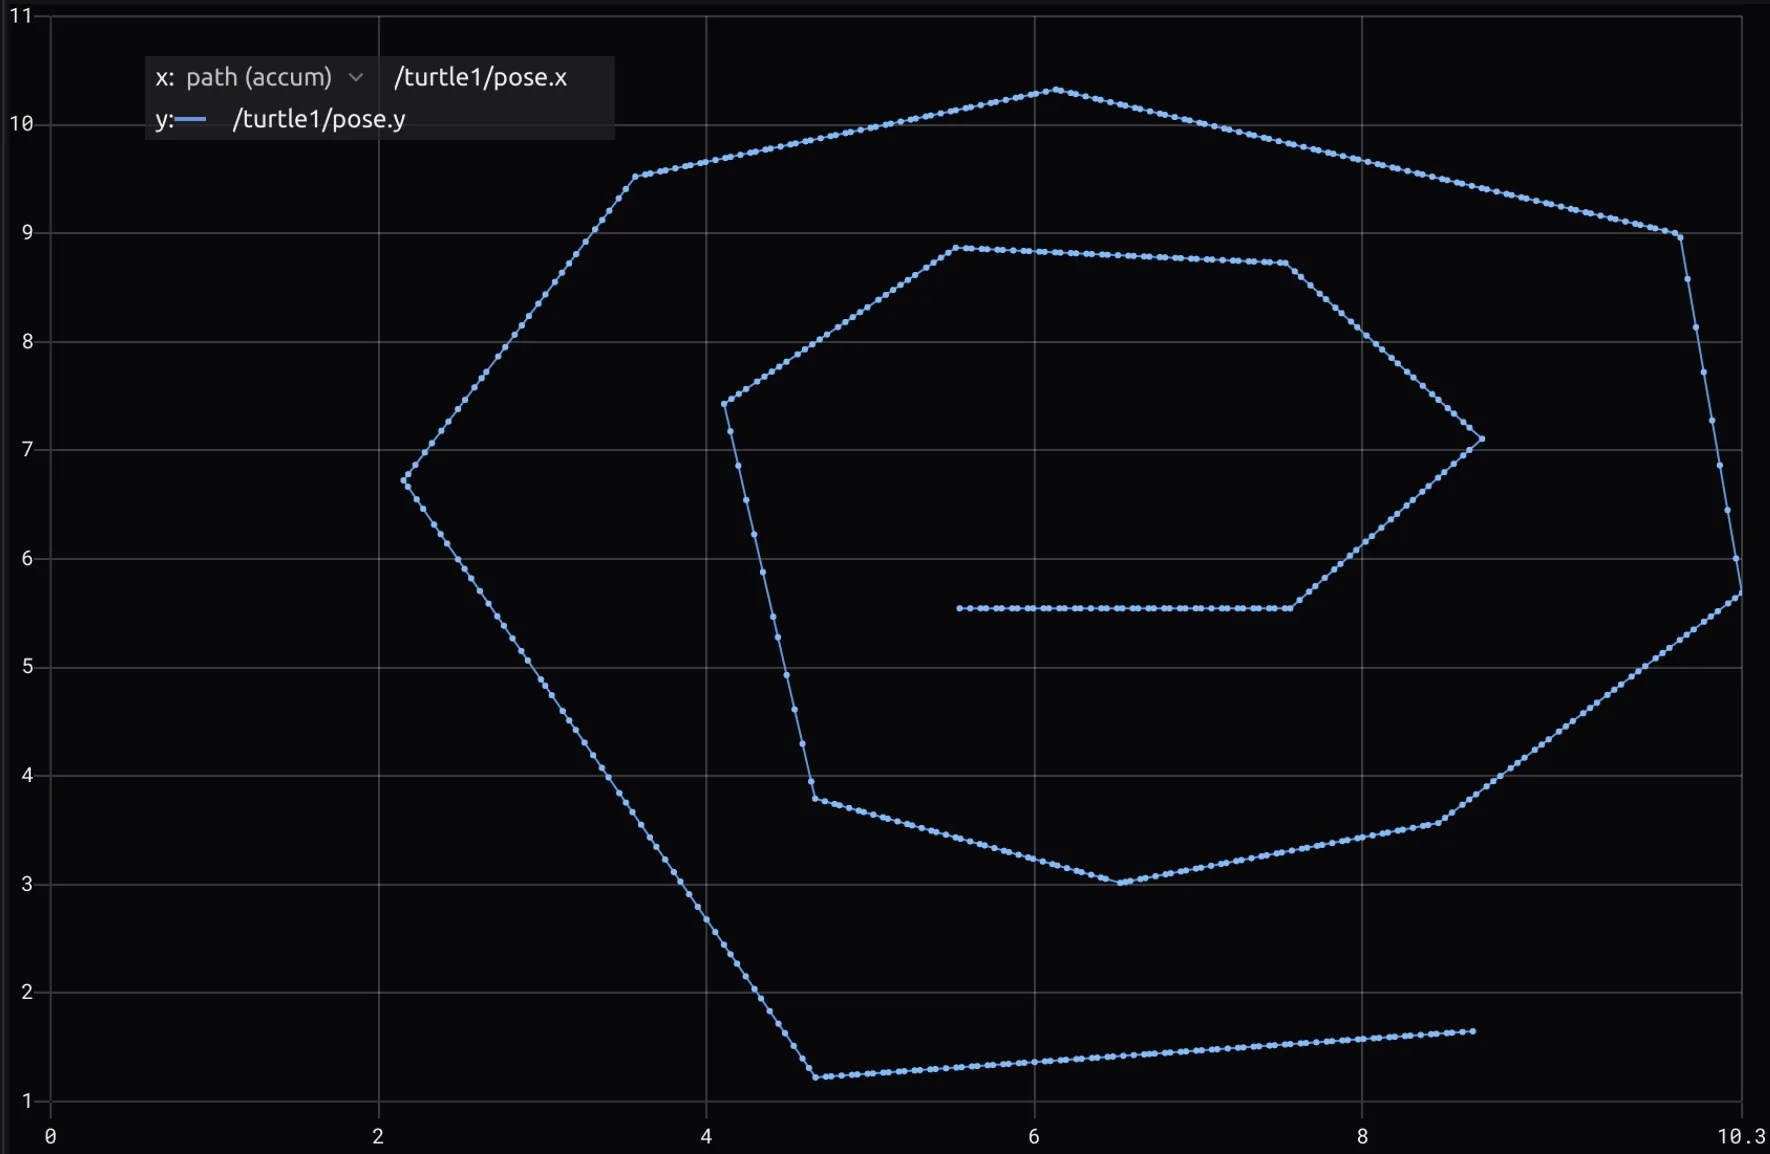
Go back to the turtle_teleop_key terminal and navigate our turtle around. As expected, you’ll see the plot’s values change as our turtle’s position changes.
Navigate the turtle
Finally, let’s use Foxglove to publish messages back to our live ROS stack to test and debug our turtle simulation.
Earlier, we saw that the turtlesim node subscribes to the /turtle1/cmd_vel topic, which contains our turtle’s position. Knowing this, we should be able to publish navigation commands as ROS messages on this same topic, directly from within Foxglove, to control our turtle’s position.
Add the aptly named Publish panel to your layout, for a convenient interface that allows you to draft and publish ROS messages on a given topic. Specify /turtle1/cmd_vel as your topic to publish on, and select geometry_msgs/Twist as your schema name. This will automatically populate the input field with a JSON message template that adheres to the geometry_msgs/Twist schema.
Edit any of the message’s field values, and click “Publish”:
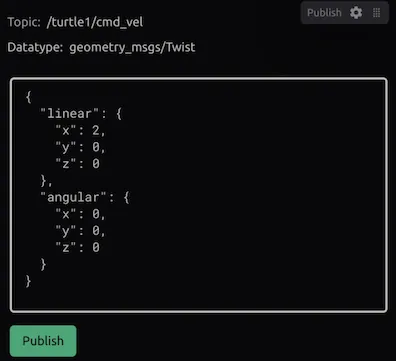
Notice that manually publishing our edited message to /turtle1/cmd_vel causes our turtle to move in the simulation! This in turn also affects the trajectory of our Plot panel’s charted line.
Continue exploring with Foxglove
While turtlesim may be a basic example of a ROS simulation, its foundational concepts mirror those present in more complex robotics systems in production – both real and simulated.
Simulation fills a crucial role in robotics development by enabling fast iteration without putting expensive hardware or human safety at risk. Many robotics companies simulate hundreds or thousands of times as much data as they generate in real life.
We hope this tutorial helped you review some foundational ROS concepts, see the role simulation plays in robotics development, and learn how Foxglove can shed light on the inner workings of your robot (or in this case, simulated turtle). Since Foxglove integrates a variety of traditional robotics tools into one user-friendly app, we hope it helps you spend less time spinning up different tools and more time making your robot go.
For other ways to explore your robotics data, check out the rest of Foxglove’s panels (e.g. Table, Data Source, User Scripts), and stay tuned for our yet-unreleased extensions library.