Using Foxglove webhooks with Google Cloud Run
React to changes in your data in real time


When you need your software to react to new data in Foxglove immediately, Webhooks are the right tool for the job. You can configure a webhook to alert you when new recordings, events, and devices are added to your Organization. This lets you build high-performance infrastructure around your robotics data.
This tutorial will show you how to set up a webhook that alerts your infrastructure when new recordings are added to Foxglove. We’ll use Google Cloud Run to deploy a webhook endpoint that receives notifications and verifies their origin.
Prerequisites
To follow this tutorial, you will need an Admin account with a Foxglove Organization on a Pro or Enterprise plan. You will also need to set up a Google Cloud project to deploy the webhook endpoint into.
Set up your GCP project
Follow Google’s instructions up to “Write the Sample Application” to deploy with Cloud Run here: Quickstart: Deploy a Python Service.
Deploy a webhook endpoint
We’ll create a simple Bottle app to receive webhook notifications, and deploy it using Cloud Run.
Create a directory called webhook-endpoint, and cd into it.
Save this snippet to a new python file main.py:
import hmac
import os
from pprint import pformat
from flask import Flask, request, abort
app = Flask(__name__)
TOKEN = b"HdNRS1HmGS11WcFAXWwpDttTmWM390P5" # fill in your token here after you create your subscription
@app.route("/webhooks", methods=["POST"])
def handle_webhook():
   print("Request content", pformat(request.json))
   digest = hmac.new(TOKEN, msg=request.get_data(), digestmod="sha256").hexdigest()
   signature = request.headers.get("fg-webhook-signature")
   if signature is None or not hmac.compare_digest(digest, signature):
       print(f"Verification failed, expected {digest}, got {signature}")
       abort(400, "Client Error")
   print("Verified OK")
   return "OK"
if __name__ == "__main__":
   app.run(host="0.0.0.0", port=int(os.environ.get("PORT", 8080)), debug=False)
Then, save the following snippet into a file named requirements.txt:
Flask==3.0.0
gunicorn==20.1.0
Werkzeug==3.0.1
Deploy the webhook endpoint with gcloud run deploy. Follow the prompts, making sure to respond y to “Allow unauthenticated invocations”. Take note of the service URL when deployment is complete.
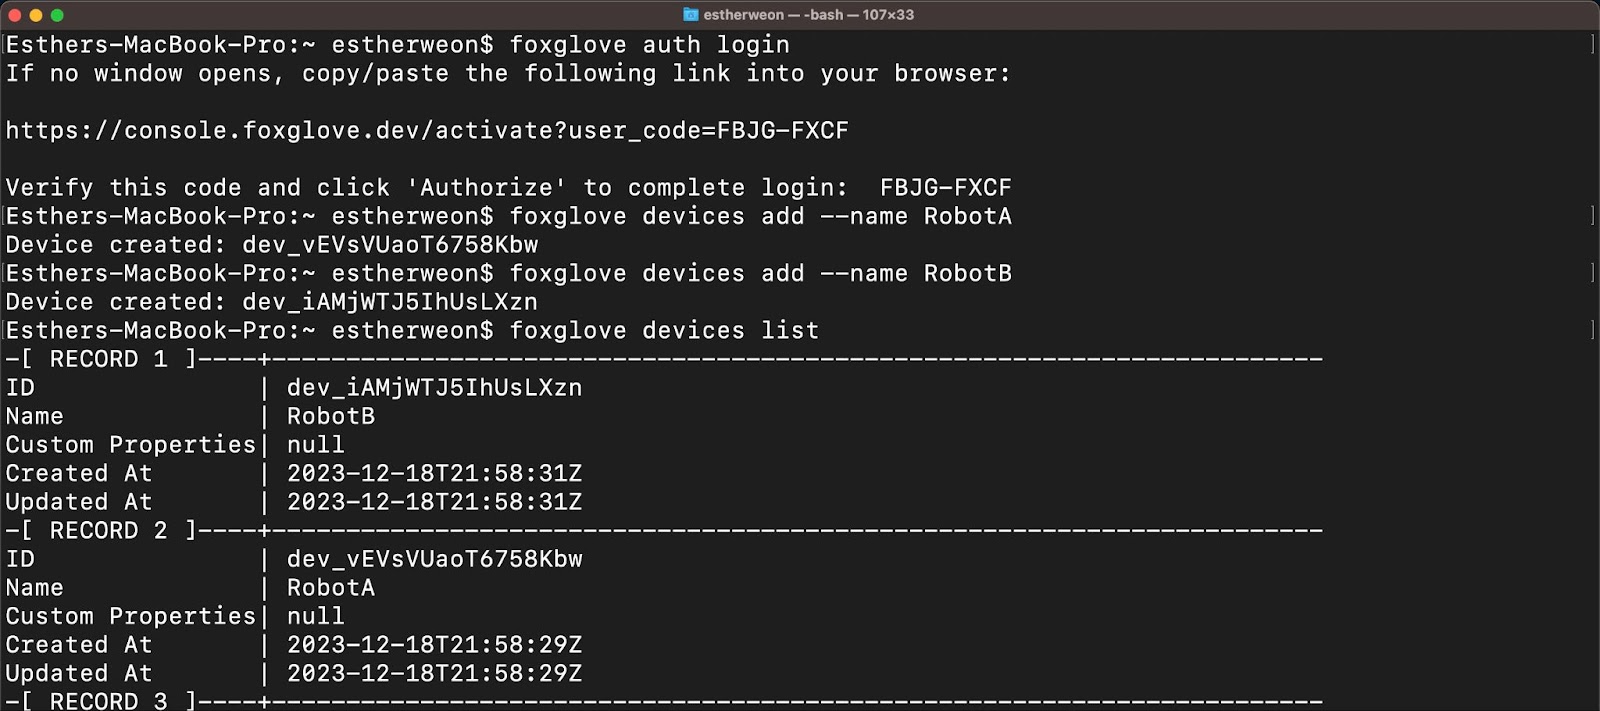
Create a new webhook
Next, we’ll set up our webhook. Log into Foxglove and navigate to webhooks (Settings -> Webhooks).
Click the ”+” button in the top right to create a new webhook.
Give it a name, and fill in the service URL under URL. Select the “recording.imported” event type and click “Save”.
After your webhook is created, you will be shown a secret token which you can use to verify the origin of notifications. Copy it into serve.py as your TOKEN string, and re-deploy your service with gcloud run deploy.
Test with a ping event
You should see your new webhook listed under Webhooks. Click it to view its details.
To test connectivity, you can click the Ping button in the top right to trigger a ping event.
Open the logs for your Cloud Run service by starting from the Google Cloud console, selecting “Cloud Run”, then your service name, then the “Logs” tab.
Wait a few seconds, and you should see a log line that looks like this:
Request content {
'timestamp': '2022-10-01T06:54:29.078Z',
'deliveryAttemptedAt': '2022-10-01T06:54:31.021Z',
'eventId': 'whev_uDYJSMFeVF2y5ZfL',
'webhookId': 'whk_KS6UE8rZfJ5CrBSY',
'payload': {
'type': 'ping',
'webhookId': 'whk_KS6UE8rZfJ5CrBSY'
}
}
Verified OK
If you see nothing, or you see some other error response, don’t worry - we’ll go over how to debug connectivity issues next.
View delivery attempt history
If you refresh the webhook page in your browser, you should see a new Delivery entry at the top of the page.
If your previous delivery was successful, you should see a 200 in the delivery row. Failures are more interesting, so let’s modify our server to fail on every request:
...

@app.route("/webhooks", methods=["POST"])
def handle_webhook():
# Insert this line at the top of the route handler
abort(500, "Server Error")
# Nothing below will run
print("Request content", request.json)
...
Re-deploy your service to Cloud Run before continuing.
Now, trigger another ping event from the web UI. Pretty soon you should see five new failed delivery attempts under Deliveries. Foxglove webhooks retry failures up to five times, until a 2xx response code is returned. Click through to see the failure time, 500 response status and Server Error response body in the details.
Retry a failed delivery attempt
You can manually retry a failed delivery attempt by clicking Retry from the failed delivery details page.
First, remove the abort(500, "Server Error") line from your server, and deploy it again to restore it to working order.
Then, click Retry and wait for the next delivery attempt. You should see a new successful delivery appear under Deliveries.
Next Steps
Congratulations! 🦊 You can now configure webhooks, view delivery attempts, and retry them manually. From here, you could extend this example service to send Slack notifications when new recordings are uploaded, or use the Foxglove python client library to gather insights about your recordings as soon as they’re created.