Using Rosbridge with ROS 2
Talk to your ROS 2 robot from the web using WebSockets.

This post is an introduction to using Rosbridge with ROS 2 and JavaScript. If you’re working on a ROS 1 robot, check out our blog post Using Rosbridge with ROS 1. For information on how to use Rosbridge with Foxglove, check out our docs. Also, it should be noted that we no longer recommend using rosbridge, but we are leaving this post up for posterity. We currently recommend using the foxglove_bridge. Check out our docs for more information about the ROS Foxglove bridge.
If you’ve decided to build a robot using ROS (Robot Operating System), you now have easy access to a wide range of open source libraries, developer tools, and device drivers to support every step of your robotics development journey. Included in this rich ecosystem is Rosbridge, an easy way for you to interact with your robot and its data from a web page.
In this tutorial, we’ll cover what exactly Rosbridge offers, and how to start using it with your own ROS 2 projects. By the end, we’ll have created a web page that can listen to messages published by your ROS stack.
Why Rosbridge?
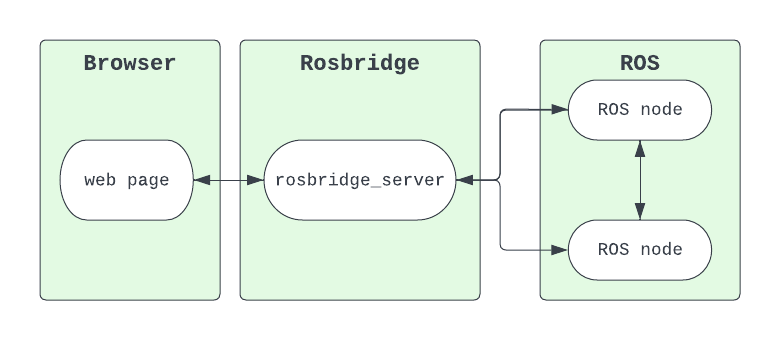
Web browsers have spent decades making it easier to build and distribute interfaces that are easy to use, lightning-fast, and available cross-platform. Unfortunately, ROS nodes communicate with each other via TCP/UDP sockets, which are not available in web browsers.
Rosbridge fills this gap by providing the connection between your robot and web browser using WebSockets, which are supported in every modern web browser. It exposes the pub/sub functionality of ROS, so that you can publish and subscribe to topics from your web page.
Create a web page that listens to your ROS stack
First, we’ll build a web page that communicates across a Rosbridge connection to do two things:
- Listen for the Rosbridge connection, and display its status on the page
- Listen to a specific ROS topic, and list its published messages on the page
We’ll be using roslibjs to handle our web page’s Rosbridge communications.
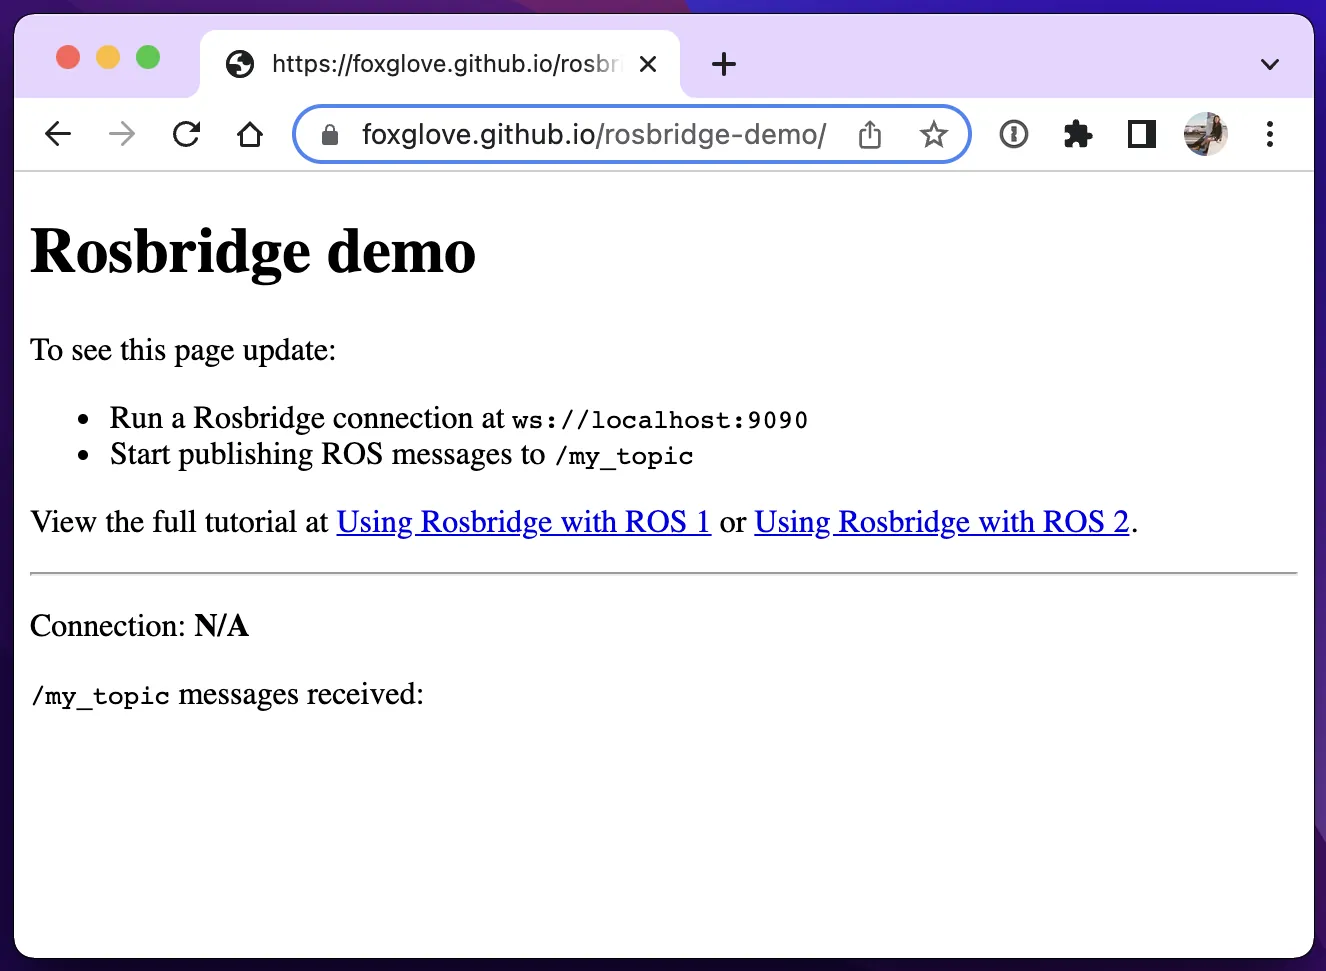
Create a basic HTML file titled index.html:
<!DOCTYPE html>
<html>
 <head>
   <meta charset="utf-8" />
 </head>
 <body>
   <h1>Rosbridge demo</h1>
   <p>To see this page update:</p>
   <ul>
     <li>Run a Rosbridge connection at <code>ws://localhost:9090</code></li>
     <li>Start publishing ROS messages to <code>/my_topic</code></li>
   </ul>
   <p>View the full tutorial at <a href="/blog/using-rosbridge-with-ros1" target="_blank">Using Rosbridge with ROS 1</a> or <a href="/blog/using-rosbridge-with-ros2" target="_blank">Using Rosbridge with ROS 2</a>.</p>
   <hr/>
   <p>Connection: <span id="status" style="font-weight: bold;">N/A</span></p>
   <p><code>/my_topic</code> messages received: <ul id="messages" style="font-weight: bold;"></ul></p>
   <script type="text/javascript" src="https://cdn.jsdelivr.net/npm/roslib@1/build/roslib.min.js"></script>
   <script type="text/javascript" type="text/javascript">
       // Our JavaScript code will go here
   </script>
 </body>
</html>
Open this file in your browser:
Now, let’s update our page with the status of the Rosbridge connection:
// Create ros object to communicate over your Rosbridge connection
const ros = new ROSLIB.Ros({ url: 'ws://localhost:9090' });
// When the Rosbridge server connects, fill the span with id "status" with "successful"
ros.on('connection', () => {
  document.getElementById('status').innerHTML = 'successful';
});
// When the Rosbridge server experiences an error, fill the "status" span with the returned error
ros.on('error', (error) => {
  document.getElementById('status').innerHTML = `errored out (${error})`;
});
// When the Rosbridge server shuts down, fill the "status" span with "closed"
ros.on('close', () => {
  document.getElementById('status').innerHTML = 'closed';
});
Finally, we’ll listen to a topic and display its received messages on the page:
// Create a listener for /my_topic
const my_topic_listener = new ROSLIB.Topic({
  ros,
  name: '/my_topic',
  messageType: 'std_msgs/String',
});
// When we receive a message on /my_topic, add its data as a list item to the "messages" ul
my_topic_listener.subscribe((message) => {
  const ul = document.getElementById('messages');
  const newMessage = document.createElement('li');
  newMessage.appendChild(document.createTextNode(message.data));
  ul.appendChild(newMessage);
});
Run your Rosbridge server
Now that we’ve written all the code we need for our web page to show meaningful information from our ROS stack, let’s test it all out.
For the purposes of this tutorial, we’ll assume you already have ROS 2 installed on your computer. Let’s start by installing the rosbridge_server package:
$ sudo apt install ros-<ROS_DISTRO>-rosbridge-serverNext, you may have to source your development environment:
$ source /opt/ros/<ROS_DISTRO>/setup.bashTo launch the Rosbridge WebSocket server, run the launch file included with the Rosbridge install:
$ ros2 launch rosbridge_server rosbridge_websocket.launch \
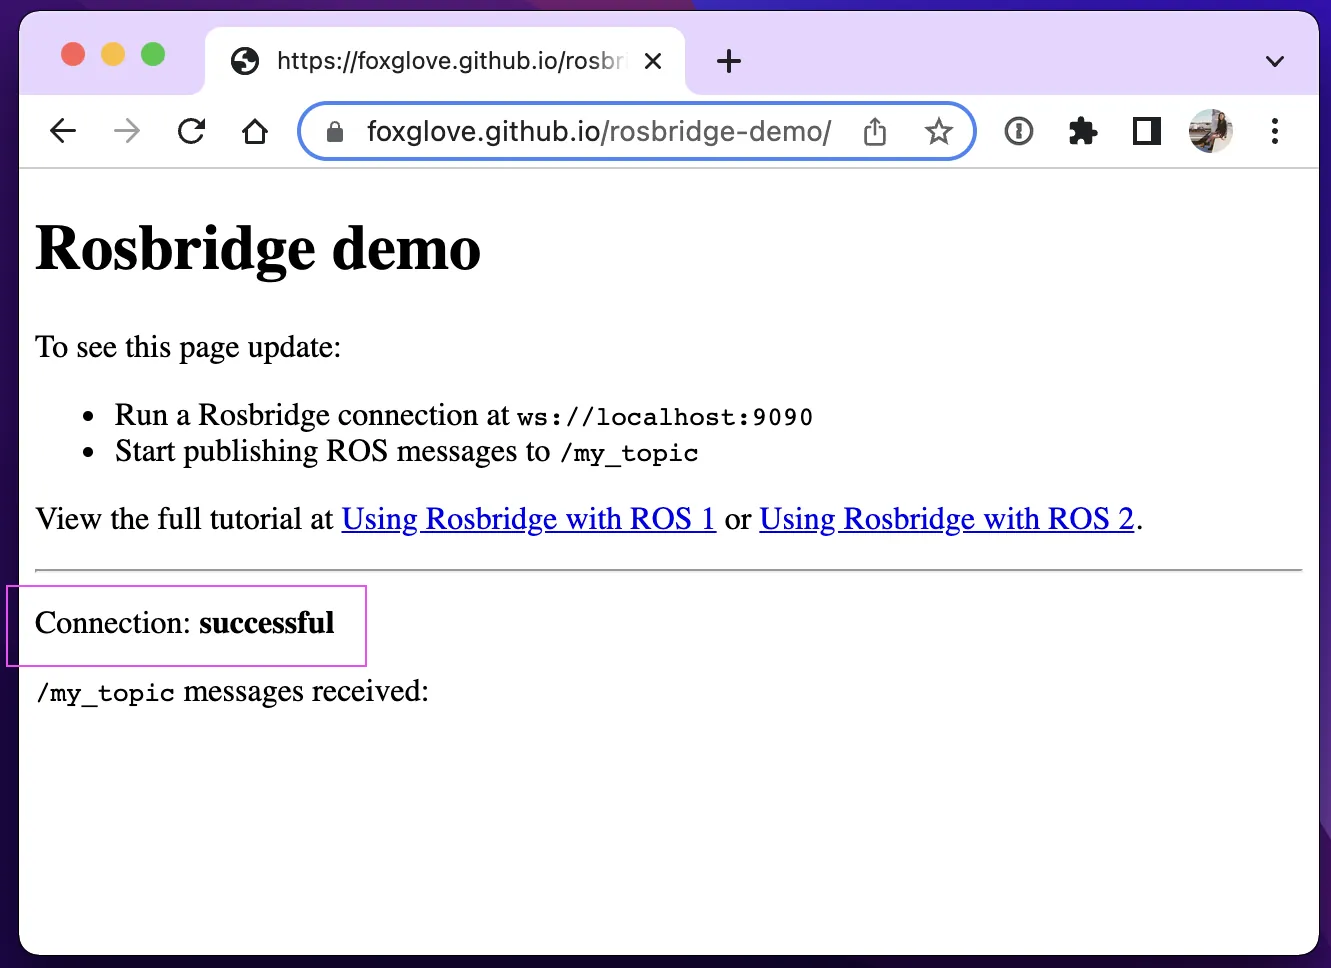
[INFO] [1541100534.152110]: Rosbridge WebSocket server started on port 9090Refresh your web page to reconnect to the robot, and verify that your index.html file now shows “Connection: successful”:
In a Terminal window, publish a message to /my_topic:
$ ros2 topic pub /my_topic std_msgs/String "data: 'Hello world!'" -1You’ll see that the page now shows the latest /my_topic message received:

Publishing more /my_topic messages with different data will add their text to this growing list.
You’ve successfully subscribed to and received messages from a Rosbridge WebSocket server! While this tutorial covered an extremely simple example, Rosbridge connections make it possible for more complex web-based tools (like Foxglove) to connect to your live robotics data.
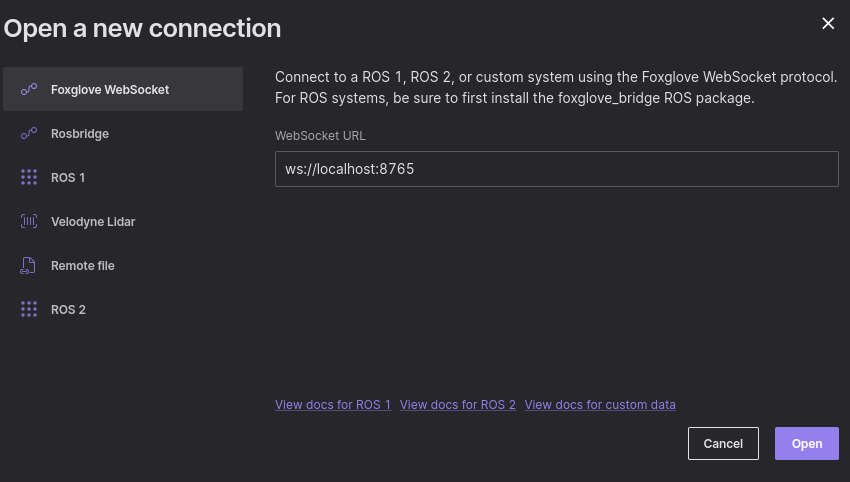
Foxglove WebSocket
Since ROS 2 Humble, there is a new method to connect to your robot using Foxglove. Use the new foxglove_bridge as the WebSocket to increase performance in your live connections.
Installation is as easy as sudo apt install ros-$ROS_DISTRO-foxglove-bridge and launch with ros2 launch foxglove_bridge foxglove_bridge_launch.xml. In Foxglove, select the option Foxglove WebSocket.
Keep learning
Rosbridge can be a useful tool for accelerating your robotics development. It brings the advantages of the web to the robotics world, helping us build zero-install user interfaces that anyone can use.
With Rosbridge, the possibilities are endless. Instead of having every teammate install the complex development environment that working with ROS usually requires, you can now use developer tools, create operator dashboards, and share data insights across your organization - all with a simple web page.
You can find all code referenced in this tutorial in our foxglove/tutorials GitHub repo. You can also experiment with connecting to your ROS robot via a hosted version of this demo .
Foxglove is an example of a web-based application that uses a Rosbridge connection to connect to your live ROS data. Open up Foxglove to build a real-time dashboard that visualizes and debugs your data – all from the comfort of your favorite web browser. For detailed information check out our docs.