Publishing and Visualizing ROS 1 Transforms
Use Foxglove to debug and edit your ROS 1 robot’s transforms.

Roboticists rely on mathematical operations called transformations (or “transforms”) to situate their robots’ components in relation to other objects in their world.
In this tutorial, we’ll learn how to publish static and mobile transforms in ROS, and how to visualize and edit these messages using Foxglove.
Publishing transforms
Transforms describe how objects in your robot’s world are positioned in relation to each other. They fall in one of two categories – static or mobile. Static transforms remain the same over time – e.g. a transform between a camera and the rover it’s mounted on. Mobile transforms, on the other hand, often vary from moment to moment – e.g. a transform between a rover’s camera and a detected pedestrian.
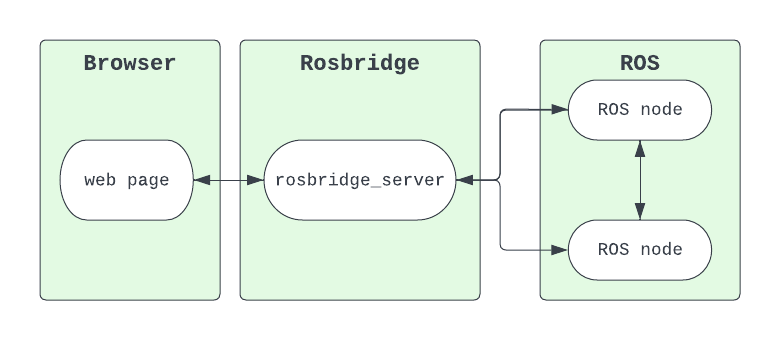
ROS 1 periodically publishes mobile transforms on the /tf topic, to track how they evolve over time. To improve bandwidth, ROS 1 only publishes static transforms on the /tf_static topic much less infrequently – often only once for a given recording session.
Static
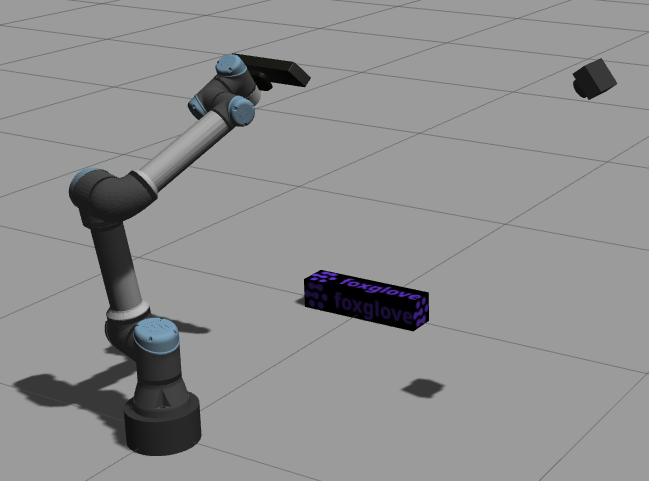
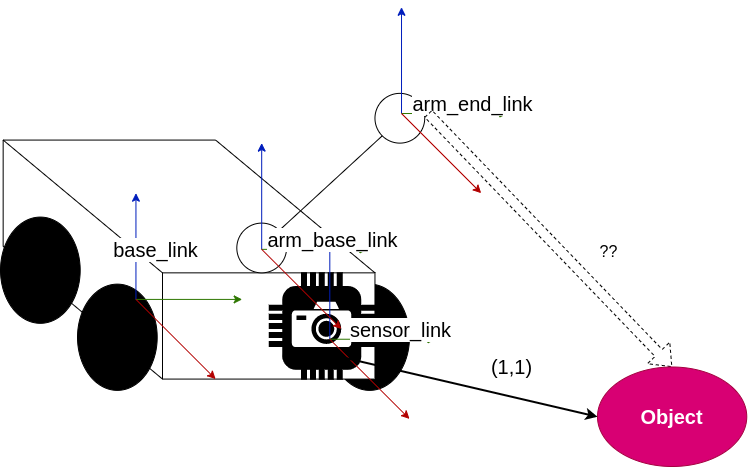
Let’s use the static_transform_publisher node from the tf2_ros package to publish a static transform. We’ll be using the example robot from our last transforms tutorial as a reference:

Execute the static_transform_publisher node from a Terminal window – x, y, z describe the relative translation, while r, p, y describe the relative orientation (i.e. roll, pitch, yaw angles):
$ rosrun tf2_ros static_transform_publisher x y z r p y parent_frame child_frame
Next, publish a static transform between your robot’s base frame (base_link) and its arm base frame (arm_base_link):
$ rosrun tf2_ros static_transform_publisher 1 -1 0 0 0 0.707 base_link arm_base_link
You are now publishing static transforms!
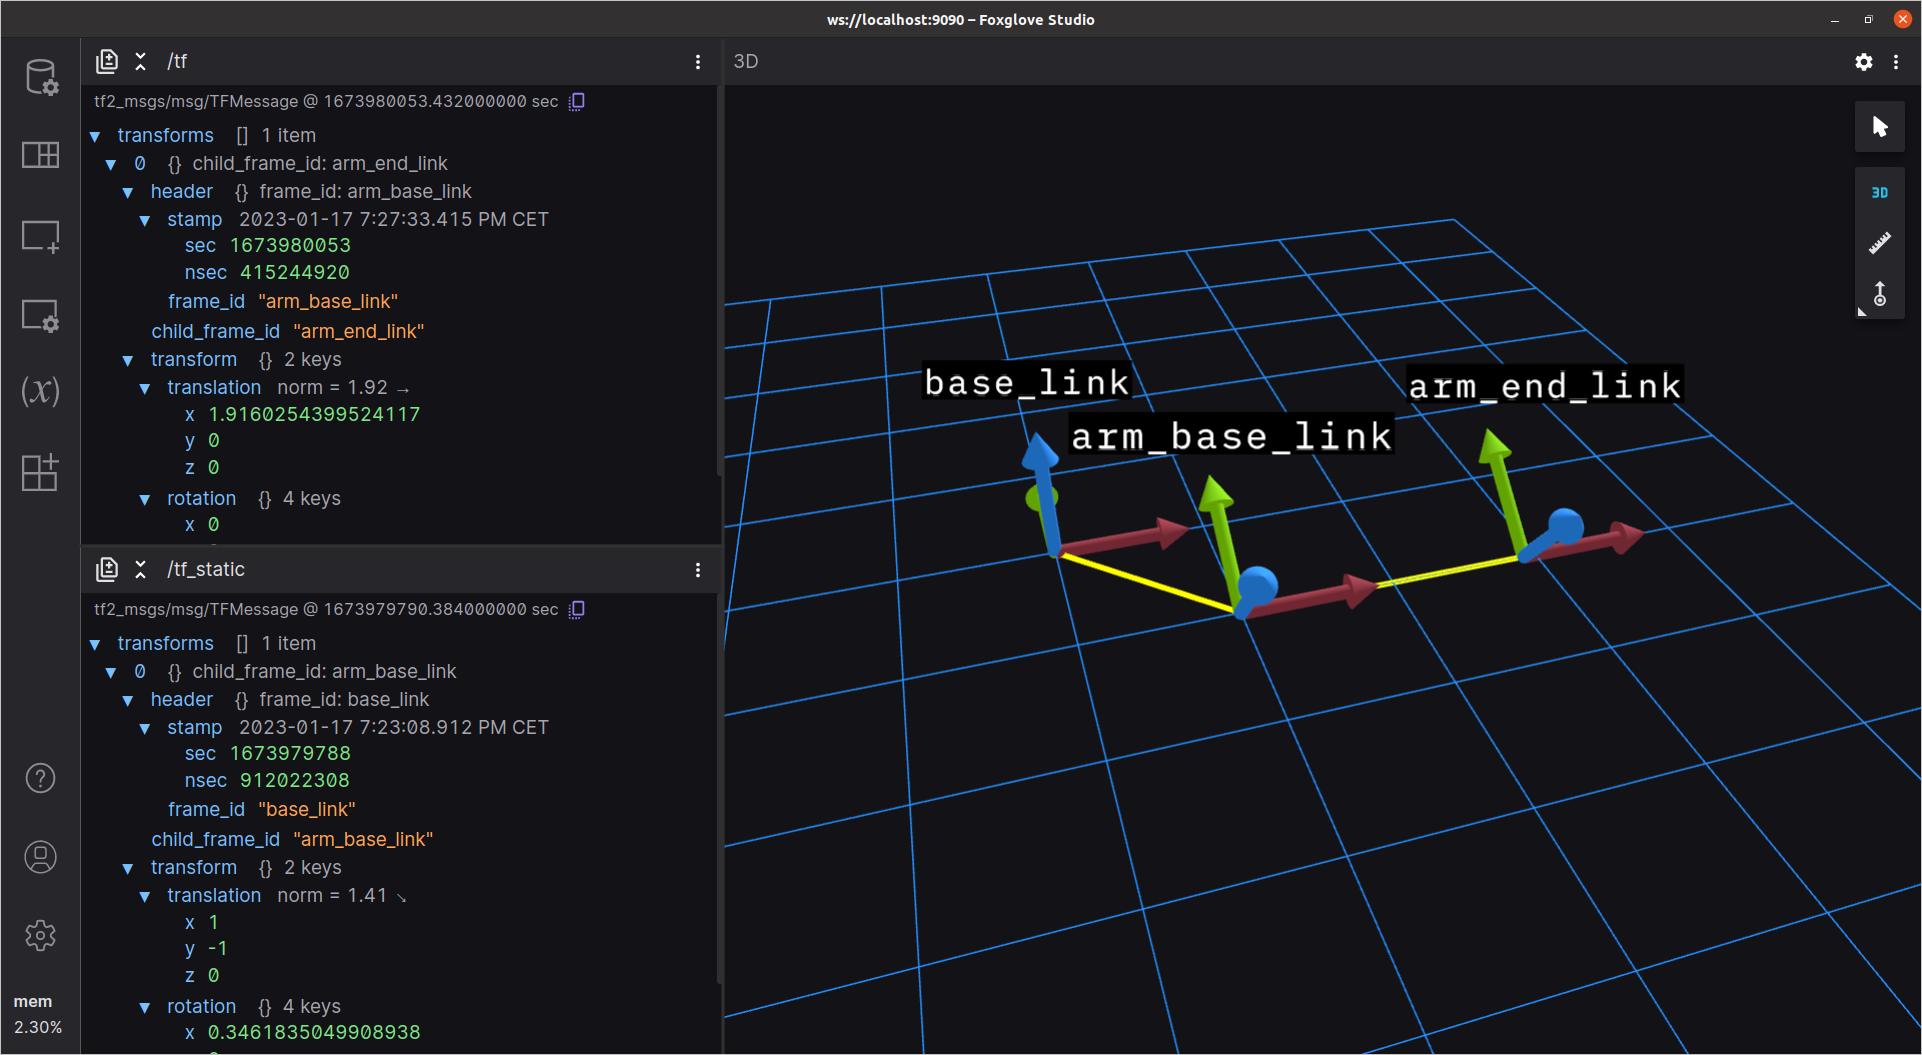
To verify, let’s inspect our broadcast messages in Foxglove. Once you load the app, open a Foxglove WebSocket connection with the default WebSocket URL:

Add a 3D panel to your layout to see all your published frames. Next, add two Raw Messages panels to look at your incoming /tf and /tf_static messages:
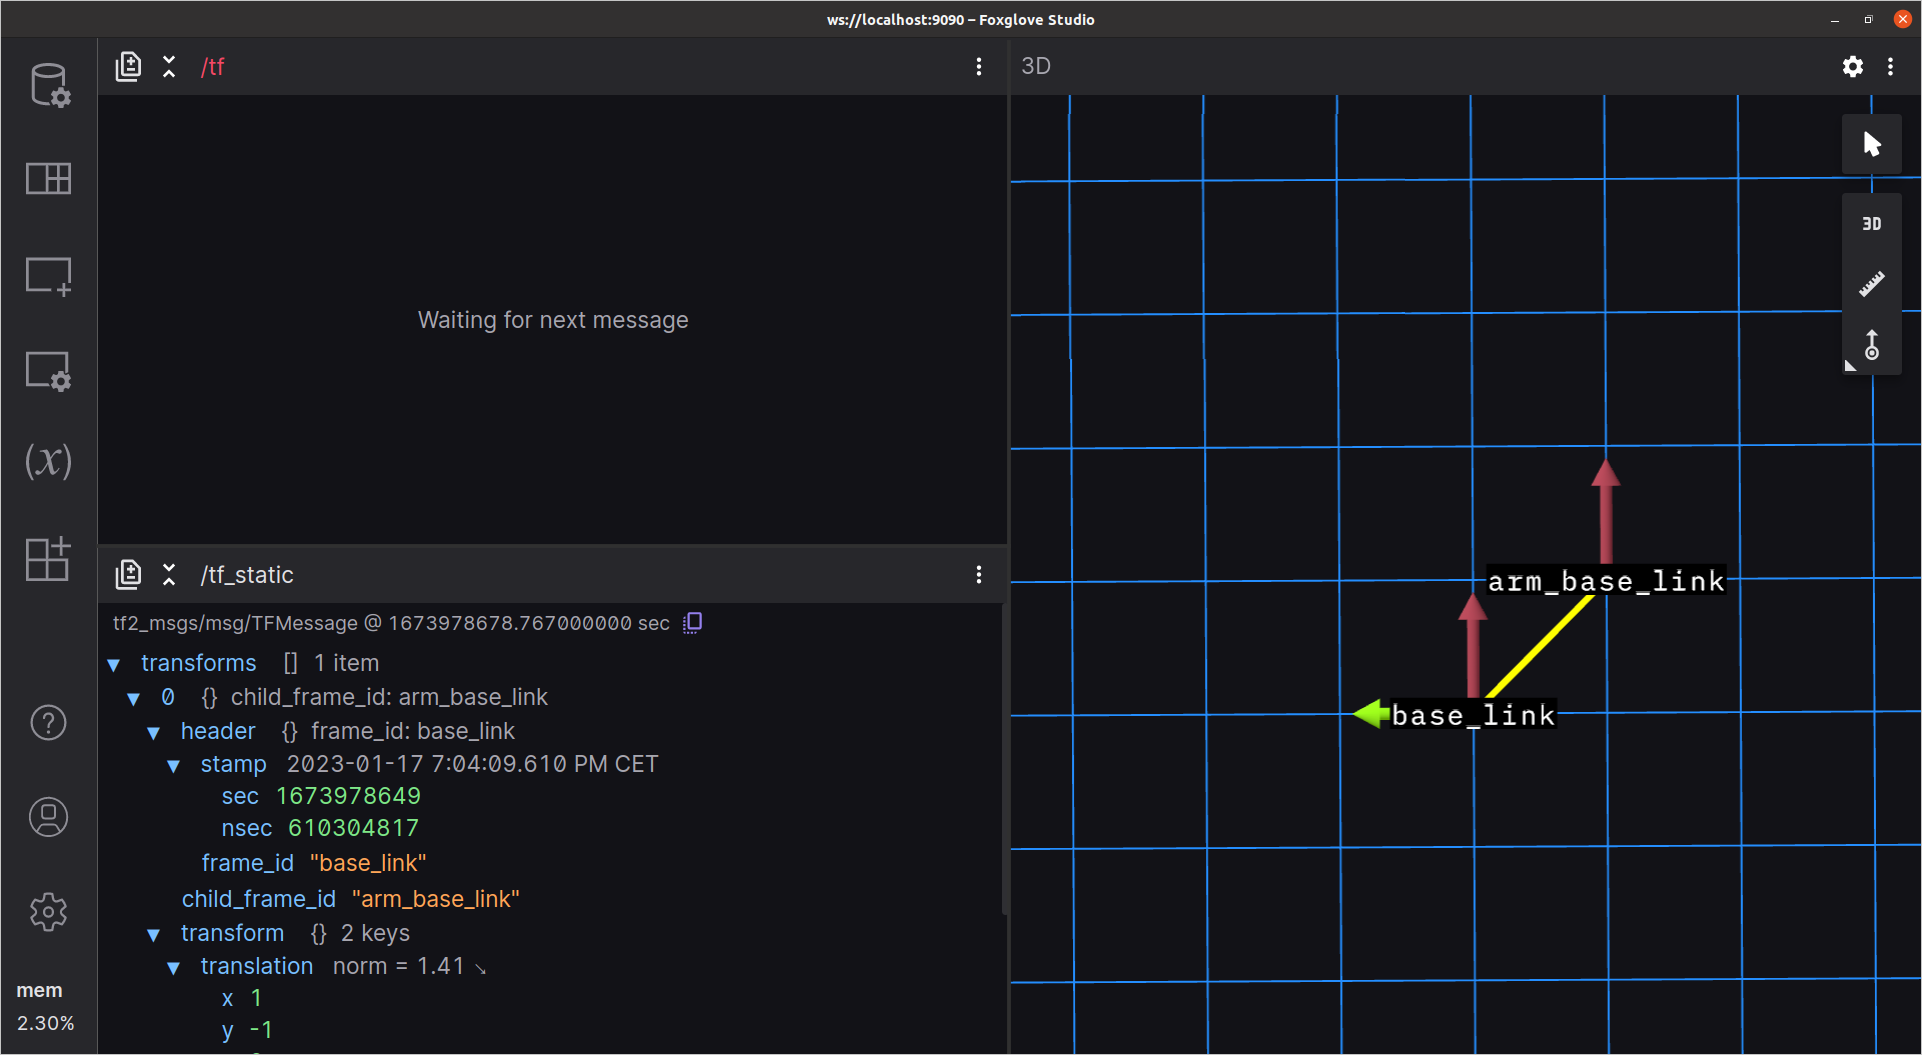
Your /tf Raw Messages panel will be empty, as we’re not yet publishing any mobile transforms. Your /tf_static Raw Messages panel, however, should be displaying your static transform messages.
Mobile
Now that we’ve published a static transform, let’s create a broadcaster node that publishes mobile transforms to describe your robotic arm’s movement.
Create a tf_broadcaster.cpp file in your package’s src/ folder, and include the necessary libraries:
#include <ros/ros.h>
#include "geometry_msgs/TransformStamped.h"
#include "geometry_msgs/Twist.h"
#include "tf2/LinearMath/Quaternion.h"
#include "tf2_ros/transform_broadcaster.h"
Define a TfBroadcaster class that publishes a transform message for each new arm transform detected. It should subscribe to the arm position topic (/cmd_vel, which publishes Twist messages), calculate a new transform whenever a new arm position is detected (armCallback), and use a timer (transform_timer_) to periodically publish the last-calculated transform:
class TfBroadcaster : ros::NodeHandle{
private:
  // Declare a timer for the tf_broadcaster
  ros::Timer transform_timer_;
  // Declare the transforms broadcaster
  tf2_ros::TransformBroadcaster tf_broadcaster_;
  // Subscription for cmdVel
  ros::Subscriber cmd_vel_sub_;
  // Declare the transform to broadcast
  geometry_msgs::TransformStamped transf_;

void armCallback(const geometry_msgs::Twist msg){
  transf_.transform.translation.x = msg.linear.x;
  transf_.transform.translation.y = msg.linear.y;
  tf2::Quaternion q;
  q.setRPY(0,0,msg.angular.z);
  transf_.transform.rotation.x = q.getX();
  transf_.transform.rotation.y = q.getY();
  transf_.transform.rotation.z = q.getZ();
  transf_.transform.rotation.w = q.getW();
}

void tfTimer(){
  // All transforms must be correctly time-stamped!
  transf_.header.stamp = ros::Time::now();
  tf_broadcaster_.sendTransform(transf_);
}
Next, let’s instantiate our broadcaster, subscribe to the arm topic, and initialize our timer:
public:
  TfBroadcaster():
  NodeHandle("~"){
    // Initialize the transforms broadcaster
    tf_broadcaster_ = tf2_ros::TransformBroadcaster();
    // Define the "parent" frame
    transf_.header.frame_id = "arm_base_link";
    // Define the "child" frame
    transf_.child_frame_id = "arm_end_link";
    // Initialize timer for publishing transform
    transform_timer_ = createTimer(ros::Duration(1),
      std::bind(&TfBroadcaster::tfTimer, this));
    // Create subscriber for cmdVel
    cmd_vel_sub_ = subscribe<geometry_msgs::Twist>(
      "/cmd_vel",10, &TfBroadcaster::armCallback, this);
   }

  ~TfBroadcaster(){}
};
Finally, write a main function to declare and spin the node:
int main(int argc, char **argv){
  ros::init(argc, argv, "tf_broadcaster");
  auto node = TfBroadcaster();
  ros::spin();
  return 0;
}
Add the following lines to your CMakeLists.txt to add the executable to the compilation list:
add_executable(tf_broadcaster src/tf_broadcaster.cpp)
target_link_libraries(tf_broadcaster
 ${catkin_LIBRARIES}
)
Compile your package with $ catkin_make, and run this second node:
$ rosrun transforms tf_broadcasterYou are now publishing mobile transforms!
To verify, let’s inspect our broadcast messages again in Foxglove. Once you reconnect to your live data, go to the Layouts sidebar and import this example layout.
To simulate a moving robotic arm, use the provided layout’s Teleop panel to publish different Twist messages to the /cmd_vel topic:
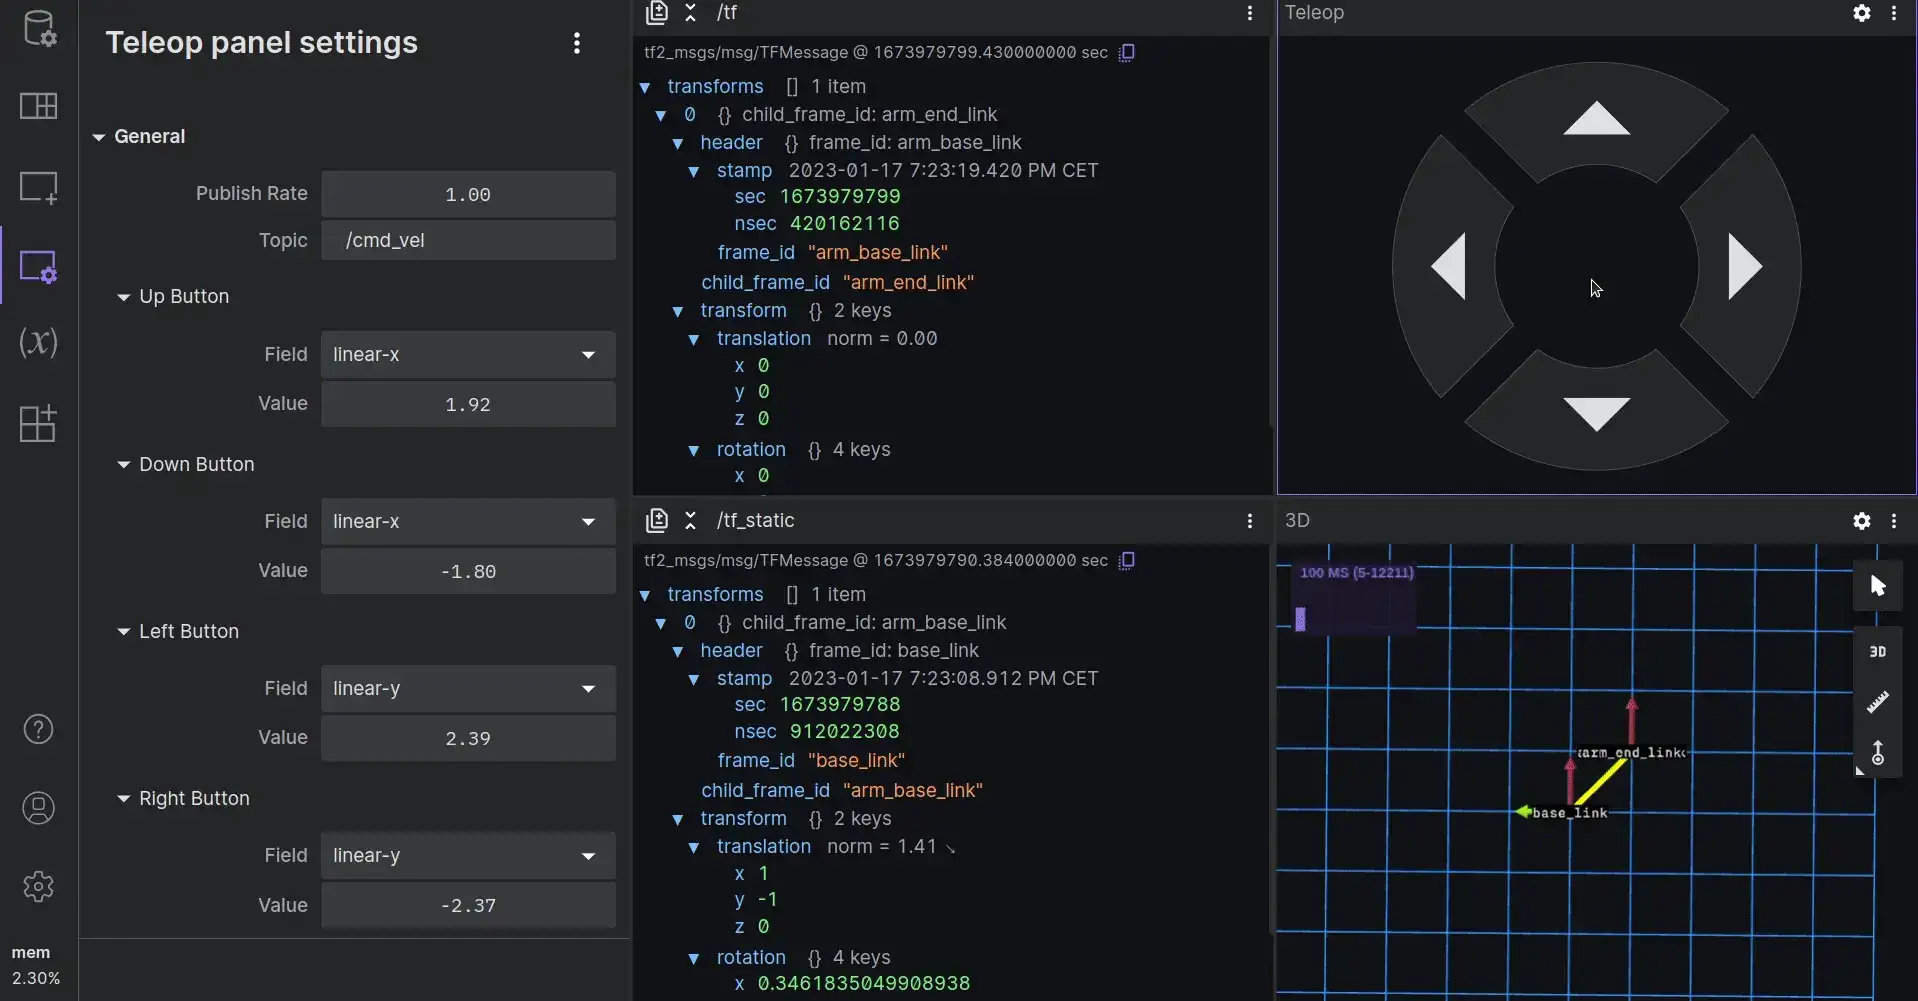
Note how your broadcaster node reacts to these new arm position messages by updating the /tf topic messages. The /tf_static topic message should remain unchanged, as the arm’s movement doesn’t affect the static transform between the base_link and arm_base_link frames.
Viewing and editing transforms in Foxglove
Finally, let’s investigate our transform tree to find the relative positions of all our frames, even if they aren’t directly connected.
One way to do this is with the tf2_echo executable – this lets you calculate any frame’s position relative to a base frame, without worrying about the string of matrices connecting them. Note that this executable is in the tf package for ROS 1, but has been moved to the tf2_ros package for ROS 2. For example, we can calculate the transform between our base_link and arm_end_link frames, even though these are not directly connected:
$ rosrun tf tf_echo base_link arm_end_link
  At time 1674295414.177
  - Translation: [2.000, -1.000, 0.000]
  - Rotation: in Quaternion [0.346, 0.000, 0.000, 0.938]
              in RPY (radian) [0.707, -0.000, 0.000]
              in RPY (degree) [40.508, -0.000, 0.000]
As expected, the output Translation and Rotation values will change whenever you modify the arm_end_link frame’s position.
Another way to view your transform tree is to use Foxglove’s 3D panel. Once you connect to your data and open the 3D panel’s settings, you’ll be able to see a list of all transforms detected in your source:
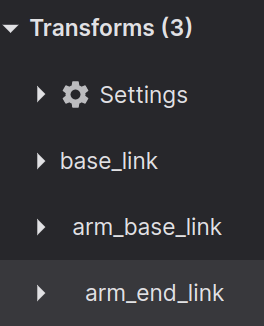
Each indented frame in the 3D panel settings represents a child of a parent frame.
You can even use the 3D panel settings to modify transforms in real time. Toggle “Editable” in the “Transforms” settings, then edit each transform’s values to see them reflected in the 3D scene:
Keep in mind that this feature is mainly for real-time debugging – whether you’re verifying the position of your robot elements or maybe correcting bad sensor readings. These updated transform values are not actually published to the /tf and /tf_static topics.
Learn more
Transforms are one of the most potent tools that you will need in your robotics career. Being able to publish, visualize, and even edit transforms can help you better understand the world your robot is navigating.
For a reference to all the code covered in this post, check out our GitHub. And as always, feel free to reach out to the Foxglove team in our Discord community to ask questions, give us feedback, and request a topic for the next tutorial!