tl;dr In this article, I discuss integrating a Luxonis OAK-D S2 stereo depth camera into my LeKiwi robot’s ROS 2 stack. I cover the steps I took to configure the depthai-ros driver to optimize bandwidth, simplify the URDF and launch files, and add pointcloud compression with Cloudini. I also discuss how I visualized RGB images, depth maps, and (compressed and uncompressed) pointclouds in Foxglove’s 3D panel, and the challenges I faced along the way.
Project Context
Over the past few months, I’ve been steadily upgrading my LeKiwi-based mobile robot platform to run autonomously with ROS 2. My earlier posts covered adding a LiDAR for 360-degree perception, calibrating a monocular camera for the base, teleoperating the robot using a Steam Deck, and finally configuring Nav2 to drive the robot autonomously.
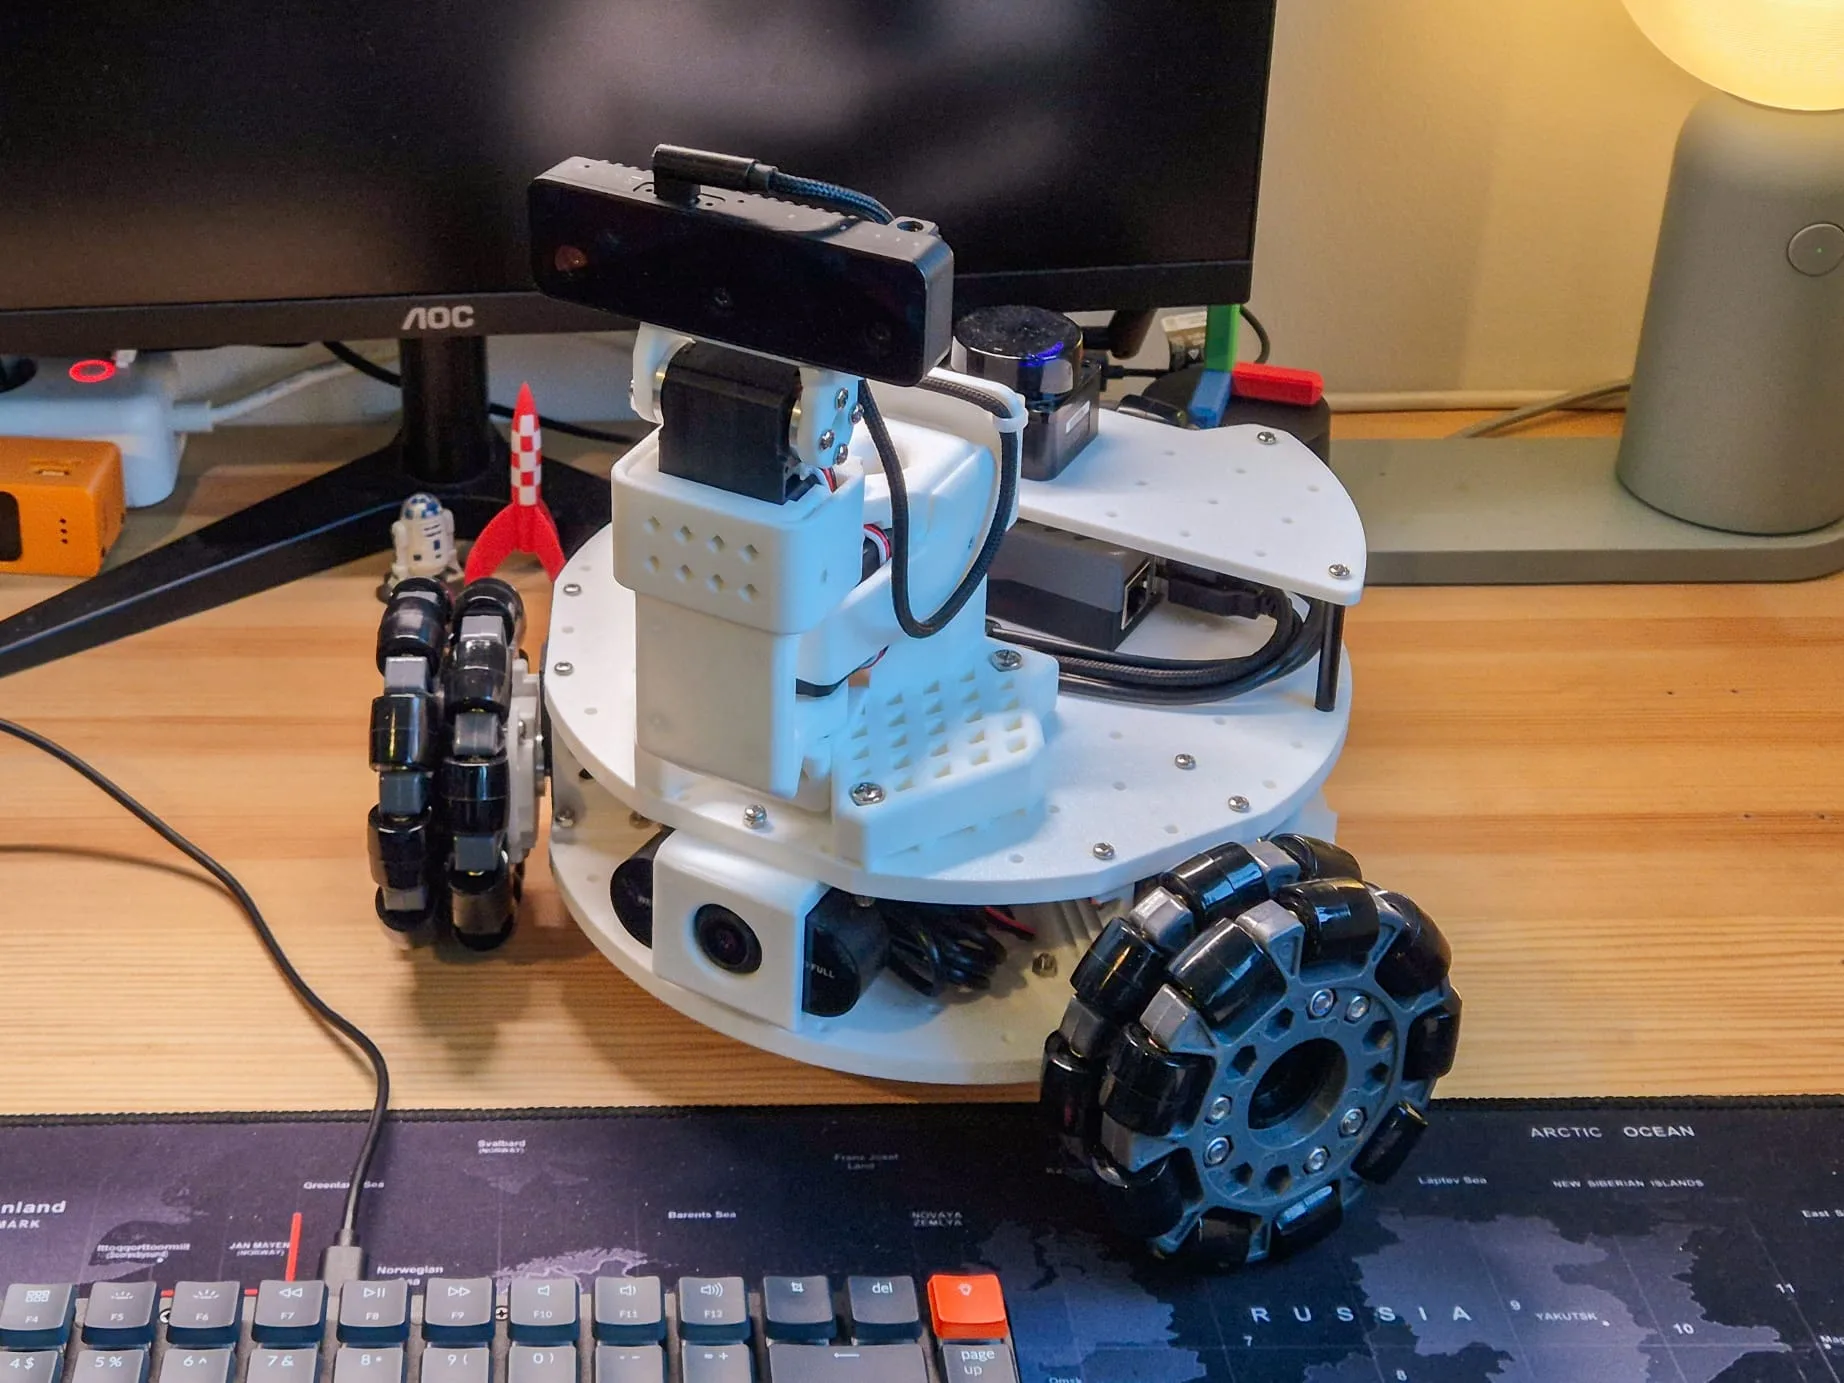
This article is slightly tangential, but it focuses on the next major sensor upgrade: adding a stereo depth camera to give the robot 3D perception. The LeKiwi is originally designed to be a mobile manipulator, with space to mount a SO-101 robot arm, which I have always wanted to add. But while building the SO-101 arm, I realized that the first two joints are perfect for a pan-tilt mechanism, and decided to stop there. Then I remembered that I had a couple of Luxonis OAK depth cameras, and thought it would be fun to mount one on this pan-tilt mechanism to give the robot an active vision system that can look around and perceive depth.
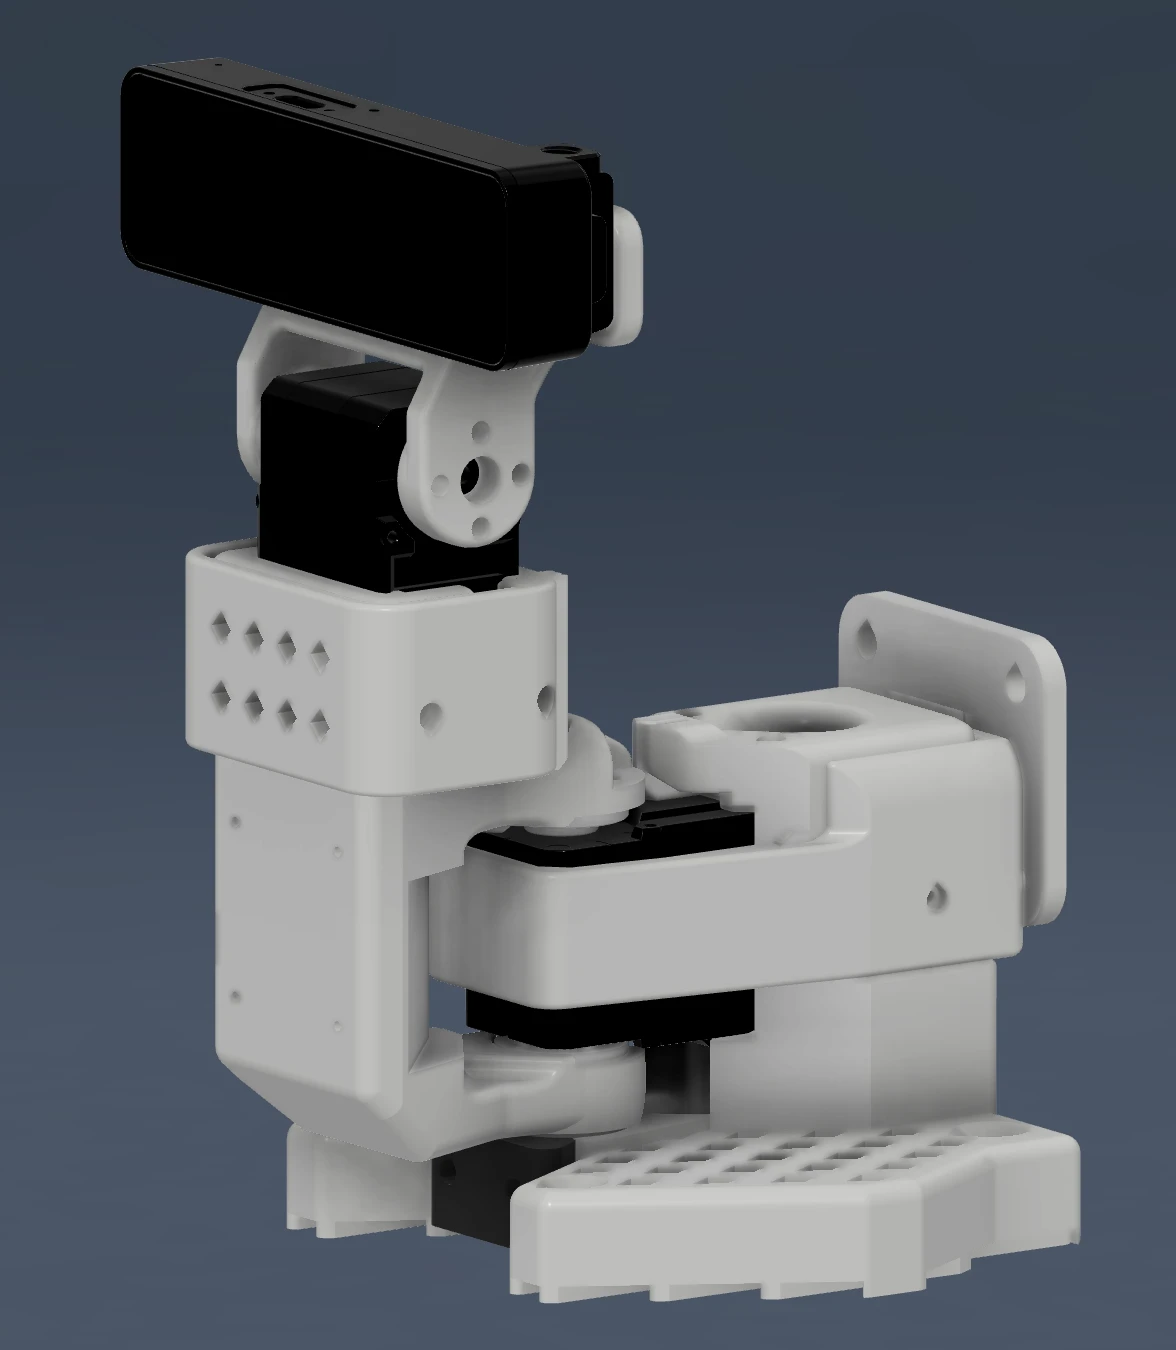
This would not only be a fun hardware integration challenge and a learning experience, but it would also allow me to experiment with visual SLAM, visual-inertial odometry, VR integration, and dig a little deeper into vision-based AI. In this article, I will only focus on how I integrated the OAK-D S2 with ROS 2, and everything I did to visualize its data on Foxglove. If you are interested in the pan-tilt mechanism itself, I’ve covered that in a separate post on my blog.
Why the OAK-D S2?
The short answer is that I had one lying around.
But I had a choice to make. I have three Luxonis cameras, the original OAK-D from their very first Kickstarter, the OAK-D Lite, and a recently acquired OAK-D S2. The original OAK-D is a great camera, but it’s quite big and power-hungry, so I immediately ruled it out.
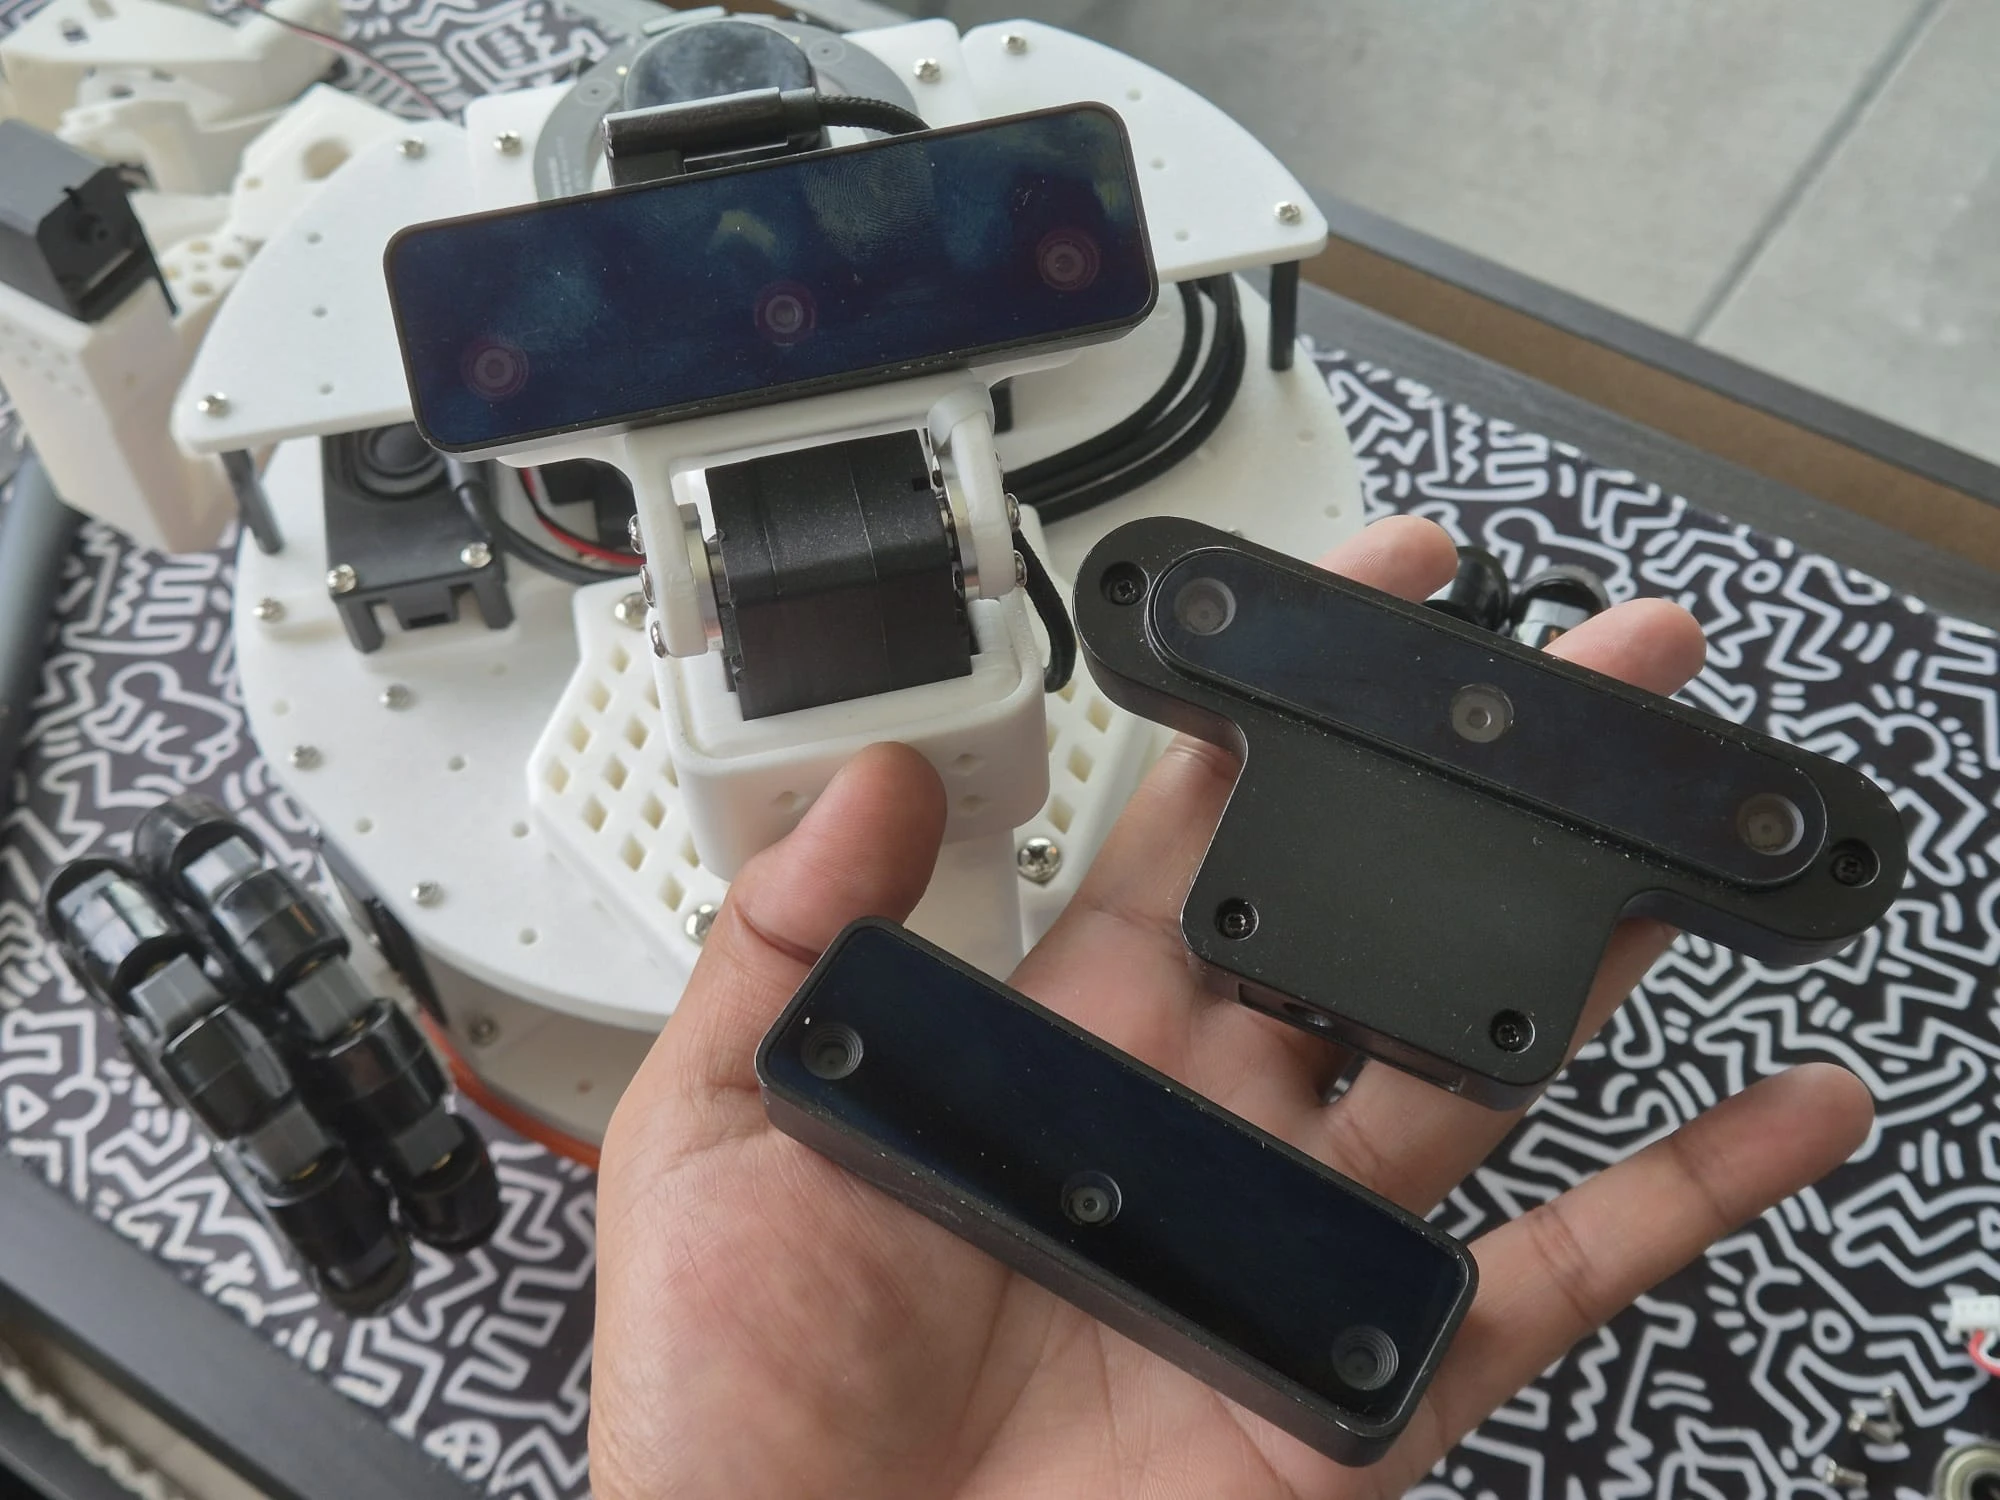
The real choice was between the OAK-D Lite and the OAK-D S2. Both cameras are pretty similar; they have an RGB camera, two monochrome cameras for stereo vision (with the same baseline), and the same Myriad X VPU. The S2 has a higher stereo resolution (800p vs 480p), better low-light performance, and a built-in IMU for visual-inertial odometry. The Lite is smaller and cheaper, but it doesn’t have the IMU and has lower stereo resolution. For my use case, the S2’s improved depth quality and VIO capabilities were worth the extra cost and size.
The real winning feature of the OAK-D S2 (in fact, any camera from Luxonis) is the DepthAI software stack, which provides onboard processing for stereo depth computation, VIO, and AI inference. This means I do not need to run heavy computation on my Raspberry Pi 5, which is already running the ROS 2 Control stack for motor control, LiDAR processing, and navigation.
These cameras can run custom pipelines that output RGB images, depth maps, visual-inertial odometry estimates, and even pointclouds, all with minimal CPU load on the host. This makes it an ideal choice for a mobile robot with limited onboard compute.
The Integration Journey
Luxonis maintains an official ROS 2 package called depthai-ros, which includes a modular driver that can be configured for different camera models and pipelines. I cloned it into my workspace and installed dependencies following the instructions in the repository. The package compiled cleanly, and the example launch files worked out of the box with RGB and depth images streaming immediately.
Configuration for Bandwidth Optimization
The depthai_ros_driver uses a pipeline-based architecture configured via YAML parameter files. The package includes several example configurations, but none combine RGB, depth, and VIO. So, I decided to create my own config tailored to my use-case: RGB images for AI inference, depth maps for obstacle avoidance, VIO as an additional odometry source, and optional pointclouds for mapping.
I created two custom configurations:
oakd_vio.yaml: Default config optimized for low bandwidthoakd_vio_pcl.yaml: Adds RGBD pointcloud output to the bandwidth-optimized config (higher CPU load)
The bandwidth optimization was critical for two reasons: First, I’m running it on a Raspberry Pi 5 alongside other ROS 2 nodes, and some additional AI features I plan on adding. Second, I plan on streaming data to visualize on Foxglove, sometimes even remotely. So, I downscaled RGB to 1/4 ISP resolution with JPEG compression, reduced depth to 15 Hz with 2x decimation, disabled raw stereo image publishing, and kept VIO at 60 Hz for smooth camera pose tracking. I created the separate pointcloud config because I don’t need pointclouds during regular teleoperation or simple Nav2 operation. Keeping it separate reduces CPU load when not needed.
When pointcloud mode is enabled, the config changes significantly: depth rate increases from 15 Hz to 30 Hz to match the RGB rate, and the 2x decimation filter is disabled. 2x decimation would reduce the pointcloud to 4x fewer points, making it too sparse for useful visualization or mapping. Instead, bandwidth is managed by compressing the full-resolution pointcloud with Cloudini (more on this later), which preserves spatial detail while still achieving good compression.
Custom Launch File and URDF Integration
I started facing issues when I tried to integrate the OAK-D S2 URDF and set up the launch file. The depthai-ros package is designed to be a general-purpose package to support Luxonis’ entire product line of cameras, which means it provides a single parametrized URDF Xacro that can be configured for each camera model, and a comprehensive ~300 line launch file with all possible features and configuration options. This makes perfect sense for a general-purpose driver, but for my single-camera robot, this complexity was overkill.
I created a minimal 80-line launch file and a custom URDF macro tailored specifically for the OAK-D S2 on my robot. The launch file does the following:
- Switches between
oakd_vio.yamlandoakd_vio_pcl.yamlbased on apointcloudargument - Starts the camera driver as a composable node in a container
- Overrides TF frame parameters to integrate with my existing robot (parent frame:
tilt_linkon the pan-tilt mechanism, base frame:oak_link)
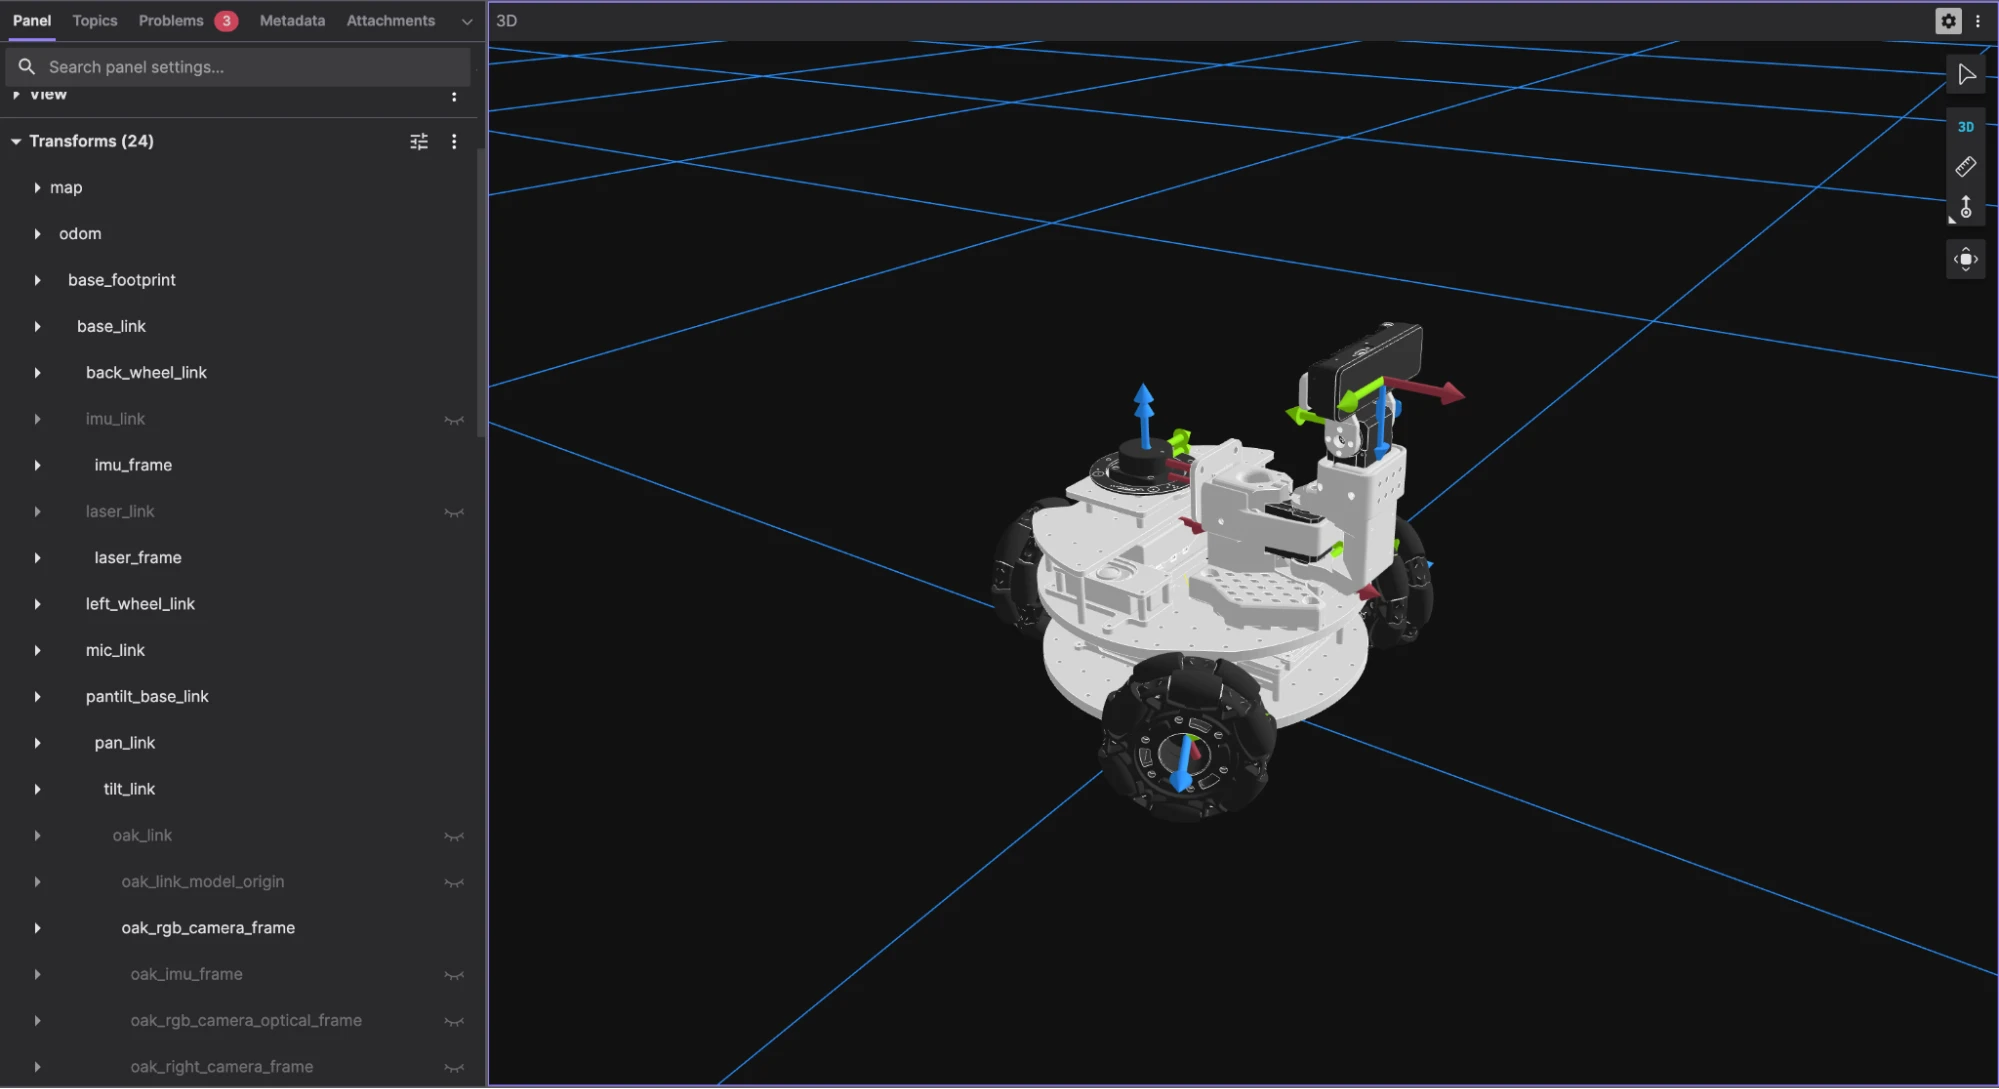
The custom URDF was necessary because the automatic URDF generation in depthai-ros maps the OAK-D S2 to the OAK-D Pro mesh (the meshes are identical) but doesn’t include the IMU frame or offsets for the built-in IMU. My custom macro defines the camera base link (oak_link), IMU frame (oak_imu_frame), and uses the correct IMU offset from the OAK-D S2 datasheet.
Visualizing with Foxglove
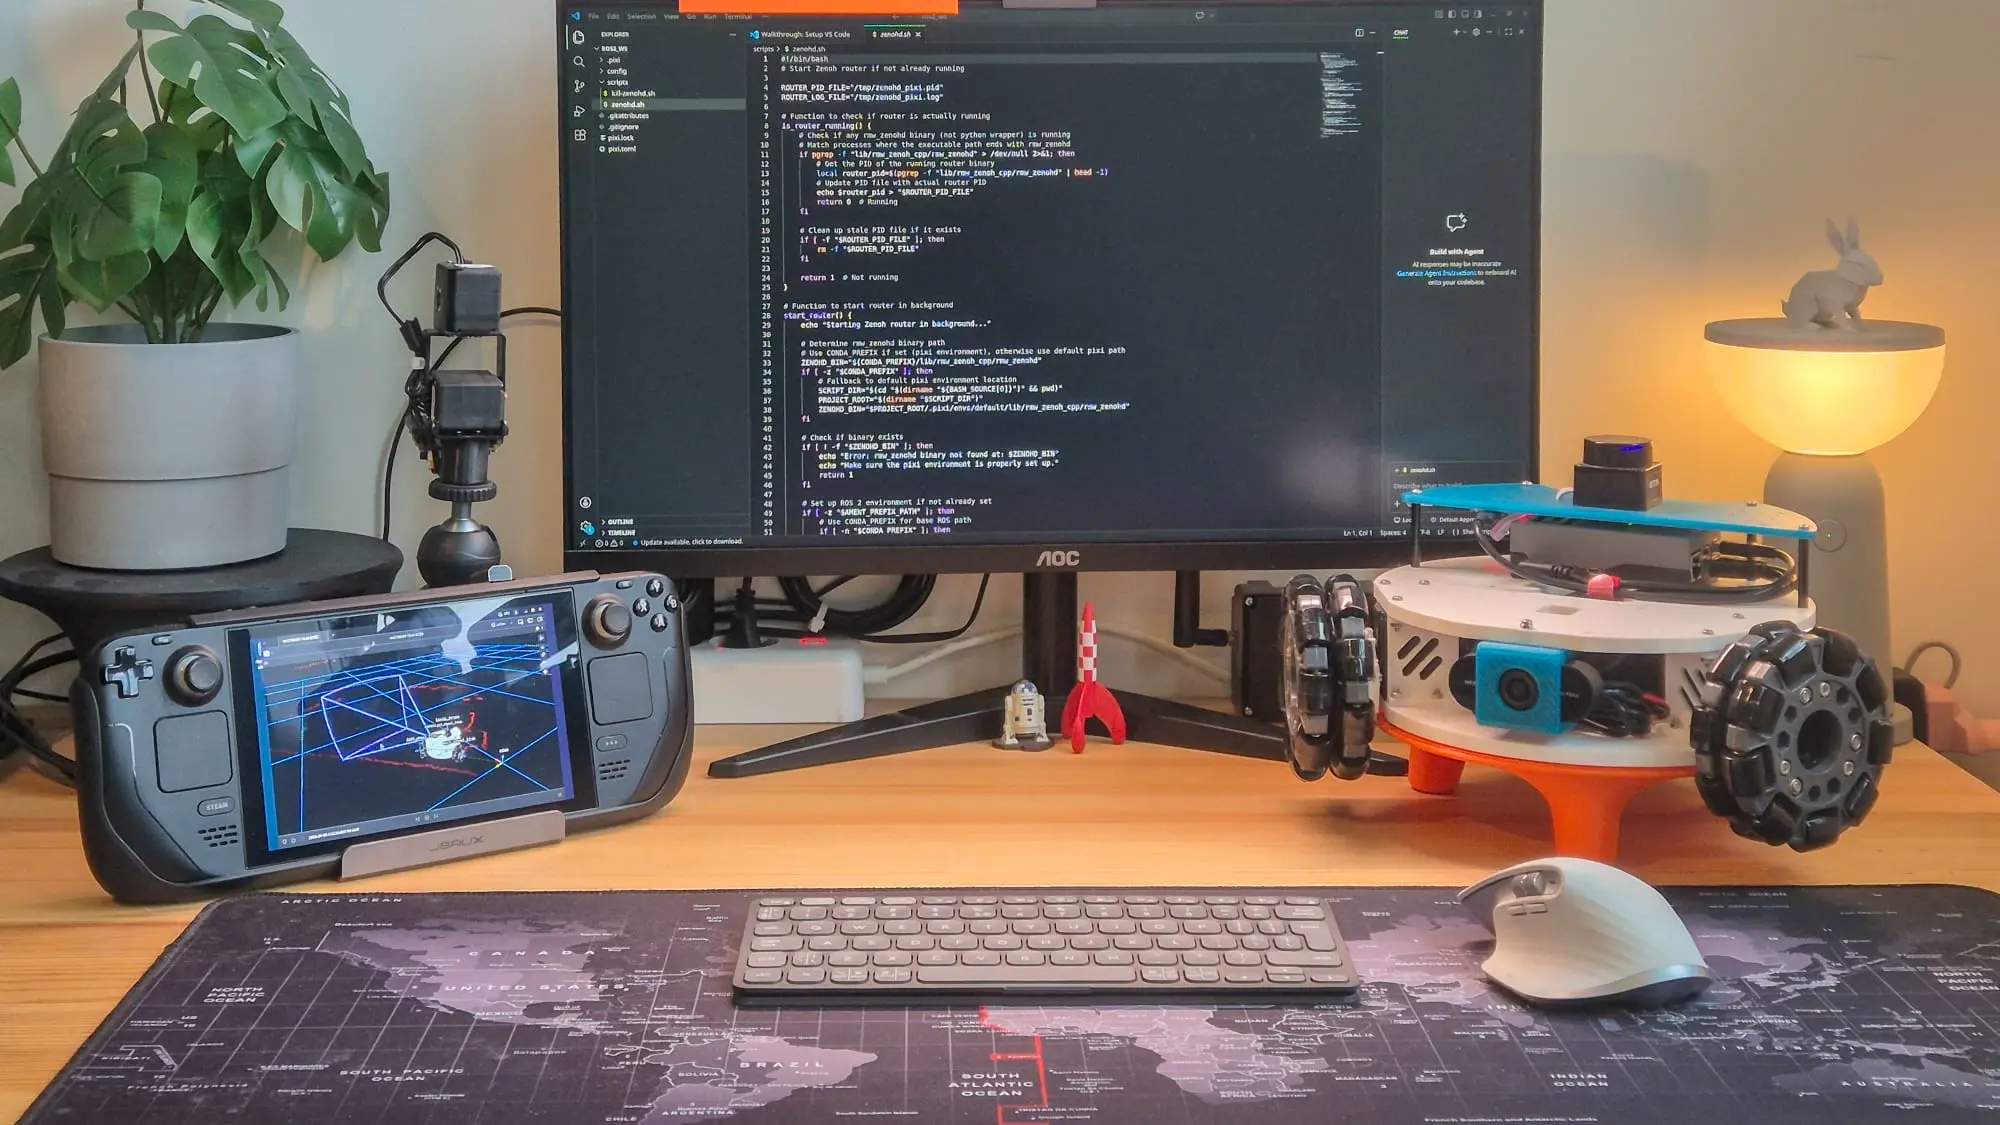
Now that I had the camera configured and the launch file set up, I could test the integration and visualize the data in Foxglove. I launched the pan-tilt mechanism with the OAK-D S2 camera and the combined URDF. On a separate terminal, I launched the Foxglove bridge. On my laptop (on the same network as the robot), I opened Foxglove and connected to the bridge.
# Launch the LeKiwi robot with the pan-tilt mechanism and the OAK-D S2 camera
ros2 launch lekiwi_bringup lekiwi.launch.py

# Launch the pan-tilt mechanism with the OAK-D S2 camera
ros2 launch lekiwi_bringup lekiwi.launch.py config:=pantilt

# Launch the pan-tilt mechanism with the OAK-D S2 camera and pointcloud outputs
ros2 launch lekiwi_bringup lekiwi.launch.py config:=pantilt pointcloud:=true

# Launch the Foxglove bridge on a separate terminal
ros2 launch foxglove_bridge foxglove_bridge_launch.xml
3D Panel
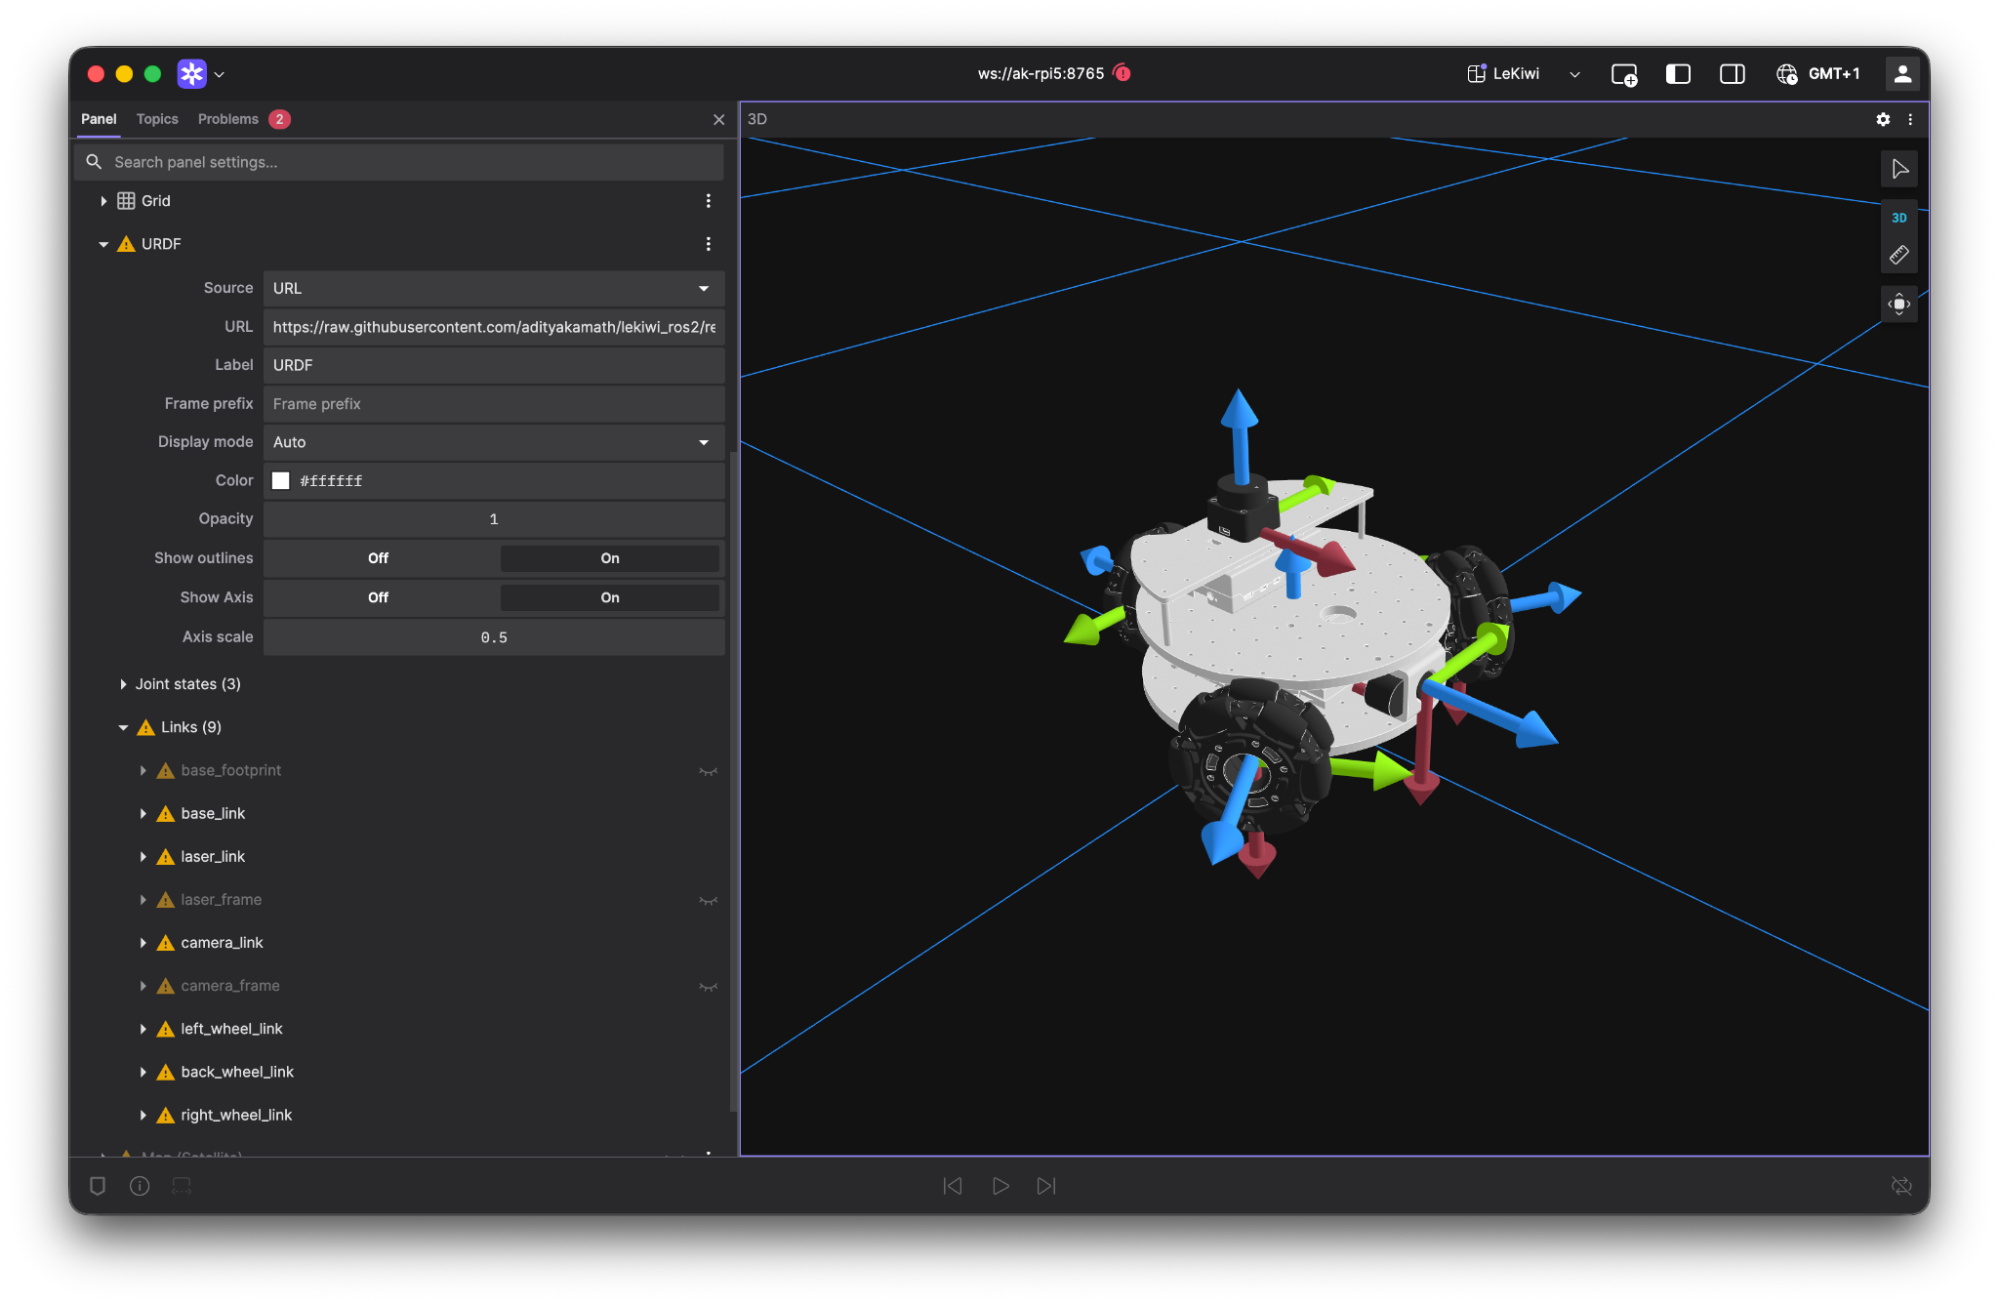
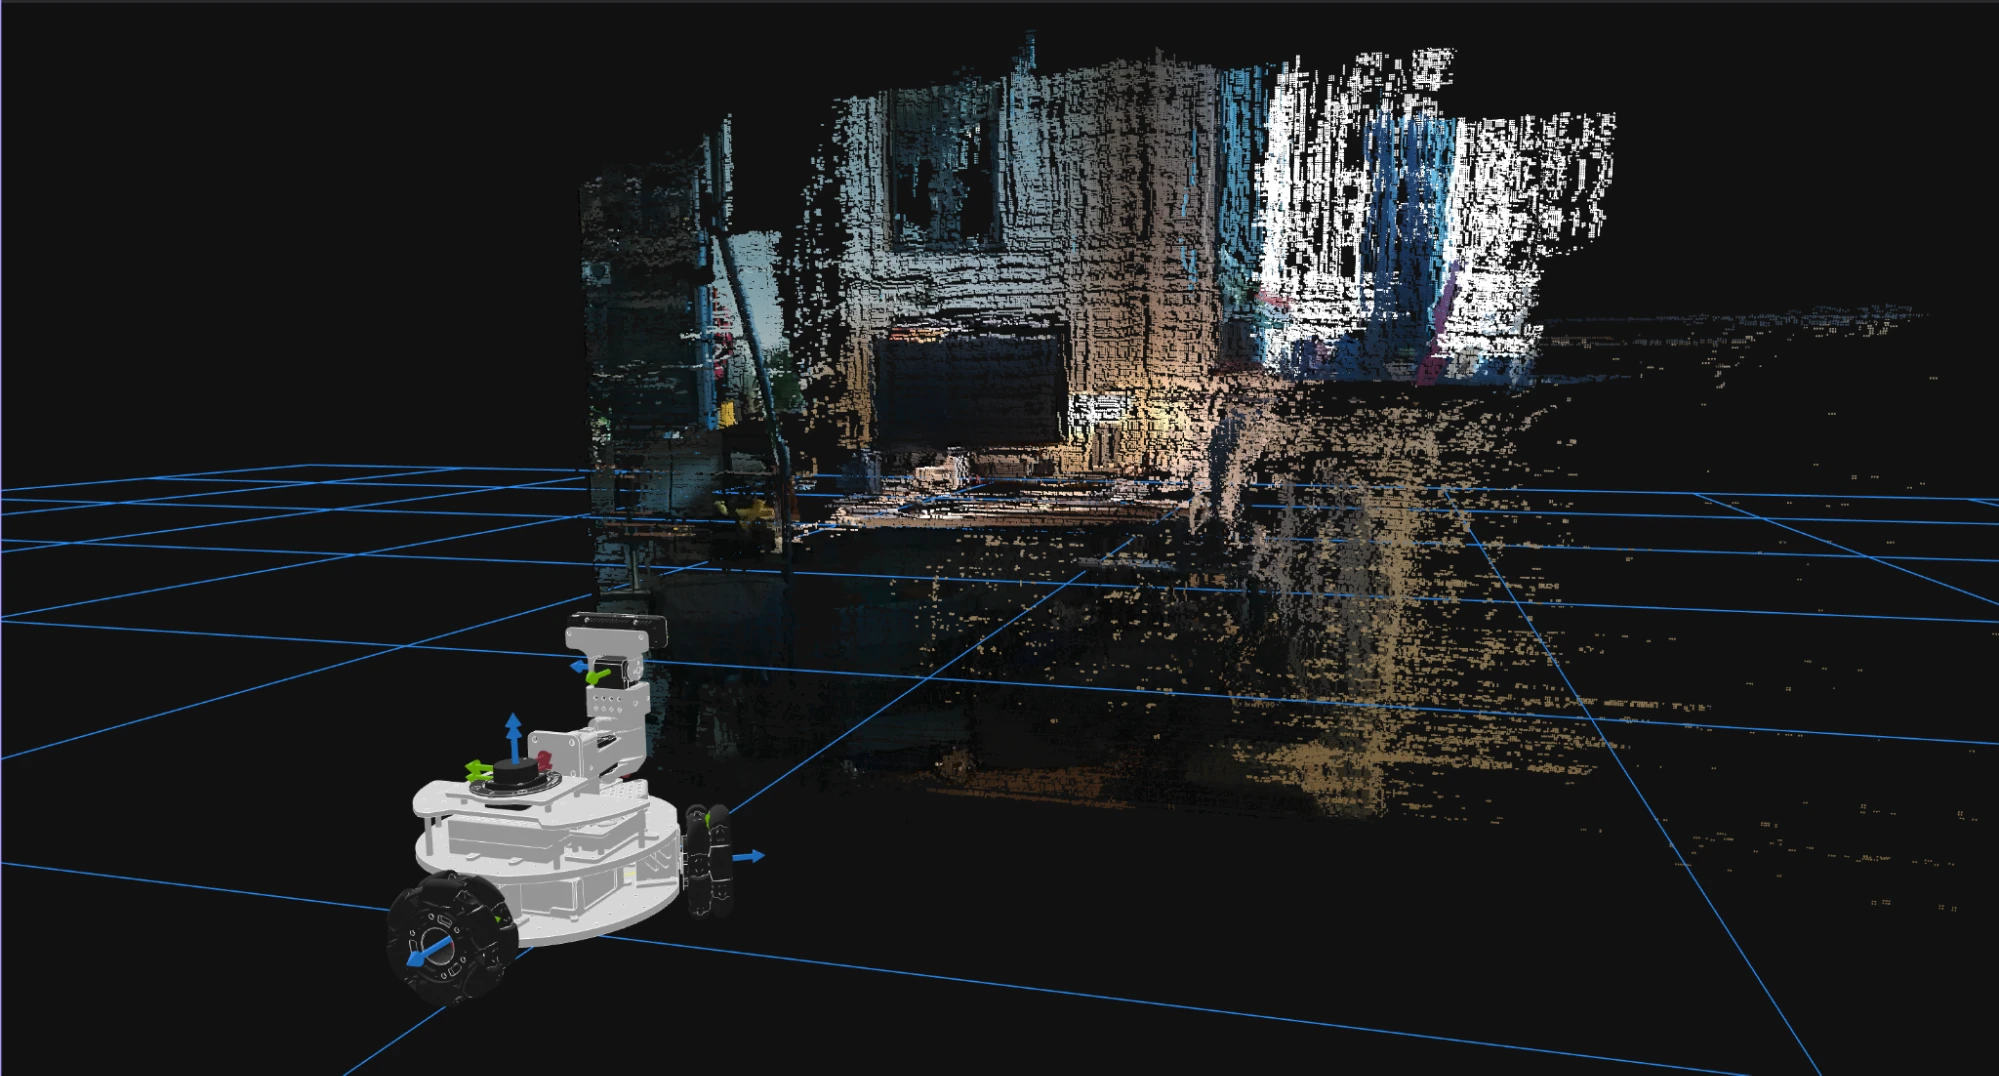
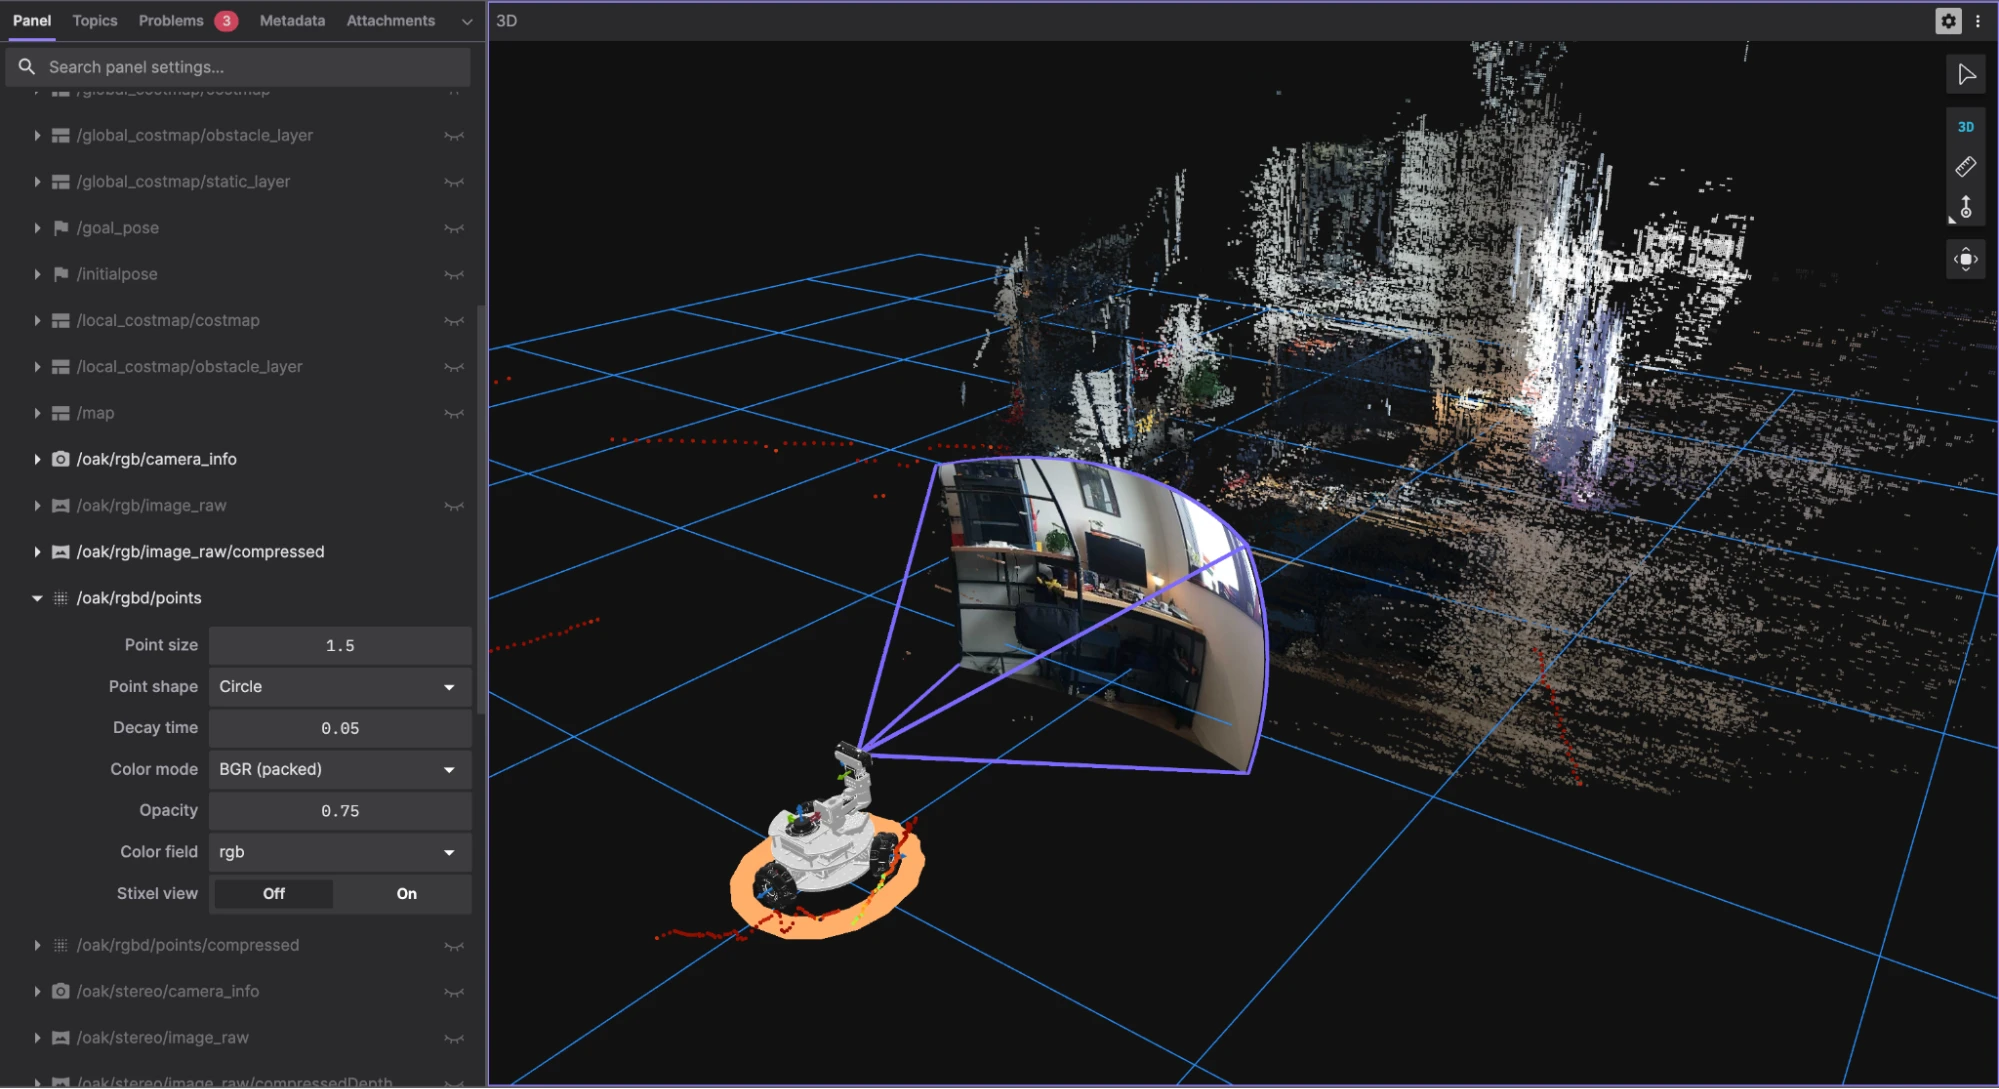
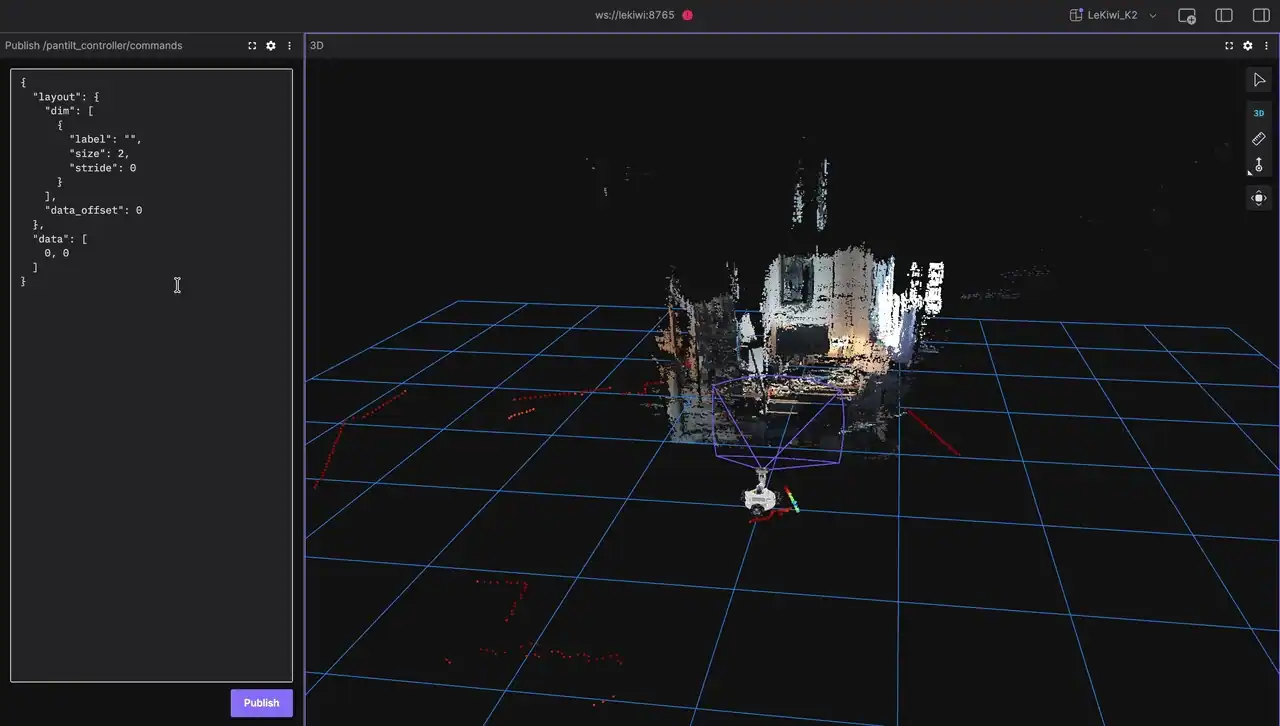
To visualize the camera outputs, I relied completely on the 3D panel in the Foxglove app, using which I could visualize the following topics:
- The robot’s URDF model with the pan-tilt mechanism and the camera mesh
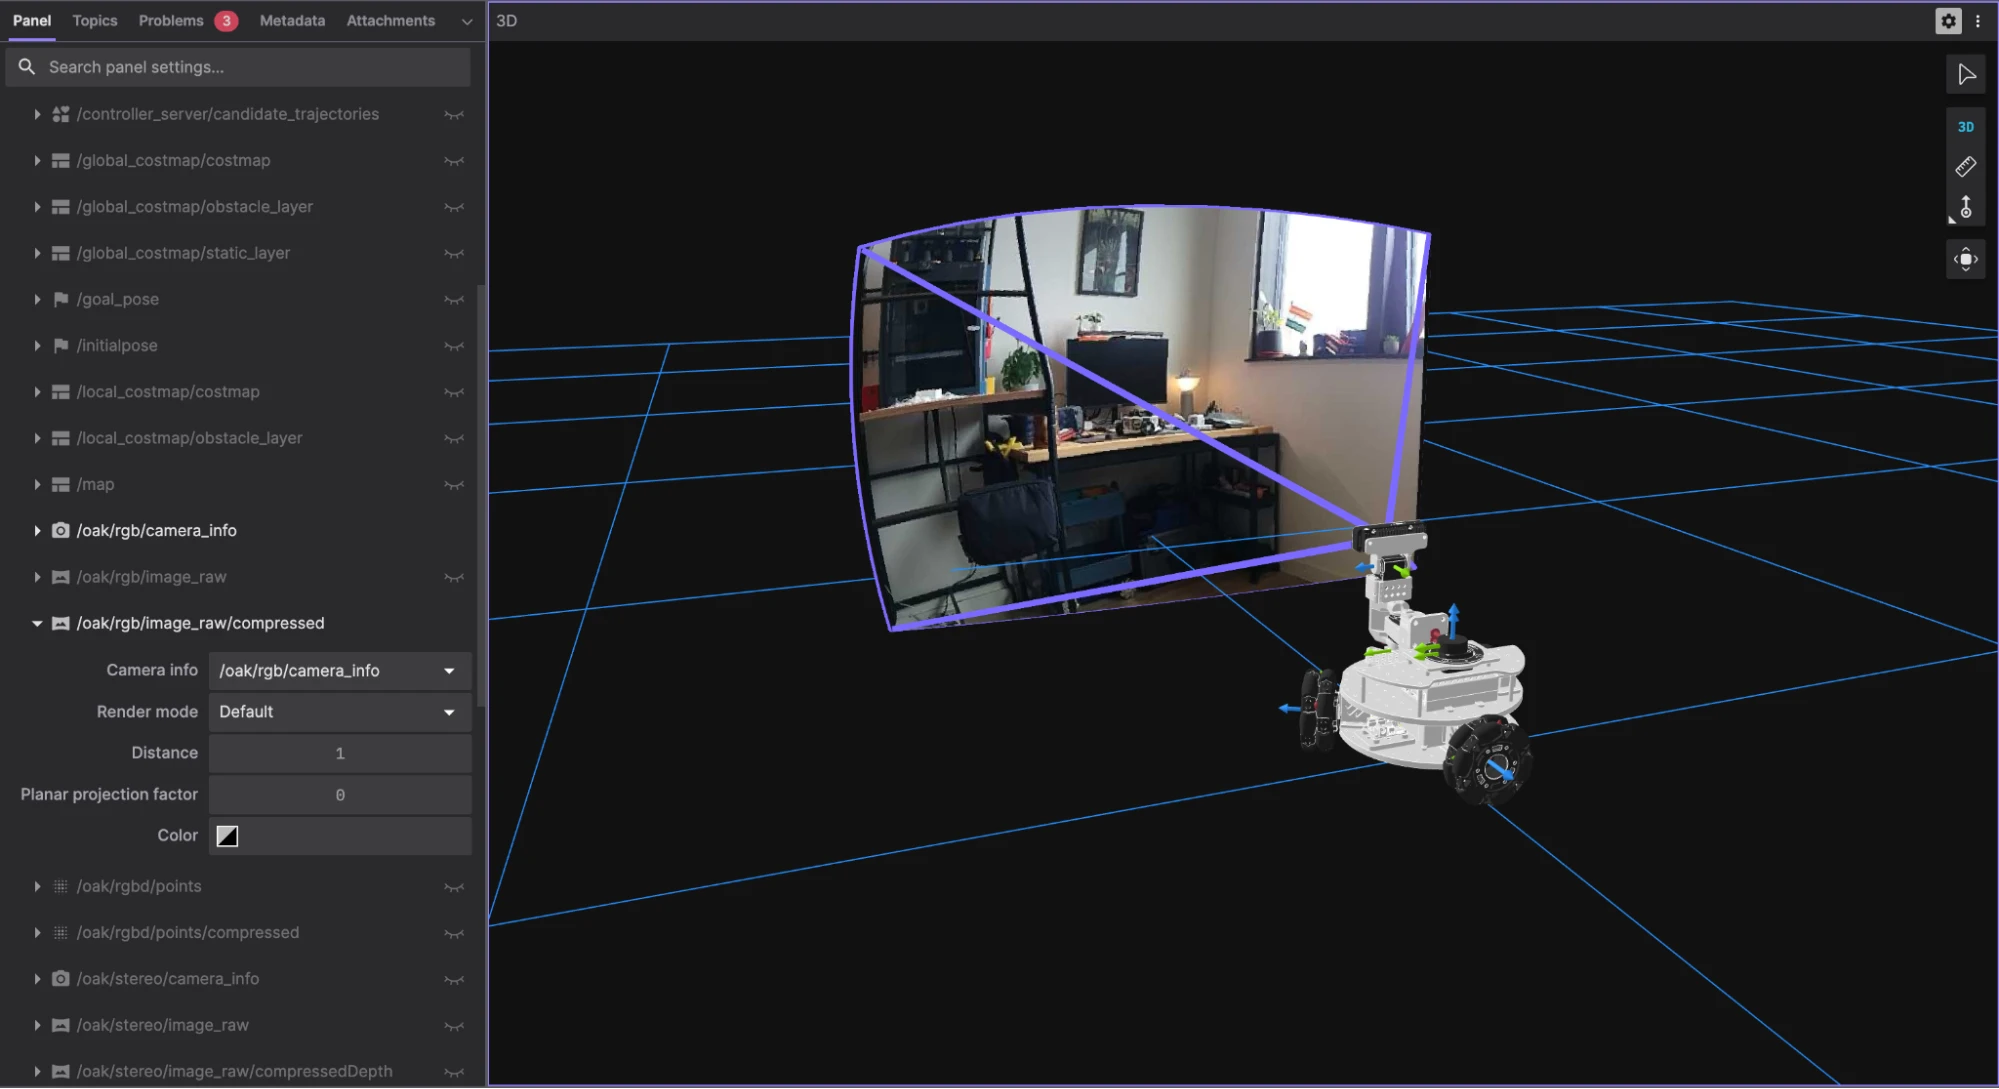
- The RGB image projected onto a frustum in 3D space
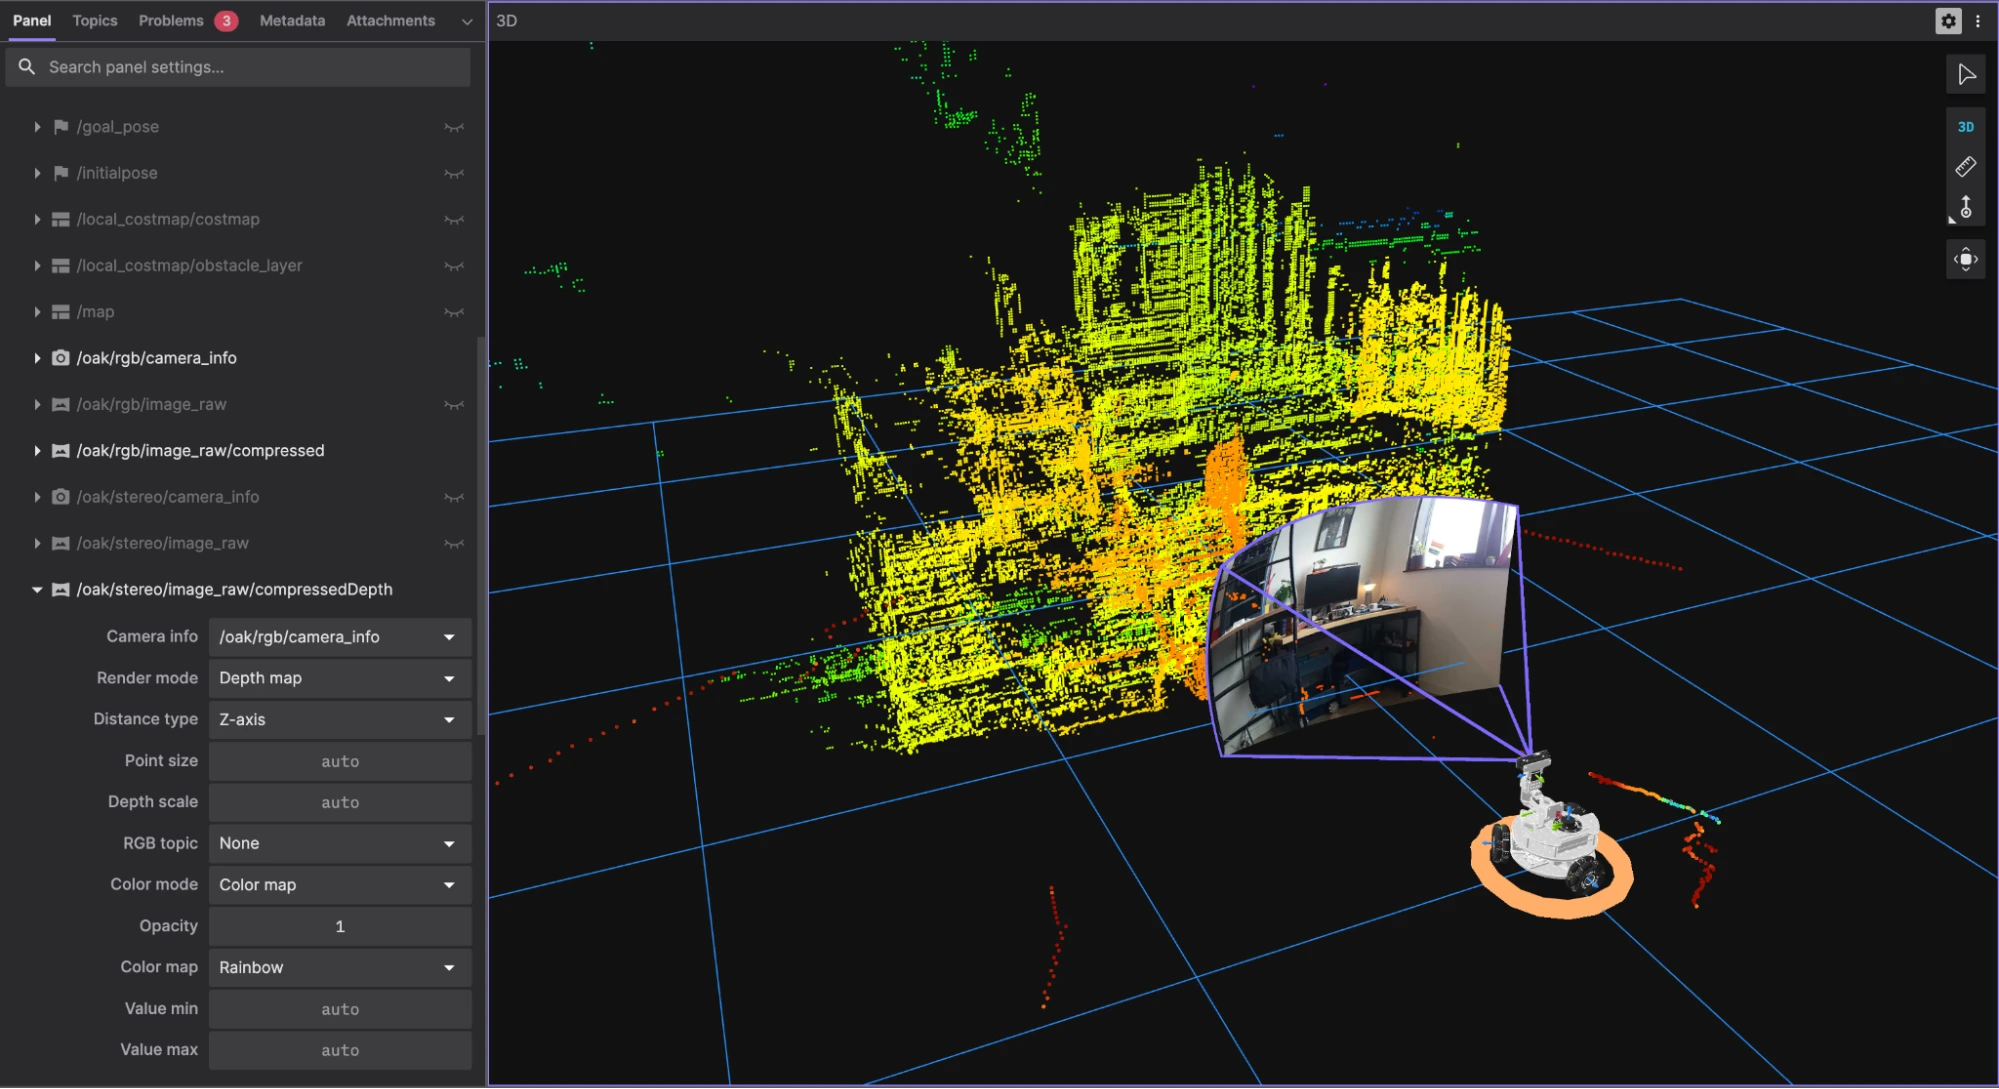
- The depth map image, rendered as a pointcloud with depth-based coloring
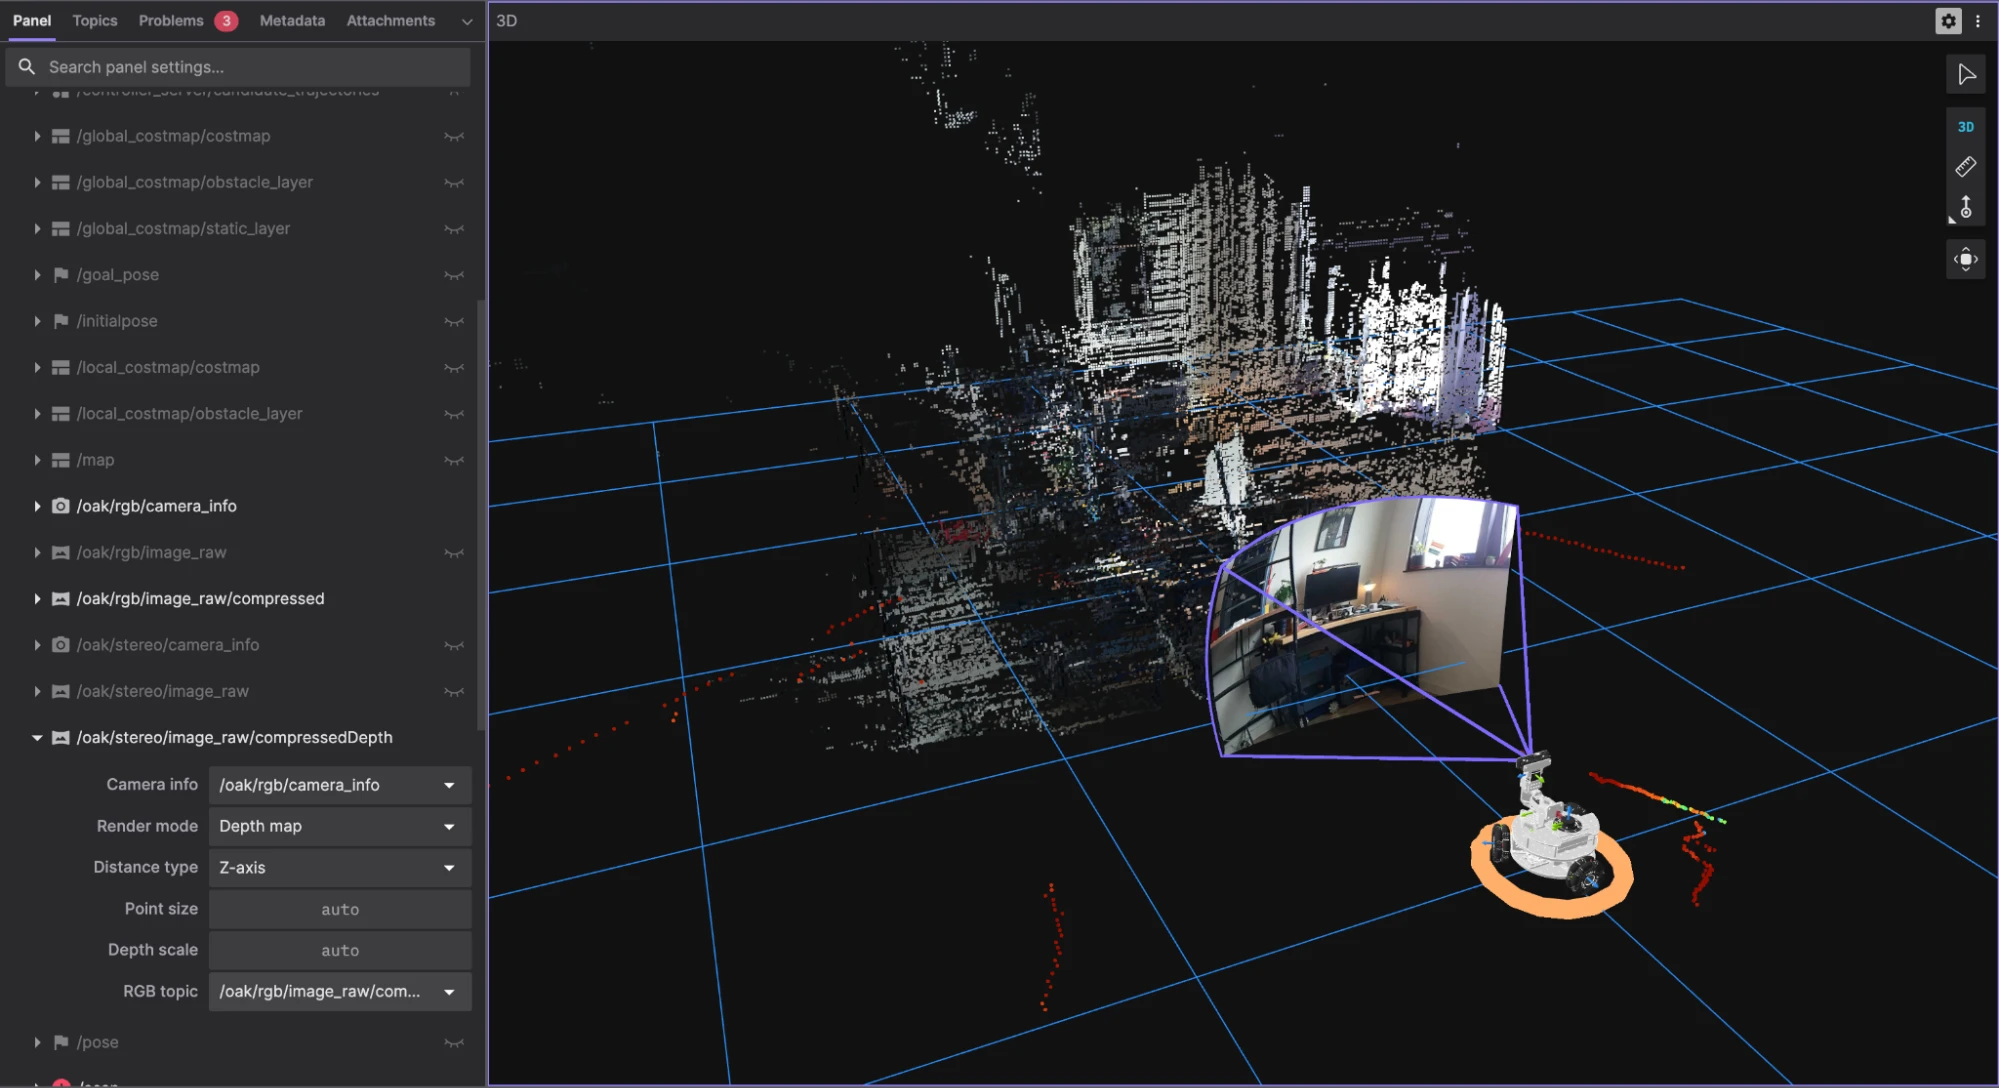
- The depth map image, with the RGB image used as a color map (by changing the RGB topic option on the left panel)
- The pointcloud topic (when enabled using
pointcloud:=true), rendered as a colored pointcloud
Pointcloud Compression using Cloudini
Despite the bandwidth optimizations, visualizing pointclouds remotely in Foxglove was still a problem. The 3D panel would freeze within minutes due to the sheer volume of data. So, I needed a better solution.
I turned to Cloudini, a pointcloud compression library by Davide Faconti that achieves impressive compression ratios using lossy quantization. Better yet, it includes a Foxglove extension that lets you visualize compressed pointclouds directly without decompressing them on the client.
The initial setup was simple: clone the repo, build it in my ROS 2 workspace, and add it to my launch file. The documentation was clear, and I had it running in about 10 minutes. But I faced some issues along the way.
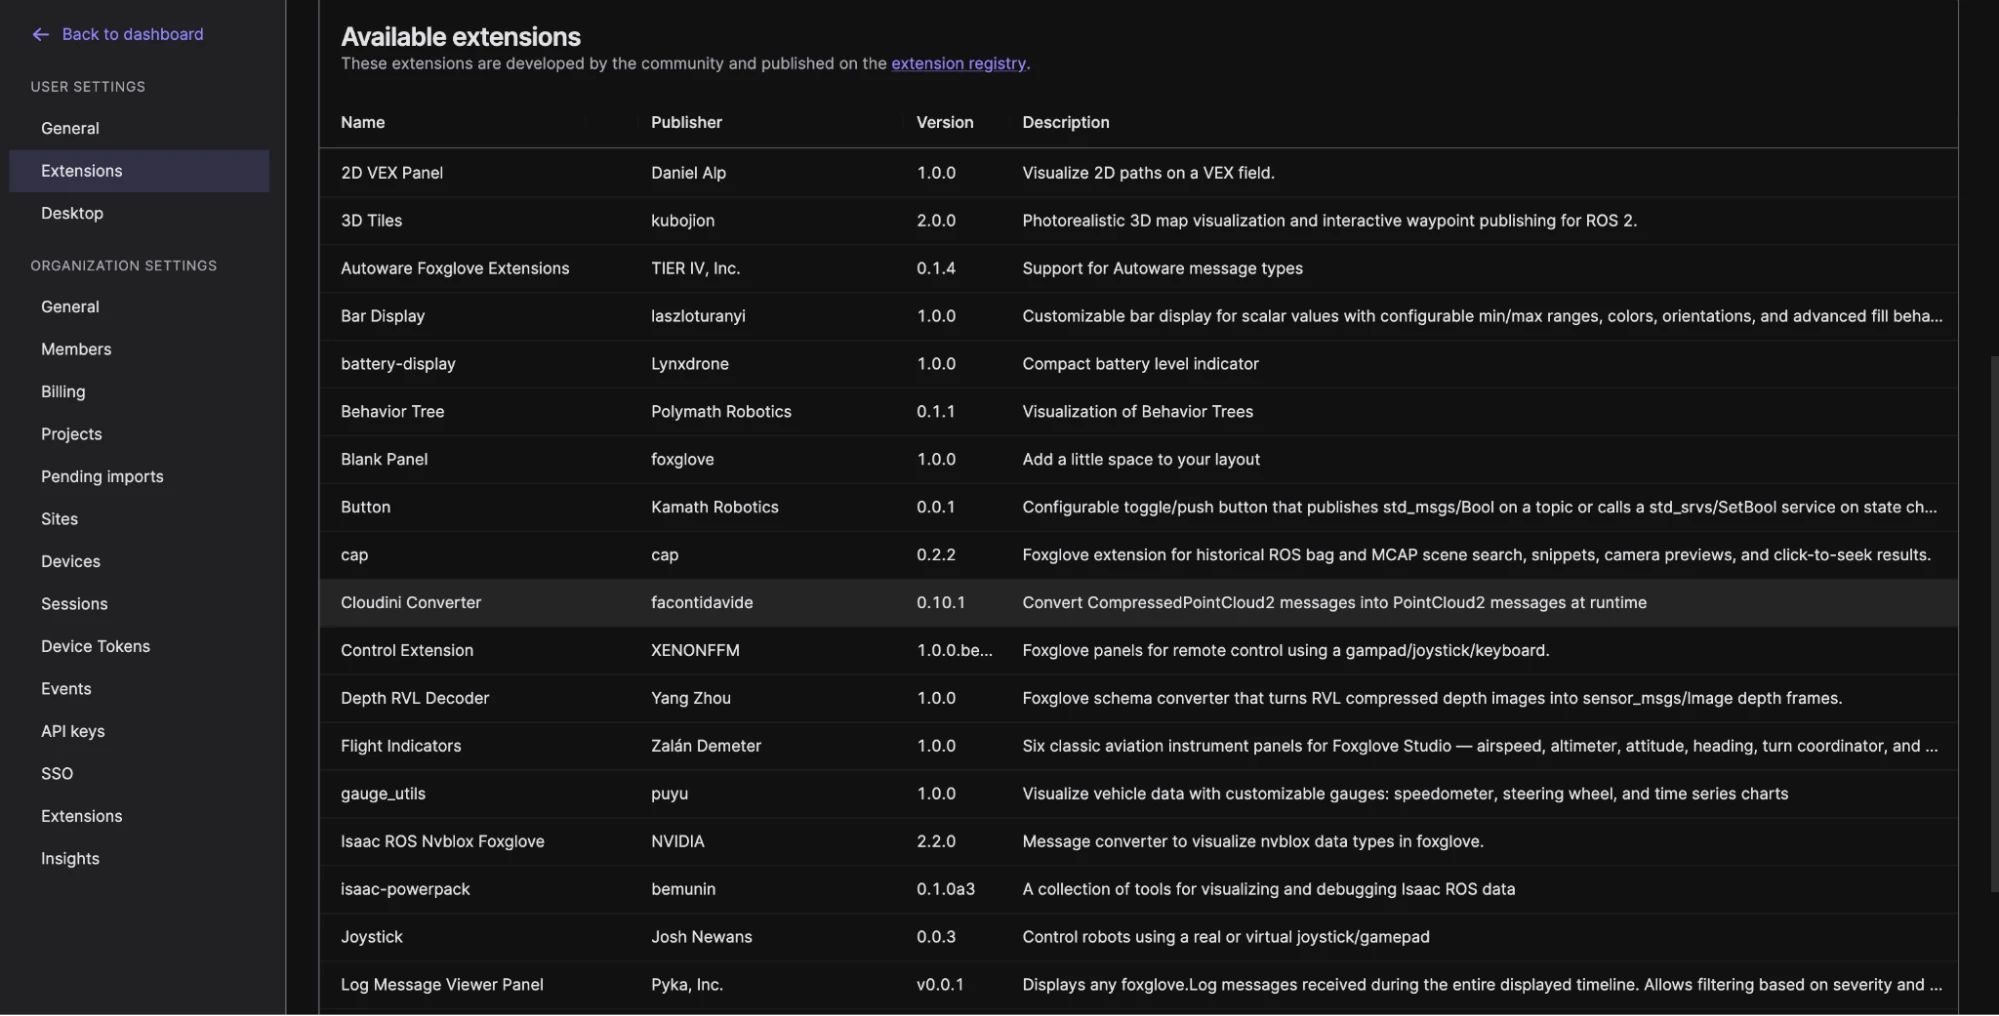
Cloudini Foxglove Extension
To visualize the compressed pointcloud in Foxglove, I needed the Cloudini Converter extension from Foxglove’s extension registry. The extension appears in Foxglove’s available extensions list and can be installed directly from there.
After installing the extension, Foxglove was able to decode the compressed pointcloud topic, and I could select it from the Topics section of the 3D Panel options. That confirmed the compressed pointcloud data was now being decoded correctly, but it revealed a new issue: all the colors were gone.

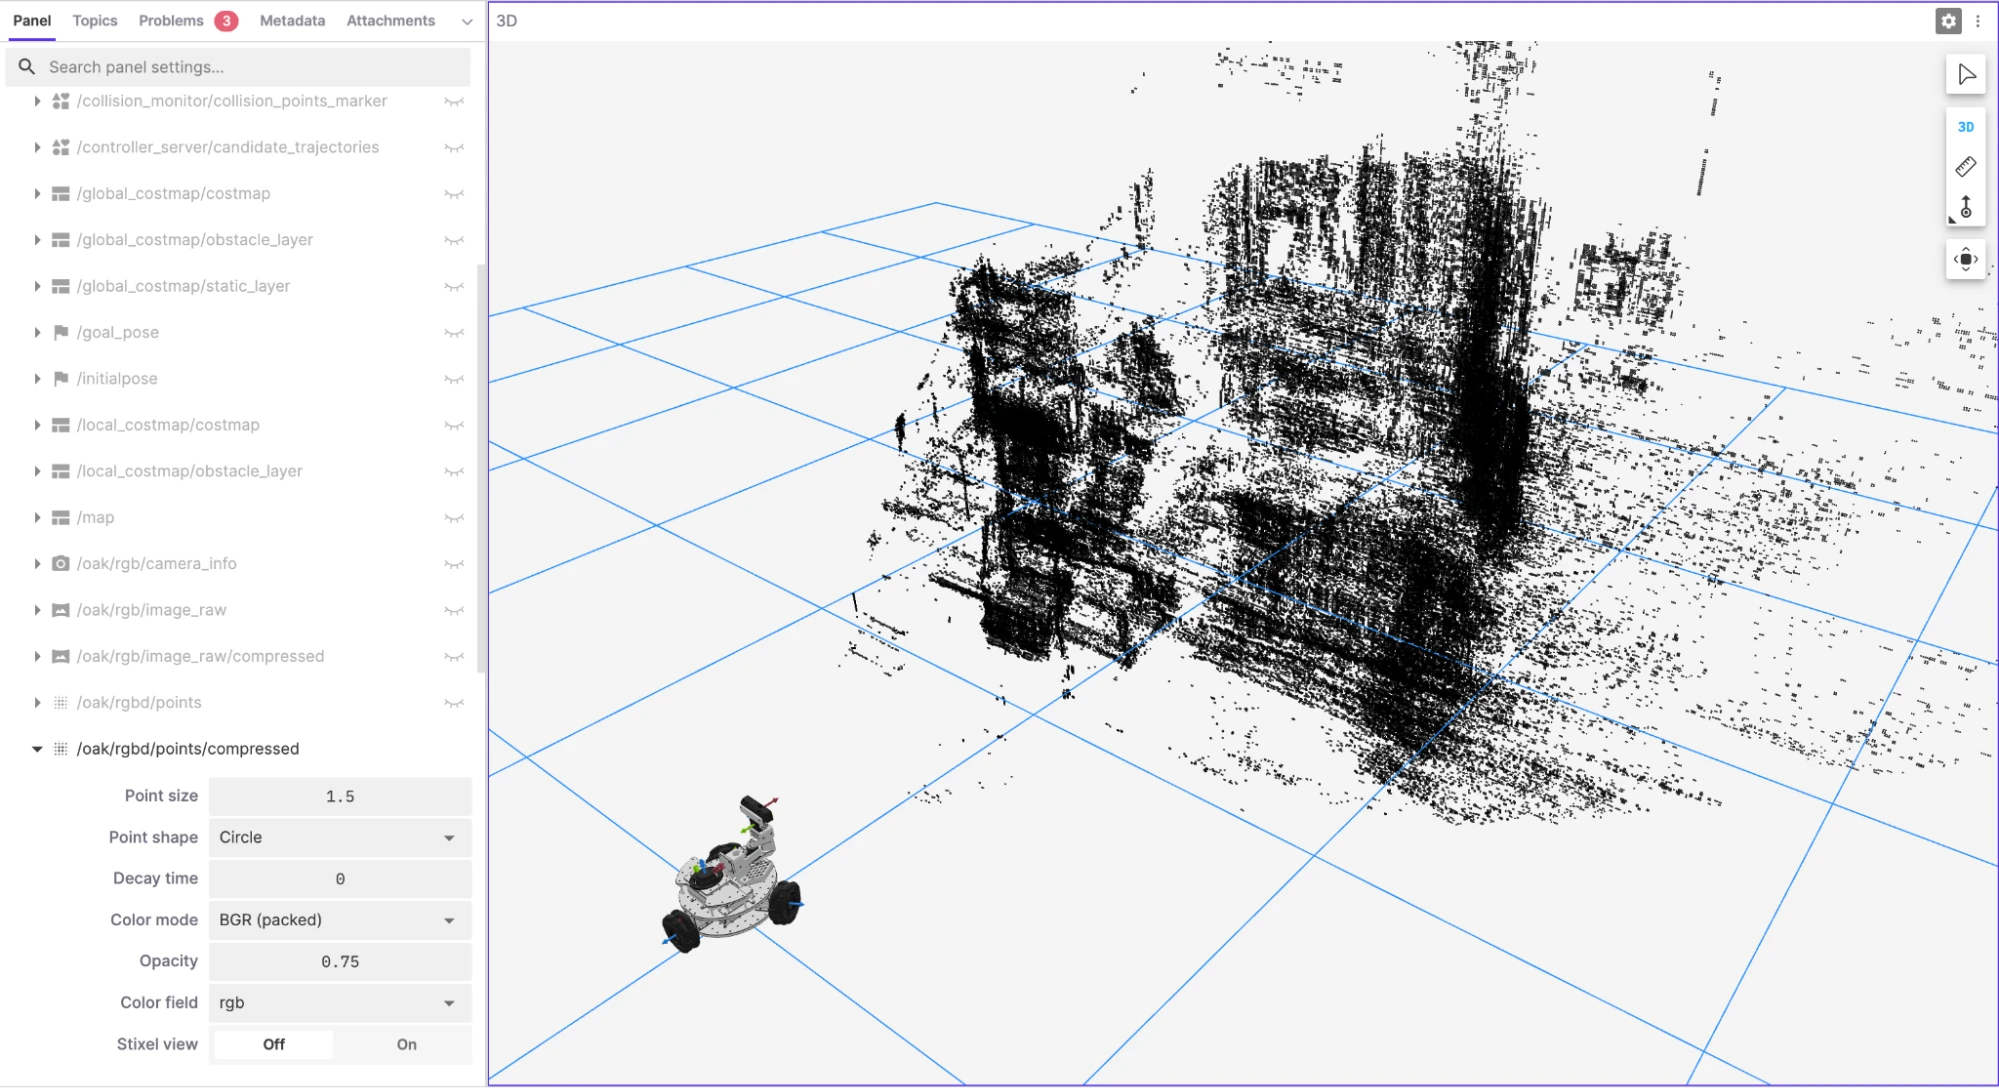
The RGB Quantization Problem
While the uncompressed pointcloud had perfect RGB colors, the compressed pointcloud showed up completely black in the BGR color mode on Foxglove. I even had to change the app’s color scheme to light mode to visualize the pointcloud properly.
After digging into the Cloudini source code, I found the issue. The depthai-ros driver stores RGB data as a bit-packed integer inside a FLOAT32 field. Cloudini applies lossy quantization to all FLOAT32 fields by default, assuming they’re XYZ coordinates. This destroys the bit-packed color data.
The problem is in how the depthai-ros pipeline packages RGB data for pointclouds. Since I did not want to push AI-generated changes to the depthai-ros or Cloudini source code, I ended up writing a custom pointcloud compressor node that uses Cloudini as a library but applies field-specific quantization. The node loops through all pointcloud fields after Cloudini’s initial encoding setup, checks for color field names (rgb, rgba, bgr, bgra), and exempts them from quantization by clearing their resolution parameter. XYZ fields still get the 1mm quantization for compression, but color data stays intact. This does impact the compression ratio, but solves the visualization problem. I updated my launch file to load this custom node when pointcloud:=true.
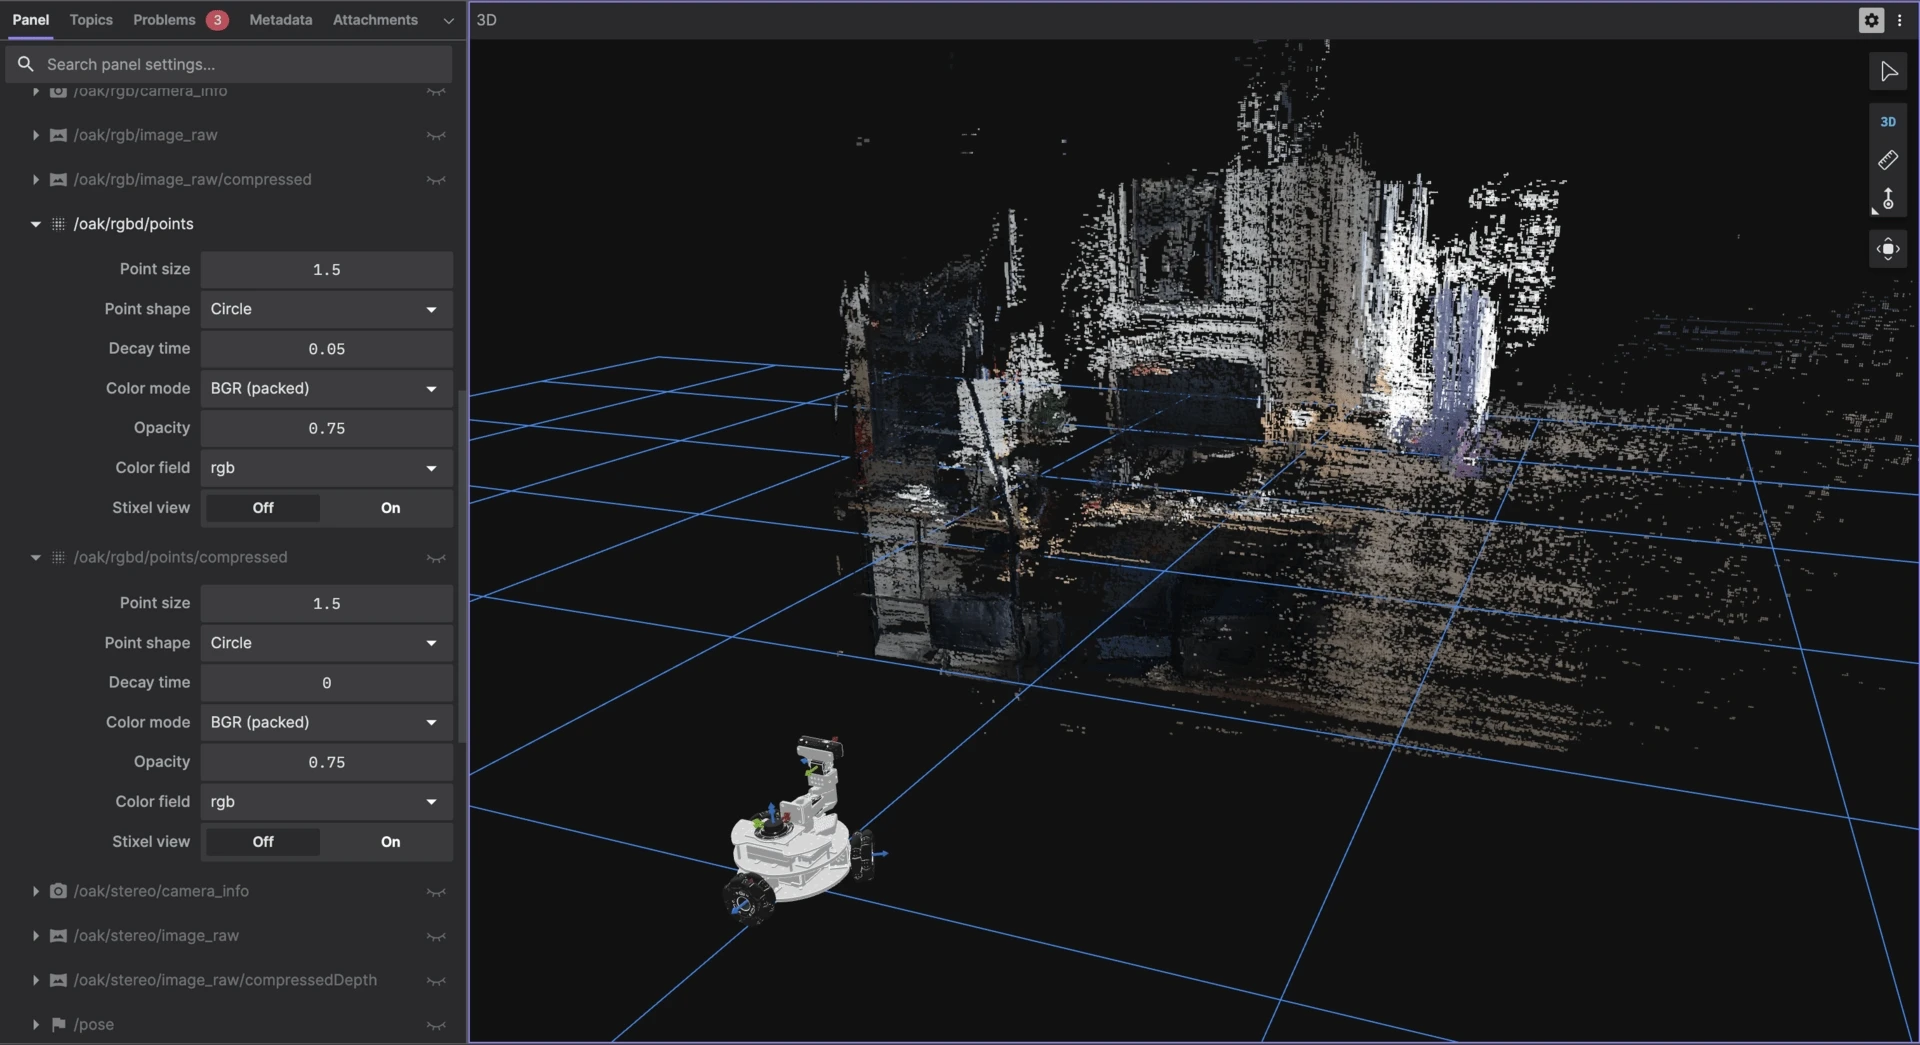
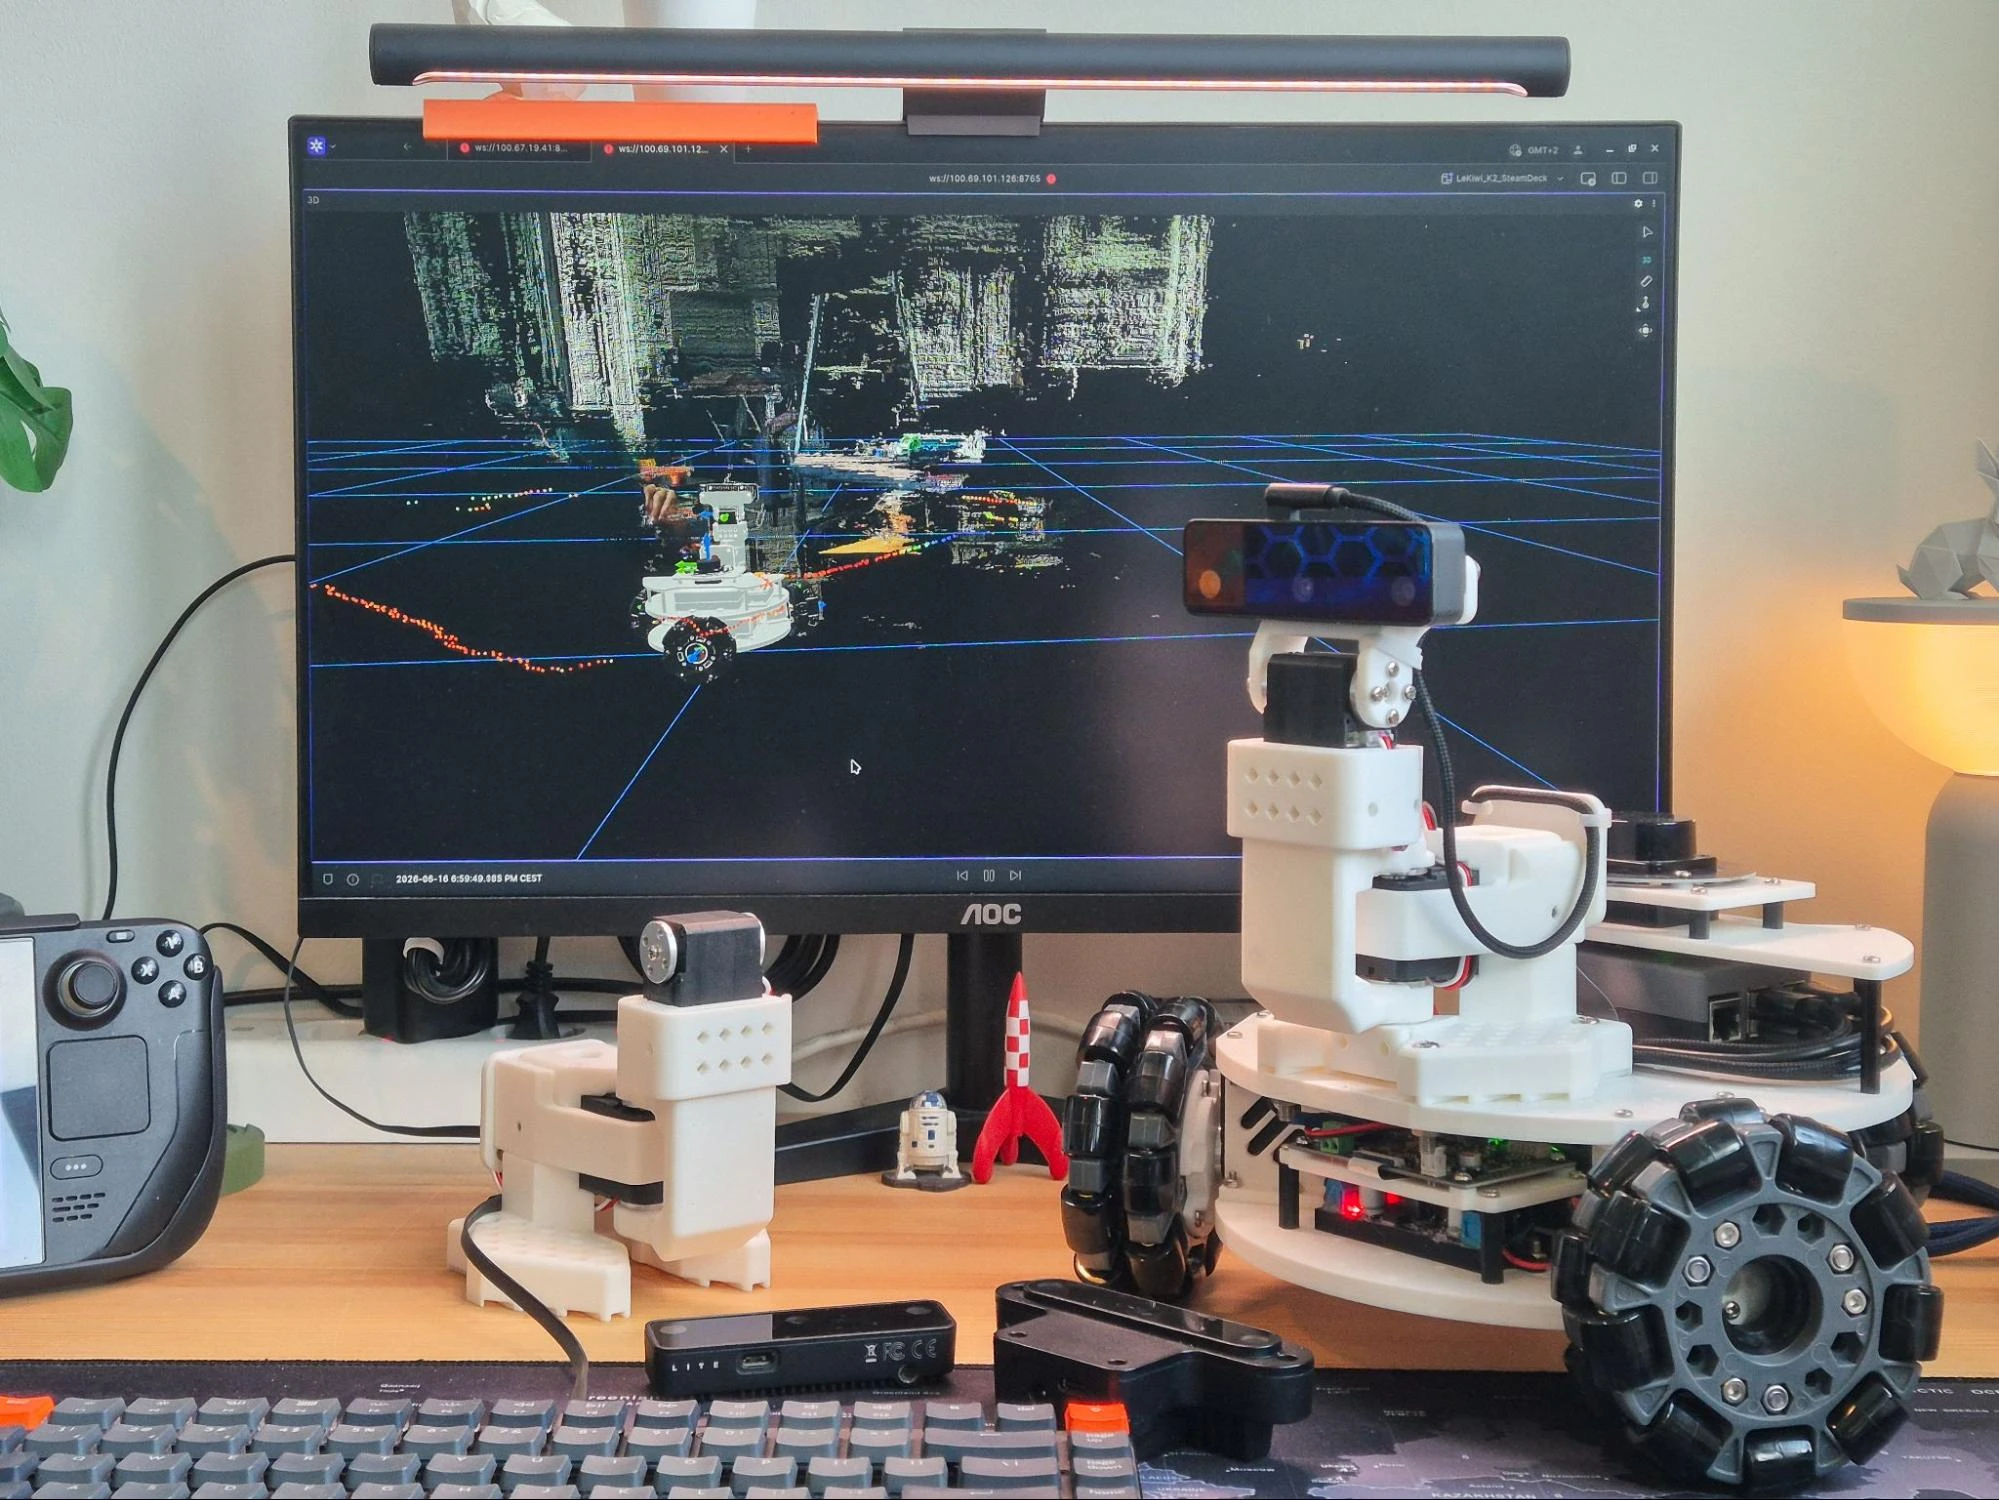
This worked perfectly. The compressed pointcloud now has full RGB colors, the bandwidth is dramatically reduced, and the visualization is nearly identical to the uncompressed pointcloud. Most importantly, the visualization no longer freezes. There’s still some lag when I move the pan-tilt mechanism, as the compressed pointcloud takes a moment to update, but it is not too bad and quite usable for remote visualization.
Wrapping Up
This integration took longer than I expected, but I learned a lot about depth cameras, bandwidth optimization, and the quirks of pointcloud data formats. Foxglove was essential throughout; being able to visualize RGB, depth, TF frames, and pointclouds simultaneously made debugging so much faster.
Cloudini is an amazing library, and I’m grateful for the open-source work that Davide Faconti has put into it. While I’m not entirely sure how well compressed pointclouds will work for features like visual SLAM, it is a fantastic solution for remote visualization.
At this point, the OAK-D S2 is fully integrated. RGB streams at 30 FPS, depth at 15 Hz, VIO at 60 Hz. Compressed pointclouds can be visualized really well in Foxglove with full color preservation. While the pan-tilt mechanism and the camera are ready for visual SLAM and AI-based perception, that’s a project for another day. For now, the next step is to dig deeper into my LiDAR-based Nav2 implementation and implement some advanced features.
All the code related to the pan-tilt mechanism and the OAK-D S2 can be found in the pantilt100 GitHub repository, and it has been integrated into lekiwi_ros2 as a git submodule, if you want to dig into the details. As always, this project is an active work in progress, so expect regular changes. Feel free to reach out if you’re working on similar camera integrations - I’m happy to share what worked (and what didn’t).
If you’re building something similar or just want to talk depth cameras, pointclouds, and robotics visualization, come join us in our Discord community. We’d love to see what you’re working on, answer your questions, and hear your feedback.